How much do you want to see of each layer in Photoshop? Just the right amount, of course!
Photoshop allows you to easily adjust the opacity/transparency of each individual layer on your image. This comes in really handy, as I’ve found many times in my career as a photographer.
Check out how to make this easy adjustment here!
Note: the screenshots below are taken from the Windows version of Adobe Photoshop, if you’re using the Mac version, the navigations may look slightly different.
What Is Opacity?
Before I explain how to change opacity, let’s make sure you understand what it is. If you have no idea what I’m talking about, you won’t know when to apply this concept.
Opacity has to do with how solid or transparent the layer is. You can see through a more transparent layer. In the same vein, reducing the opacity on an adjustment layer (such as brightness or saturation) reduces the applied effect.
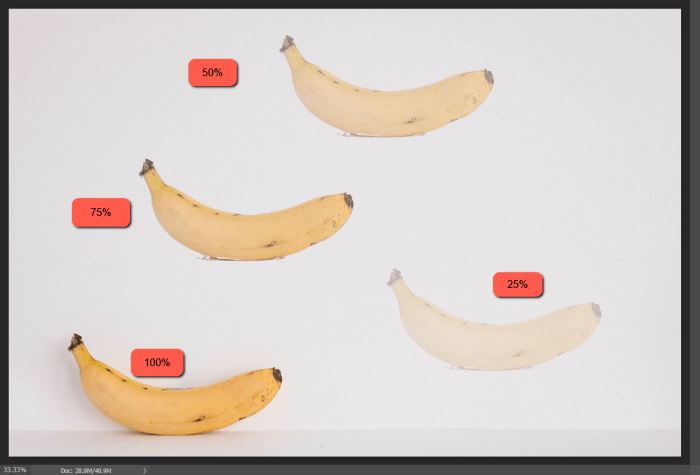
Here’s a quick example of a banana applied at different opacity levels. As you can see, the banana becomes fainter and more see-through as you lower the opacity.
Here, I filled in the background with a pattern so you can see how the leaves show through.
How to Change Opacity
Now that you understand what opacity is, let’s look at how to change it. It’s super simple. Just head over to the Layers panel on the right and select the layer that you want to adjust.
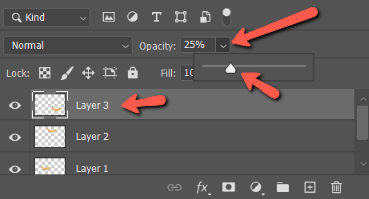
In the settings above the layers list, you’ll see a box called Opacity with a percentage next to it. Click the arrow to the right of the percentage and a slider drops down.
Click and drag the arrow to slide it up and down to change the opacity of the layer. The number gets bigger to the right and the layer becomes more opaque. To the left, the number goes down and the layer becomes more transparent.
You can also choose a value and type it in the box.
What If the Opacity Adjustment Is Grayed Out?
Occasionally, you might want to adjust the opacity, but find that it is grayed out and you can’t click on the arrow. This happens when you’ve selected a locked layer.
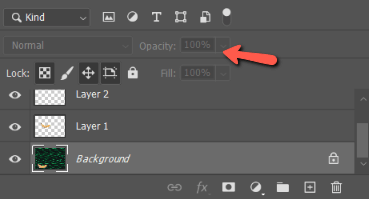
The background layer of an image automatically opens as a locked layer. You can also lock layers by selecting the layer you want to lock and hitting Control + \ or Command + \ on the keyboard. Or go to Layer in the menu bar and select Lock Layers.
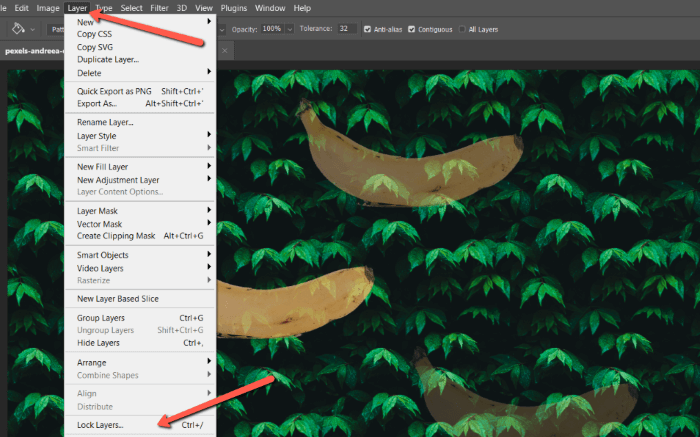
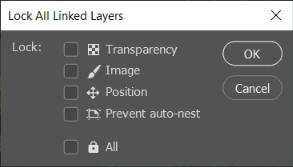
You can choose to lock one of the four aspects in the image below, or all of them.

You can also access these lock commands directly in the Layers panel.
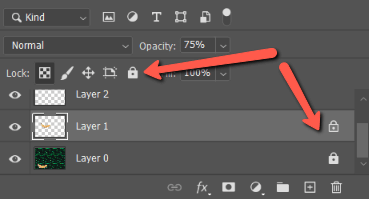
The little lock icon on the right side of the layer indicates its lock status. A transparent lock indicates only some aspects are locked and a solid lock indicates all have been locked.
If you want to make changes to the opacity, hit the lock icon on the layer you want to unlock. Now, the command becomes available.
Playing with Opacity Changes
There you have it! Changing up the opacity on each layer is a piece of cake. Check out more of our simple-to-follow tutorials like how to use the eraser tool for more exciting Photoshop info!
About Cara Koch