Learning how to use layer masks in Photoshop will elevate your post-processing skills to previously unreachable heights. Layer masking truly makes Photoshop the incredibly powerful tool that it is for all kinds of photographers and digital artists.
The function of a layer mask is very simple, yet can be used in complex ways. A layer mask allows you to hide part of a layer. This allows for you to constrain any layer, so only a particular part of that layer will affect the image. For example, portrait photographers may use a layer mask on a brightness and contrast layer to brighten just the face of their model. Landscape photographers might use a layer mask to darken just the clouds in their image. No matter what kind of photographer you are, if you use Photoshop, you need to know how to make a layer Mask.
Tóm Tắt
How to Make a Layer Mask in Photoshop
Step 1: Load an image into Photoshop, and create a second layer
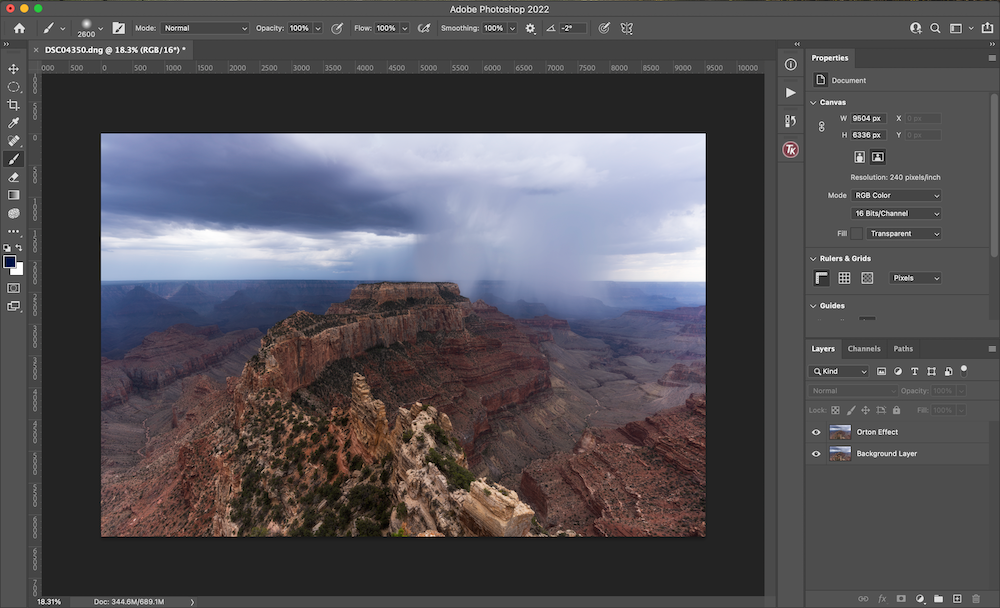
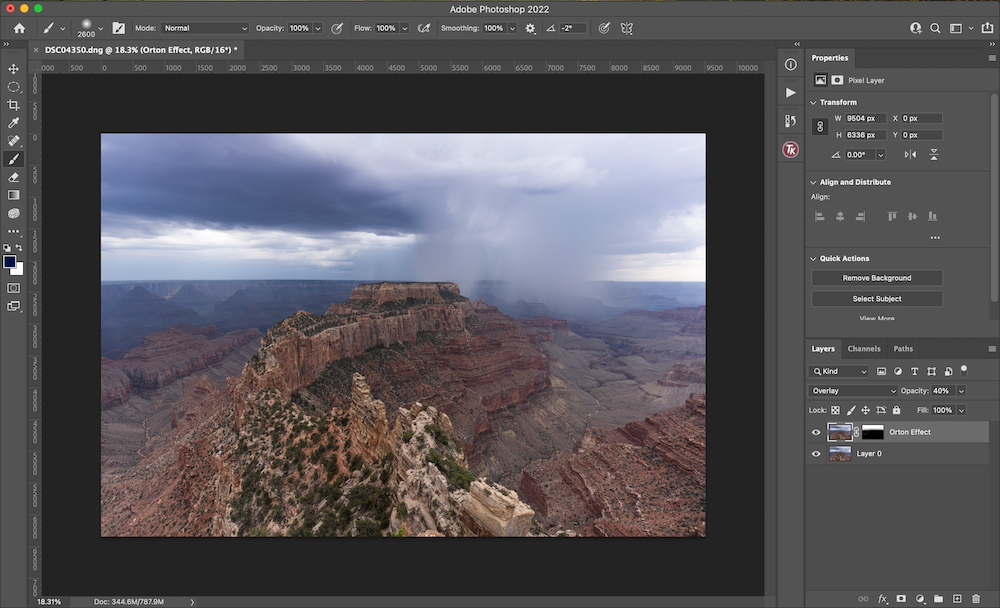
To create a layer mask, you’ll need to create a layer first. For the purpose of this example, I’ll demonstrate how to add a layer mask to an Orton effect layer. The Orton effect adds glow to a scene, but usually only works well in the sky of an image. I’ll need to use a layer mask to make sure that the Orton effect layer only affects the sky. Creating a layer mask works the same no matter what kind of layer you are using.
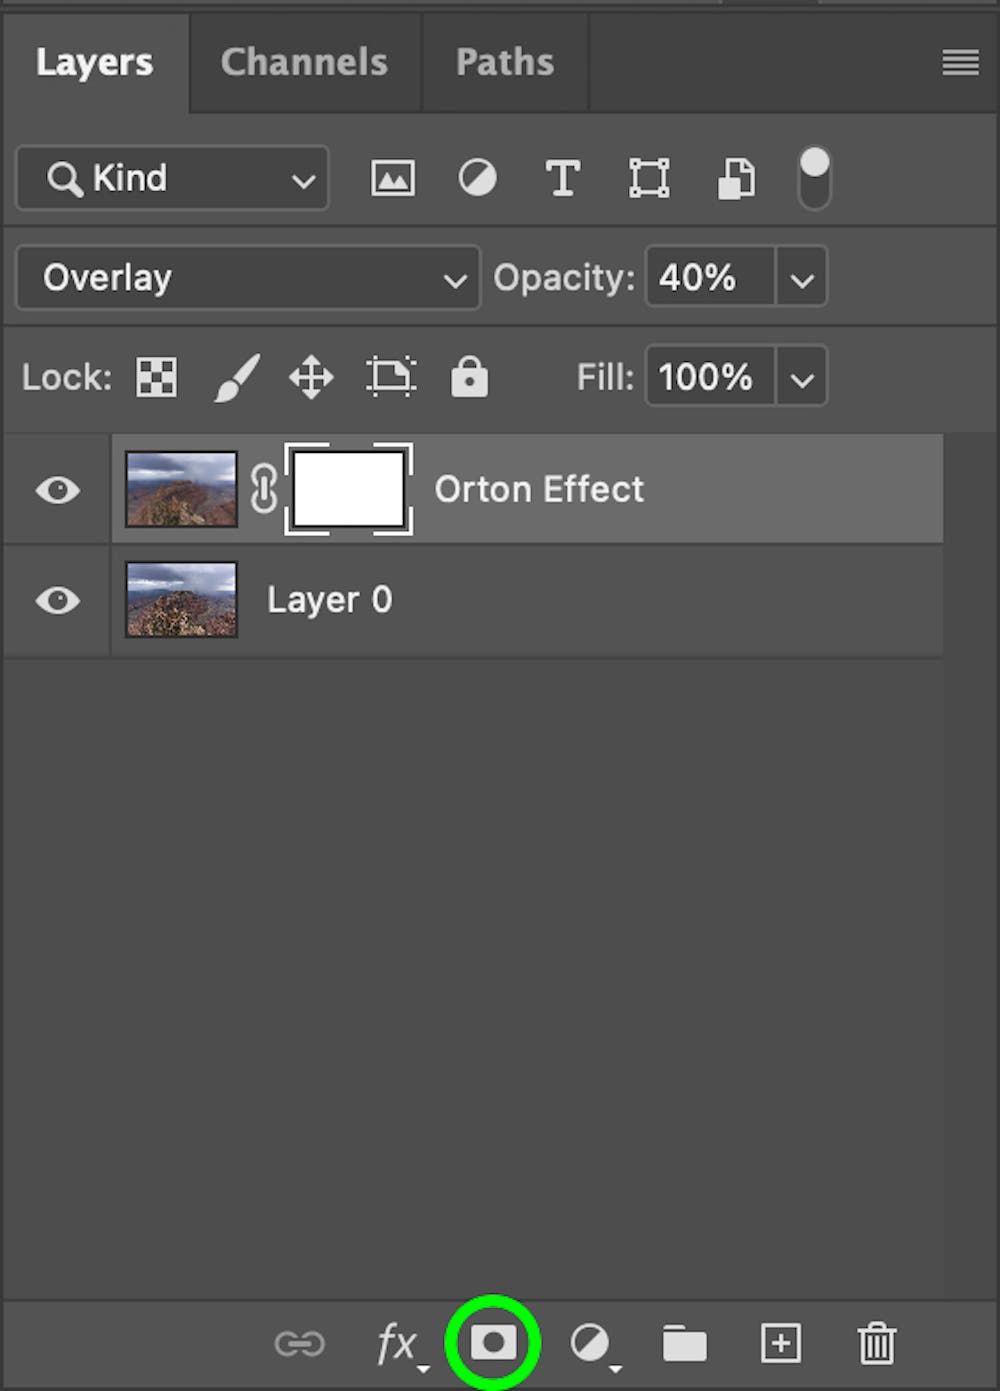
Step 2: Select the layer mask button
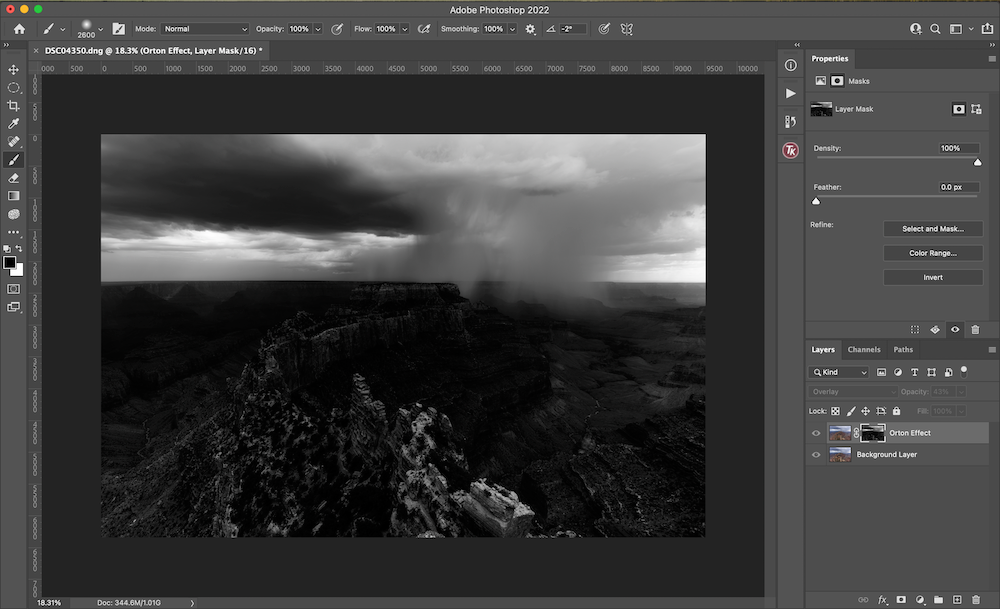
Next, make sure you select the layer you’d like to mask. Then, hit the “Layer Mask” button on the menu bar in the bottom right hand corner of your screen. The layer mask button looks like a rectangle with a circle cut out of the middle. This will then add a white layer mask to the selected layer.
Step 3: Grab the brush and paint out unwanted areas
Now, you can paint on the layer mask. Painting black will hide that part of the layer, while anything on your layer mask that remains white will show through. You can easily remember this with the saying “white reveals, black conceals.” Anything between black and white (grey), will partially conceal the layer, depending on how dark the grey is.
Once you’ve finished painting, you should be able to toggle the layer on and off and see that your layer only affects the parts of the image that you didn’t mask out.
Tips and Tricks for Using Layer Masks
Adjust the opacity of your brush
Use a lower opacity to paint out a layer slower, and more naturally. Oftentimes, I like to use 10% brush opacity and paint over an area many times. With a 10% opacity, you’d have to paint over an area 10 times before it was fully concealed. You can easily adjust the opacity of the brush in the toolbar on the top of your screen when the brush tool is selected. Simply find the opacity option, and turn this down to 10%.
Start with a black layer mask instead of white
Starting with a black layer mask will hide the whole layer, and then you can paint white to conceal small areas of the layer. This can be very helpful when you just want to reveal a very small area. To start with a black layer mask, press the option key when you click to create the layer mask.
Some layers already come with layer masks
Adjustment layers, such as curves, levels, and more, already come with a white layer mask attached to them when they are created. Don’t create a second layer mask on top by mistake. If you need to remove this layer mask for any reason, you can click on the layer mask and select the trash can in the bottom right corner menu bar.
Reuse the same layer mask
If you want to reuse a layer mask, you can do so by using “Command-Click” on a Mac, or “Control-Click on a PC. This allows you to make a selection of the mask. Then, when you go to create a layer mask, the selection will be automatically applied — essentially letting you copy and paste a layer mask.
Put a layer mask on a group
If you want to make multiple layers worth of adjustments to an area in your image, put all of the layers together in a group. Then, you can create a layer mask to go on top of the group. This will restrict all of the layers within the group to that particular layer mask.
Explore advanced layer masking techniques
Once you’ve got a grasp on creating layer masks with the brush tool, try exploring more advanced techniques like making layer masks with a color range selection, luminosity masks, or even a selection tool. These tools allow you to create even more refined layer masks for the most seamless edits.
Layer masking might seem like a complicated subject, but with a little practice, and starting with the most simple kinds of layer masks, you’ll become a pro in no time! If you want to unlock your full potential when post processing, learning how to use layer masks is an absolute must.