Tóm Tắt
How To Make Transparent Gradients In Photoshop
With a couple of clicks, you can create transparent gradients in Photoshop to apply directly onto images, new layers, or even layer masks! This post will walk you through exactly how to create these gradients using two simple methods.
To create a transparent gradient in Photoshop, you need to:
- Select Your Gradient Tool.
- Click The Gradient Editor And Choose The “Foreground To Transparent” Gradient.
- Set Your Desired Foreground Color.
- Click And Drag Across Your Canvas To Create A New Transparent Gradient.
With these basic steps covered, let’s go through each of them more in-depth to give you a better understanding of the whole process. Likewise, we’ll go over a few easy ways you can troubleshoot your gradient tool if you run into problems. Let’s get started!
Method 1: Creating A Transparent Gradient On A New Layer
For this first example, I’ll show you how to make a colored gradient on its own layer. This is useful for applying a transparent gradient over any layer on your canvas. By placing the gradient on its own layer, you can do the entire process non-destructively. That way, you can always go back and edit or reposition your gradient without any problems.
Step 1: Create A New Layer
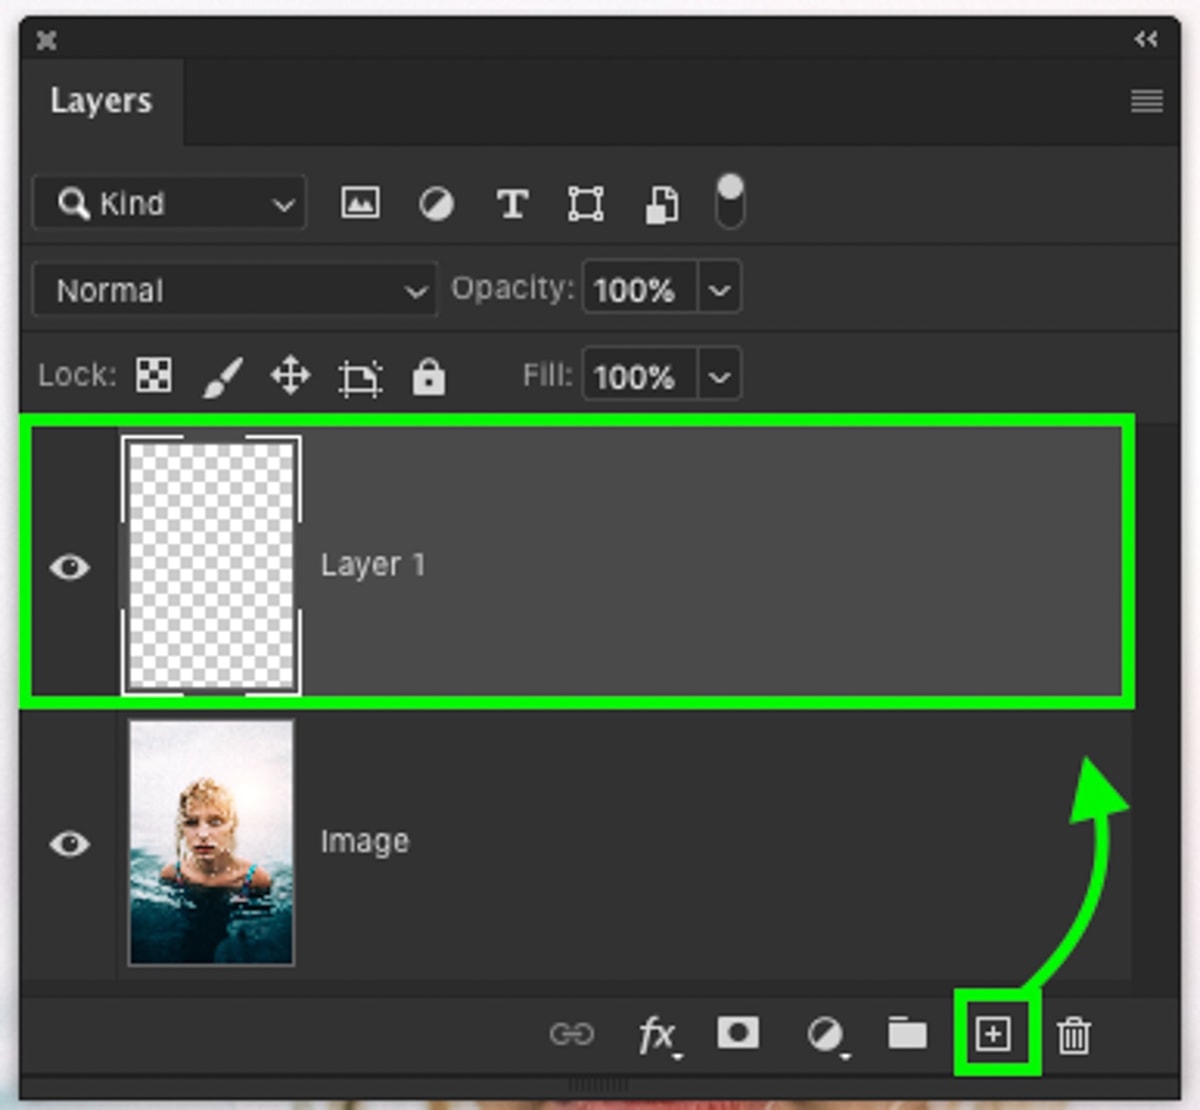
First, create a new layer by clicking the new layer icon at the bottom of the Layers panel. Alternatively, you can use the keyboard shortcut Command + Option + Shift + N (Mac) or Control + Alt + Shift + N (PC) to create a new layer.
Step 2: Select Your Gradient Tool
To select the gradient tool, click on the icon in the toolbar or press G to access it instead.

Step 3: Open The Gradient Editor And Select A Foreground To Transparent Gradient
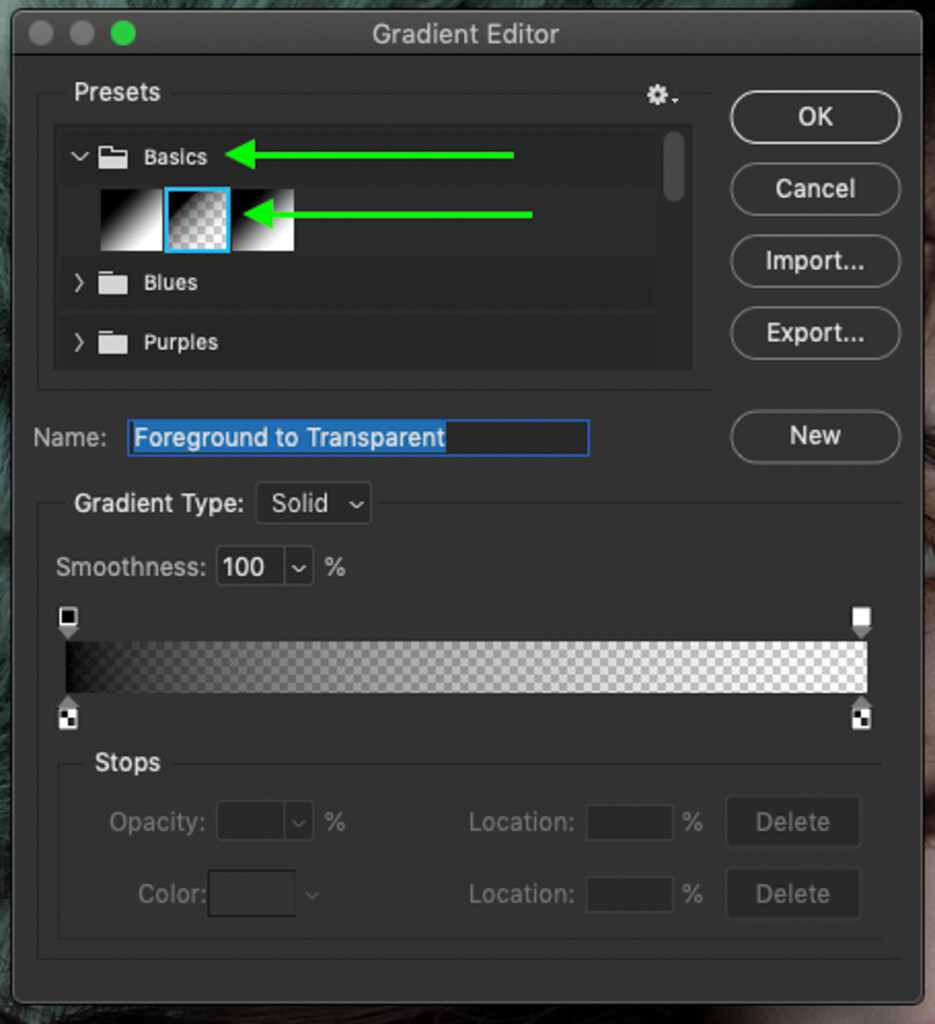
With your gradient tool selected, go to your upper toolbar and click on the gradient editor.

A new dialogue box will appear with all of your gradient tool settings. Here you can choose from various gradient presets and adjust the type of gradient you want to create.
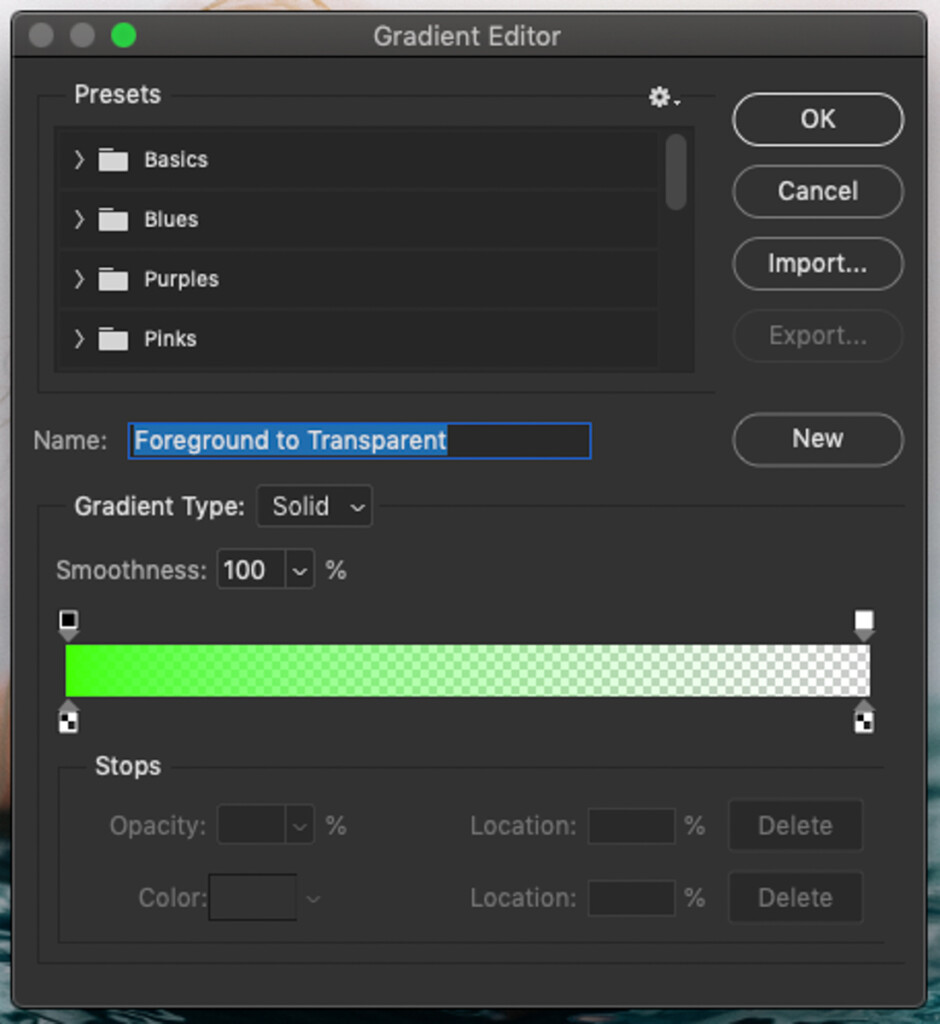
Within the presets option, click on the “Basic” folder to reveal the different gradient options inside. Here you’ll find the foreground to transparent gradient represented by the color transitioning to the white and grey checkerboard. This checkerboard is what represents transparency.
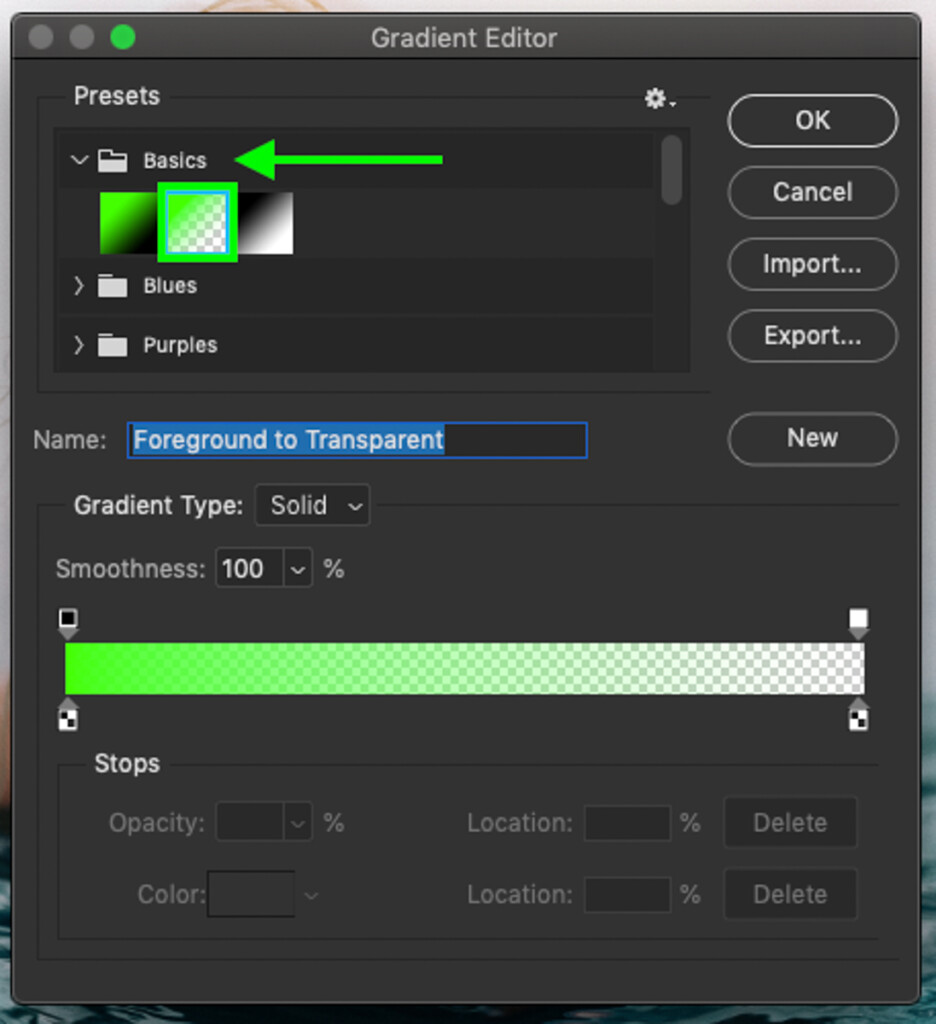
Now that you have your gradient selected click OK to exit the gradient editor.
Step 4: Choose Your Transparent Gradient Color
This gradient is called “foreground” to transparent because it bases its color on your active foreground color. You can see which color is set as your foreground color by looking to the bottom of your toolbar. The top colored box is your active foreground color.

To change your foreground color, click on the foreground color box and reveal the color picker.
Select any color from the color picker and click OK.
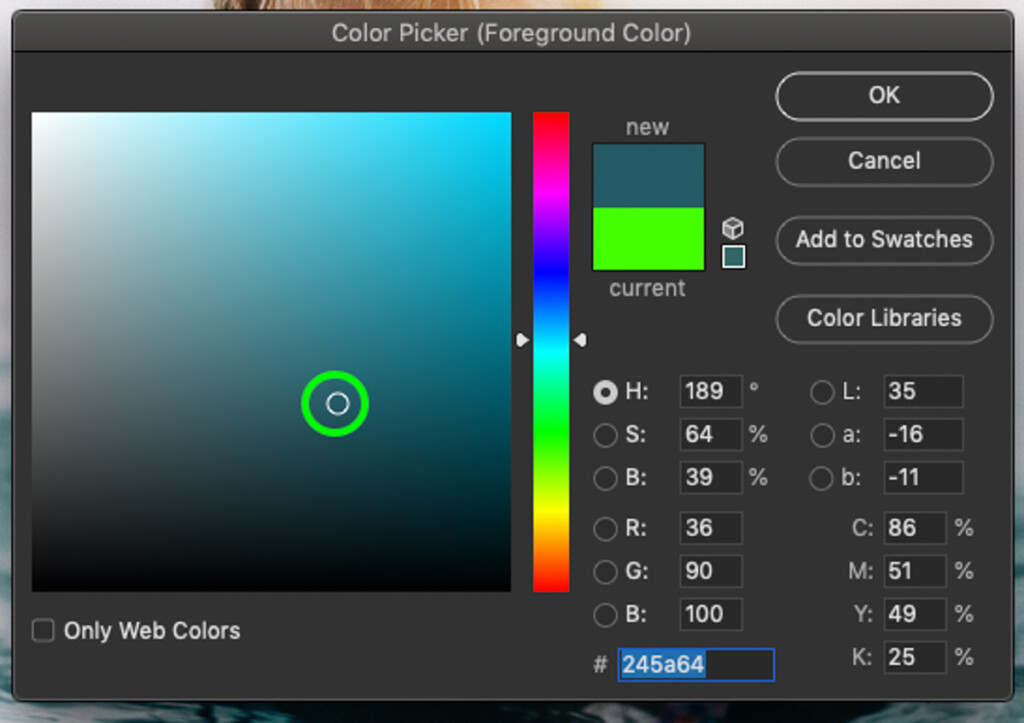
Now your gradient will match the new color you just selected!

Step 5: Applying The Transparent Gradient Onto A New Layer
With your new layer selected, it’s time to apply the gradient!
Before you create it, make sure you are using the proper gradient type for your photo. Looking beside the gradient editor in the upper toolbar, you’ll see a series of gradient types to choose from. Pick the linear, radial, angle, reflected, or diamond to alter how your gradient will appear on your new layer.

If you aren’t sure which to choose, I’d suggest sticking with the linear gradient. This type of gradient will get the job done in just about any scenario.

After choosing your gradient type, click and drag out on your canvas to create the transparent gradient.
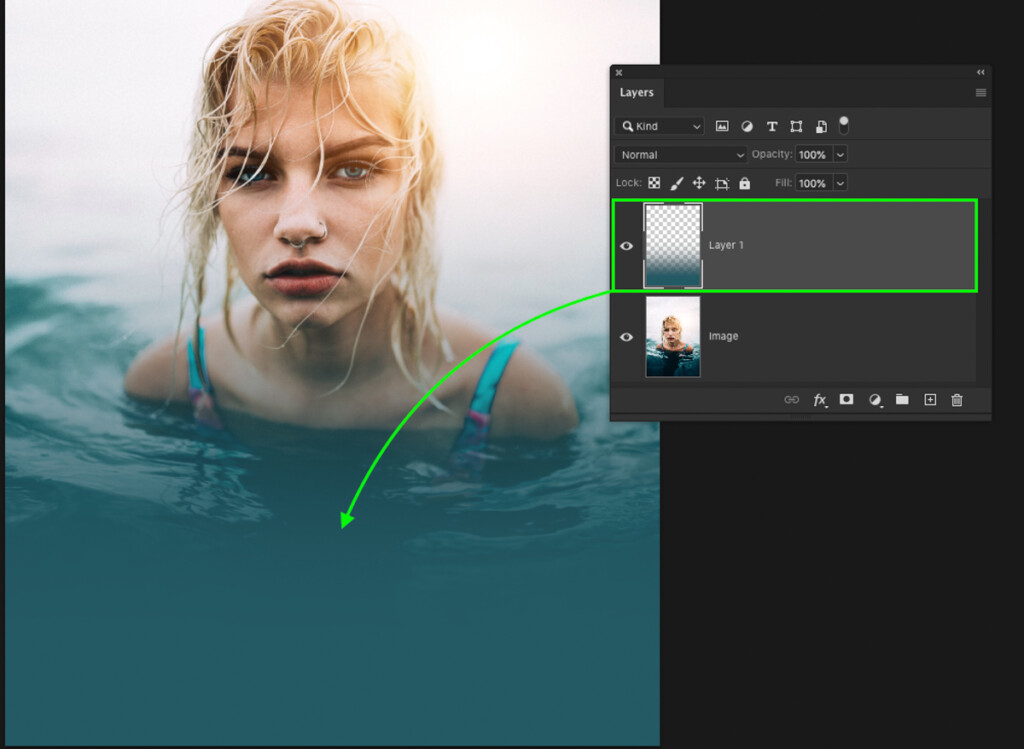
(Optional) Step 6: How To Change The Color Of Your Existing Transparent Gradient
After creating the transparent gradient, you might later decide that you need to change the color. At first glance, there isn’t any way to do this without starting all over. Luckily, there’s an easy workaround made with the help of the Layer Styles dialogue box.
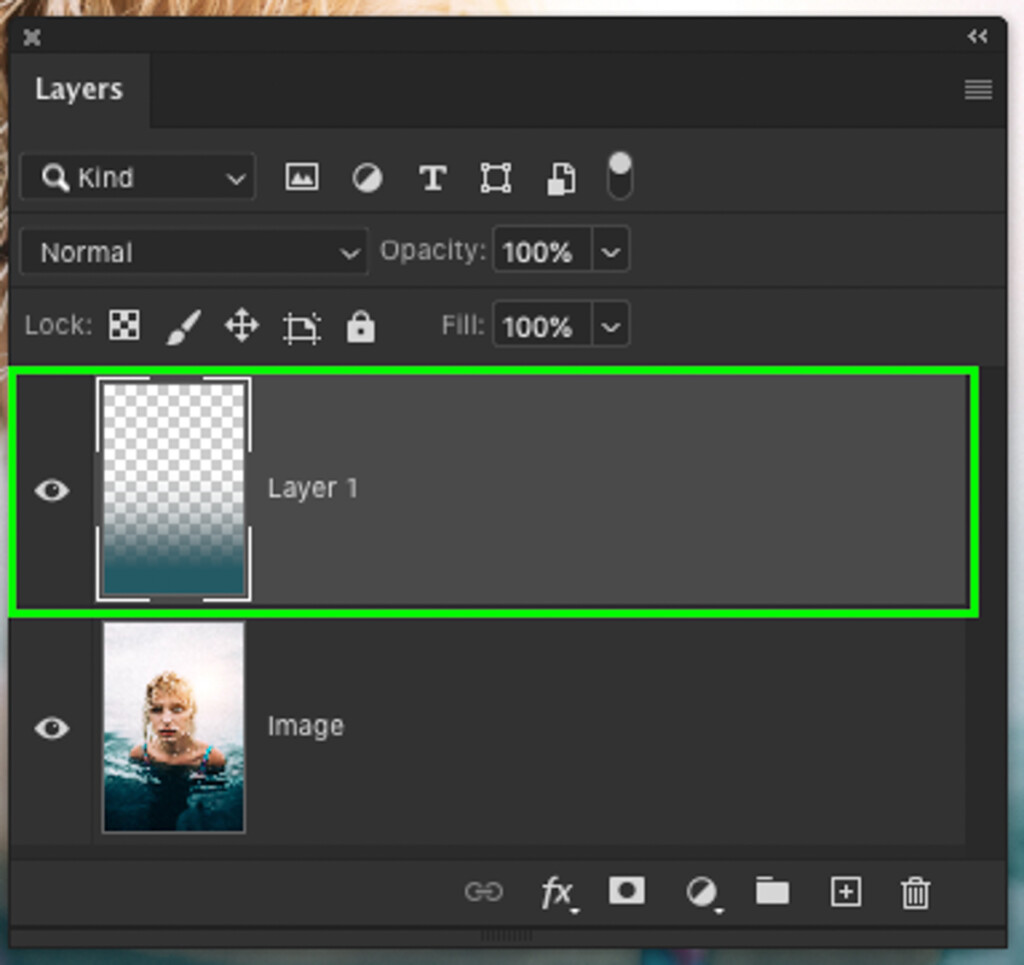
To access your Layer Styles, double click on your foreground to transparent gradient layer. A new box will appear with a variety of options to change the look of that particular layer.
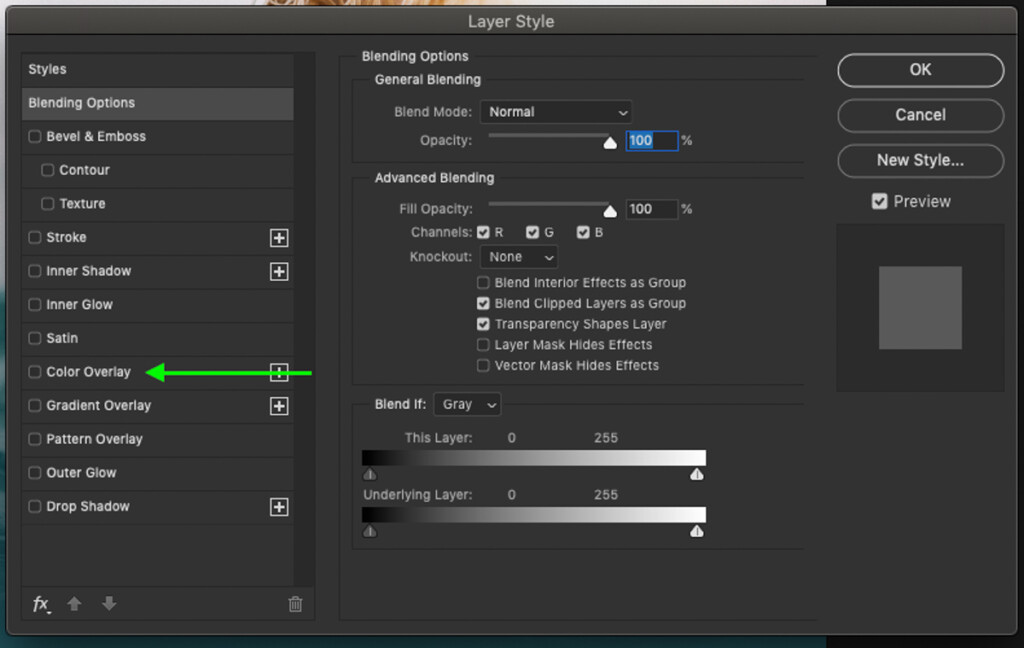
In the styles bar, click on “Color Overlay.”
Make sure your opacity is set to 100%, and the blending mode is set to normal. Next, click on the colored box to pick a new overlay color.
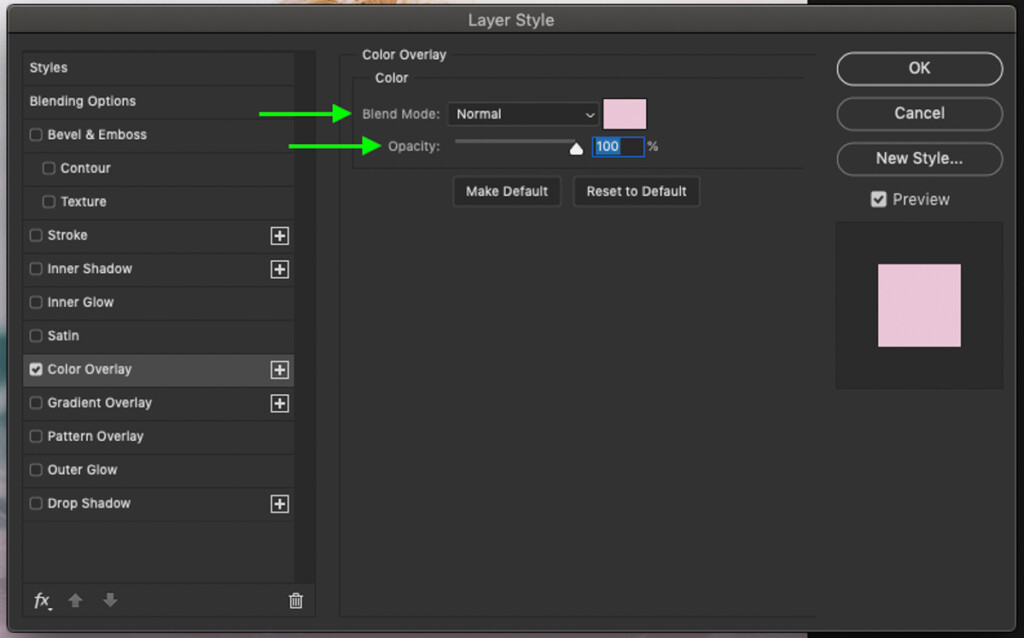
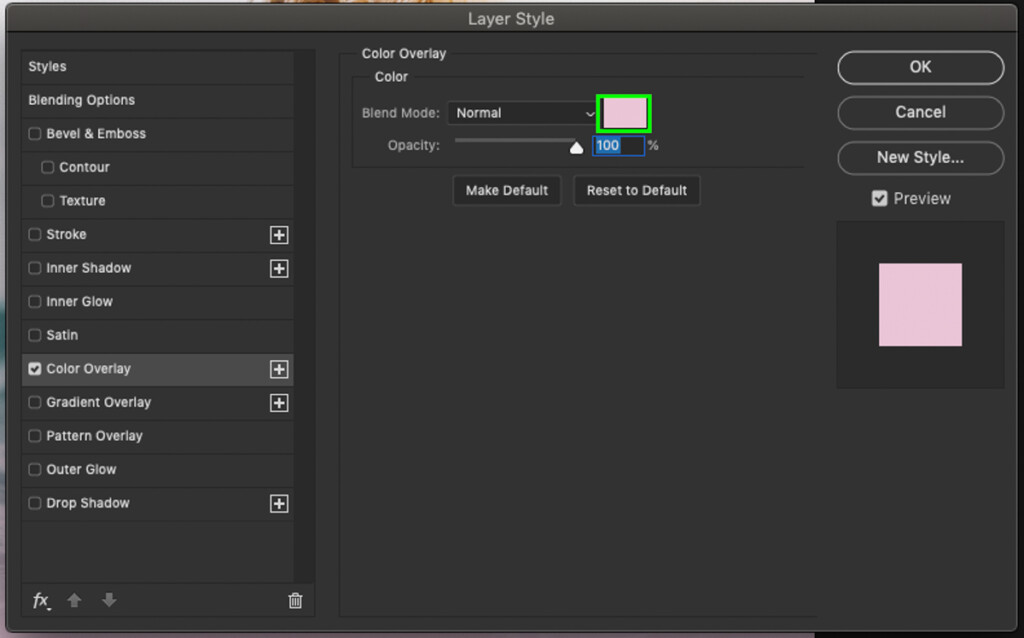
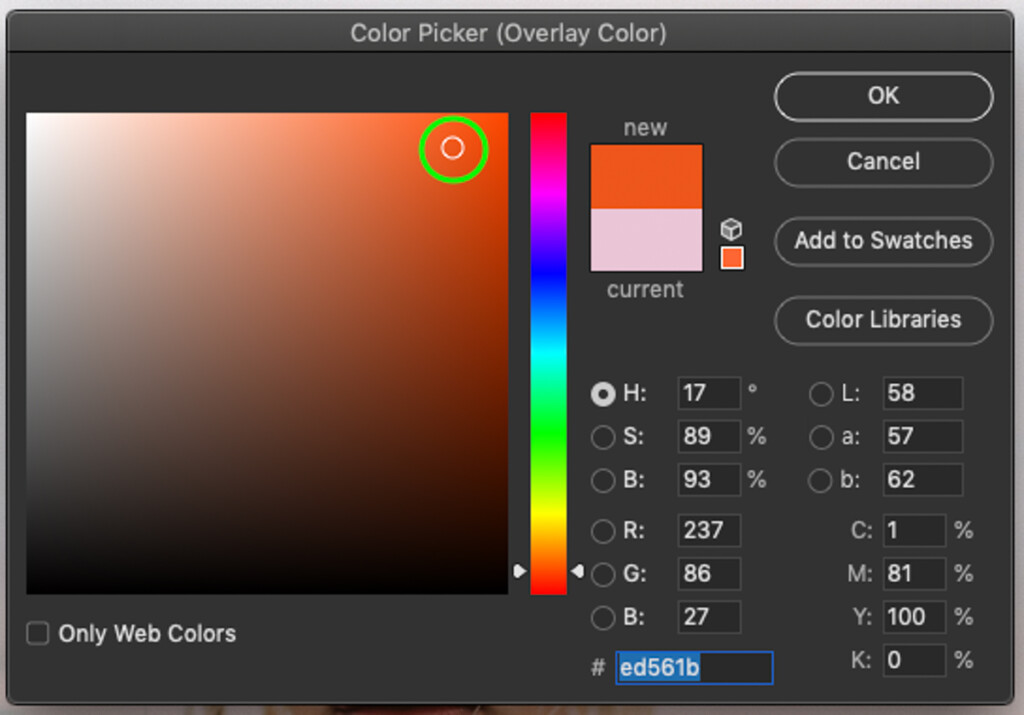
Just like before, when choosing the foreground color, use the color picker to select a new color overlay. Whichever color you pick will be applied to the colored areas of your transparent gradient. Once happy with your selected color, click OK.
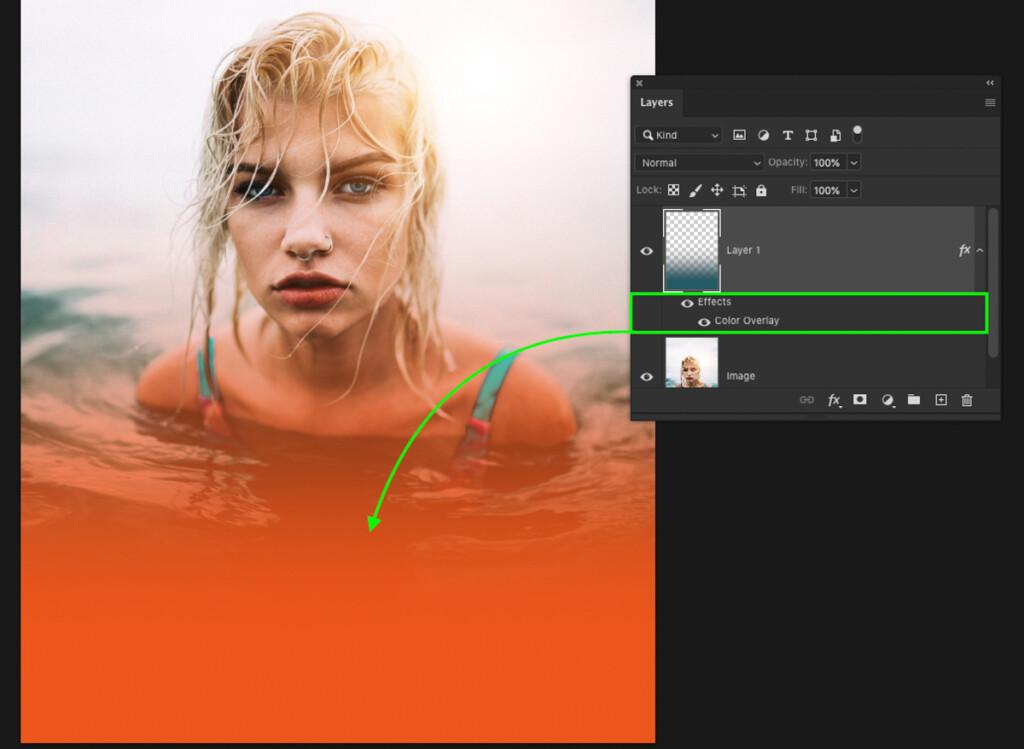
Now your gradient will take on the new color you have chosen while remaining partially transparent. If you want to edit the color overlay further, simply click on “color overlay” now found underneath your gradient layer. This will open the layer styles dialogue box so you can make further adjustments!
Method 2: Applying A Transparent Gradient To A Layer Mask
For this second method, I’ll show you how you can use transparent gradients to edit layer masks. For this process, you’ll need to follow steps 2, 3, and 4 from the previous section. You can skip out on creating a new layer part since you’ll be applying a layer mask to an existing image layer instead! With this method, you can easily fade sections of your image with only a few clicks. Here’s how to do it.
Step 1: Create A Layer Mask On Your Layer
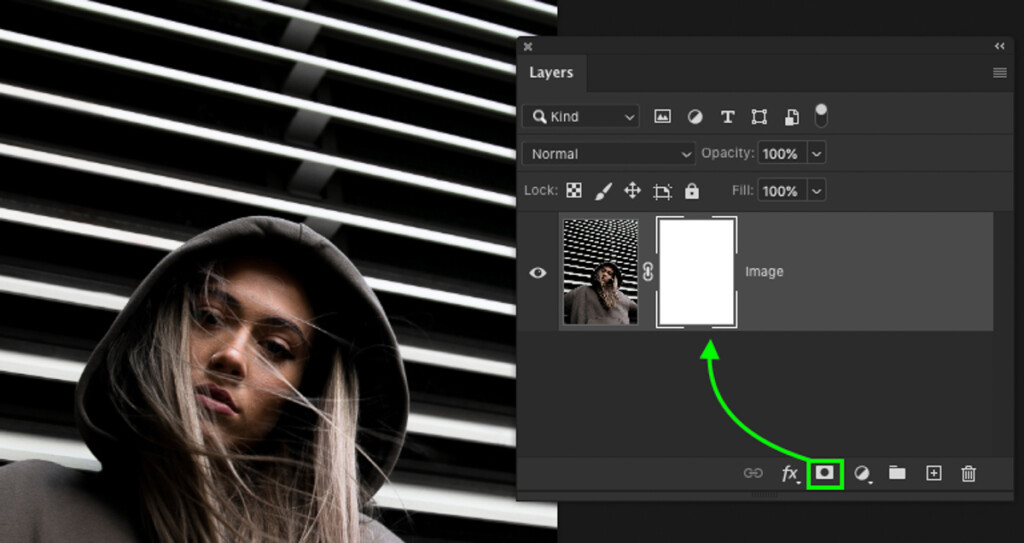
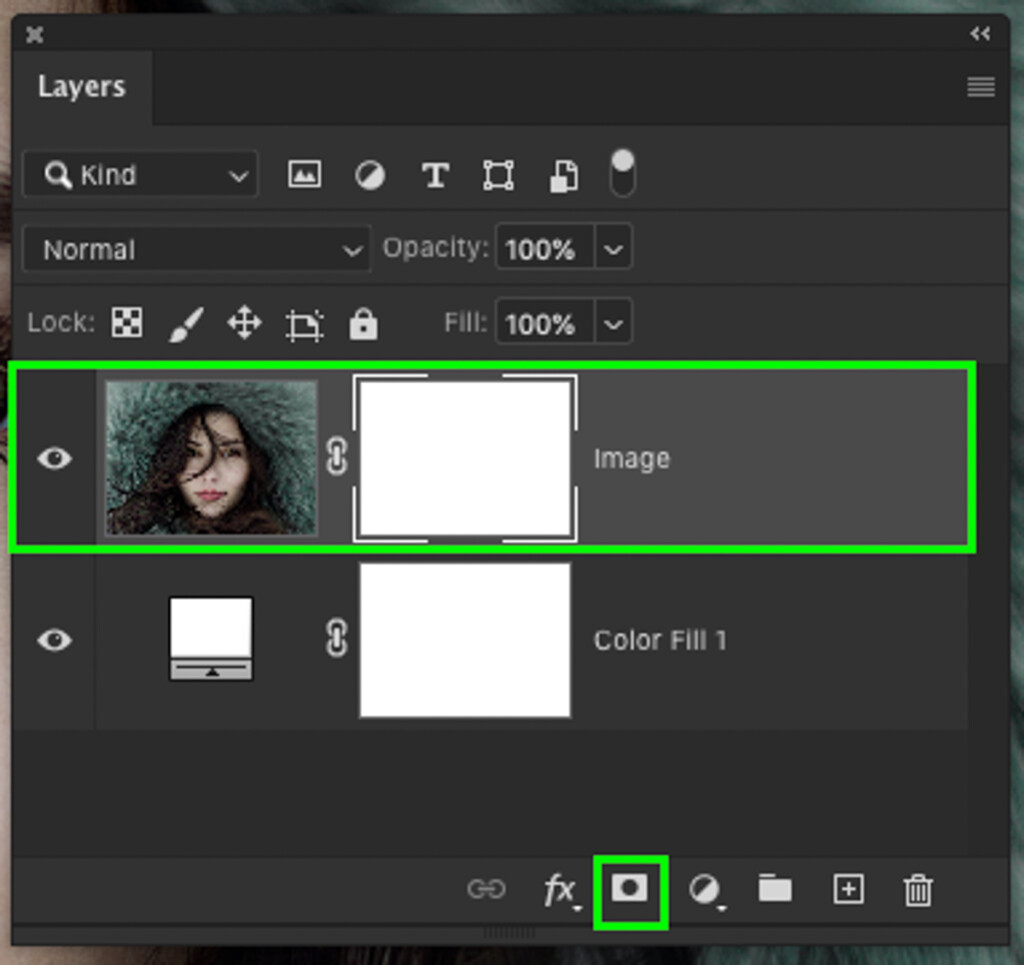
After you’ve already selected a foreground to transparent gradient using the steps covered in method 1, it’s time to add a layer mask. Layer masks can be added to any layer or group, but for this case, I’ll be applying one to my image layer. To create a new layer mask, select your desired layer, and click the layer mask icon at the bottom of the Layers panel.
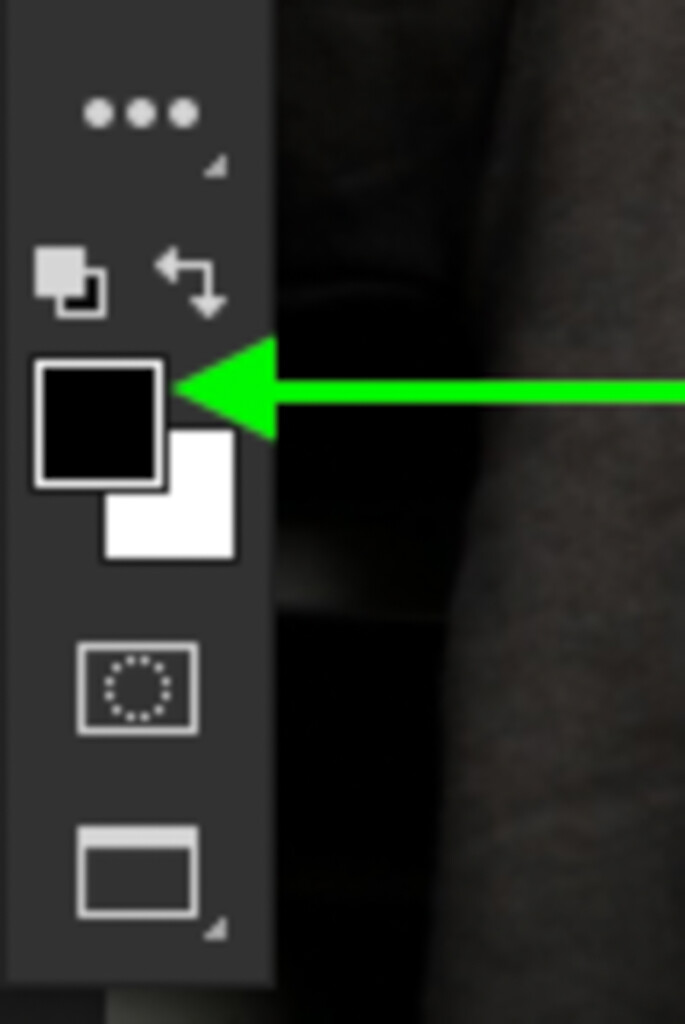
Step 2: Set Your Foreground Color To Black
Since I want to fade half of my image, I’ll set black as my foreground color. To do this, click on the foreground color box and select black from the color picker dialogue box.

Step 3: Applying A Transparent Gradient To Your Layer Mask
Next, click on your layer mask to select it. You can make sure it’s selected by taking note of the white boxes around the edges of the layer mask thumbnail.
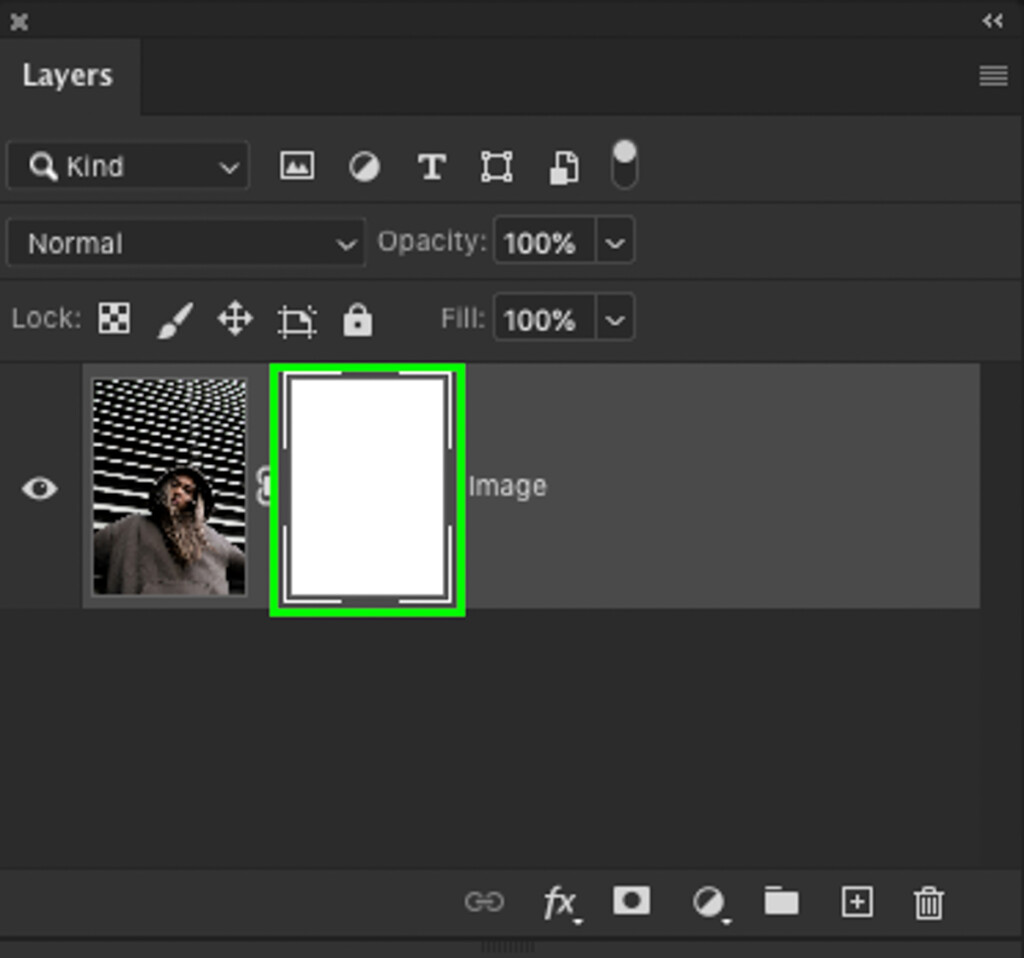
With your layer mask selected, click and drag out to apply your transparent gradient onto the mask. Now the black areas of your layer mask will become transparent while the others remain visible. This is an easy way to fade out the edges of individual layers.
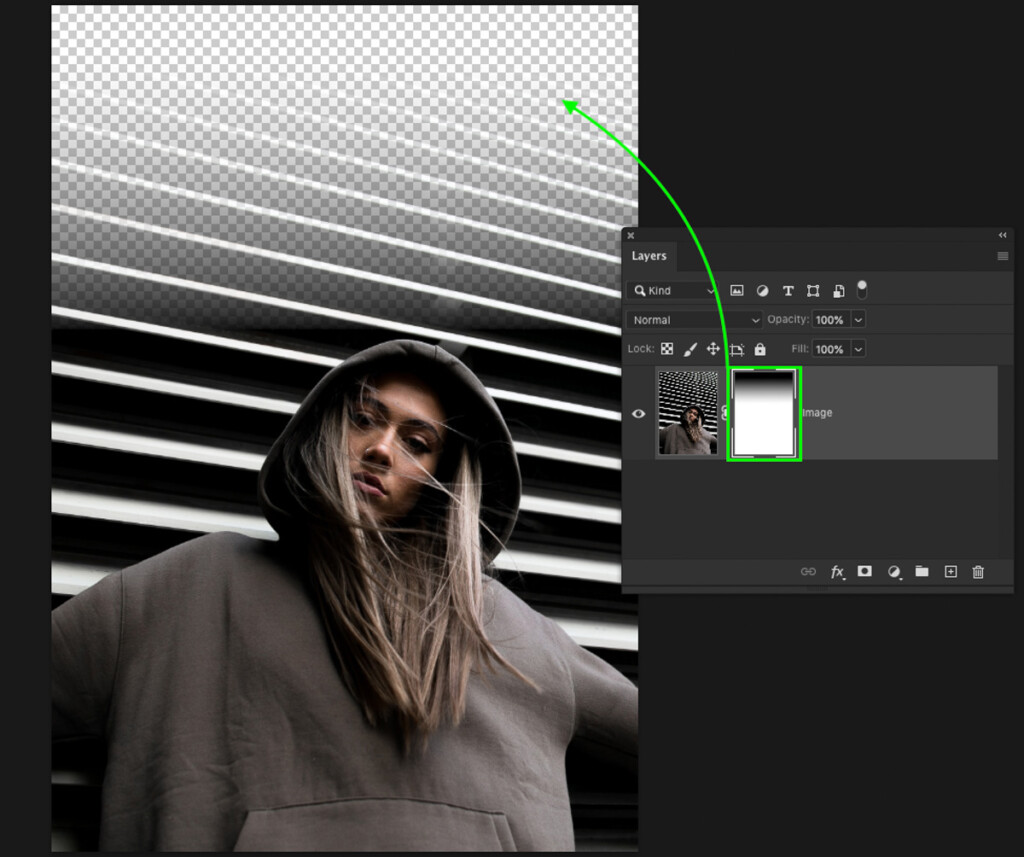
How To Use Transparent Gradients To Fade The Edges Of An Image
Now that you have a good idea of creating a transparent gradient in Photoshop, let’s go over how you can use them to fade the edges of an image. Using similar steps to what we’ve already covered, you can quickly fade all four edges of an image. However, there are a few subtle differences to be aware of.
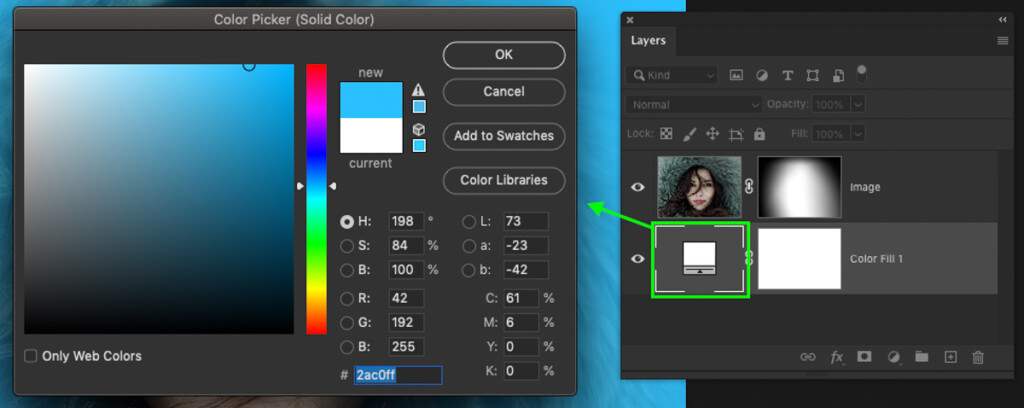
First, create a new color fill layer by going to Layer > New Fill Layer > Solid Color.
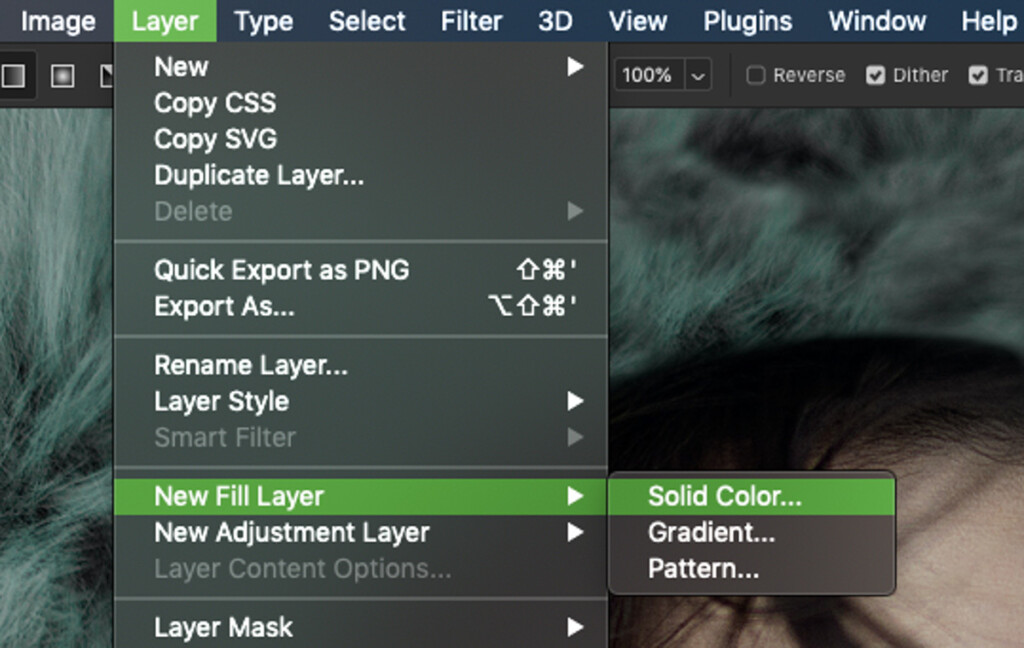
Pick your desired color and rename your layer to something specific if you wish.
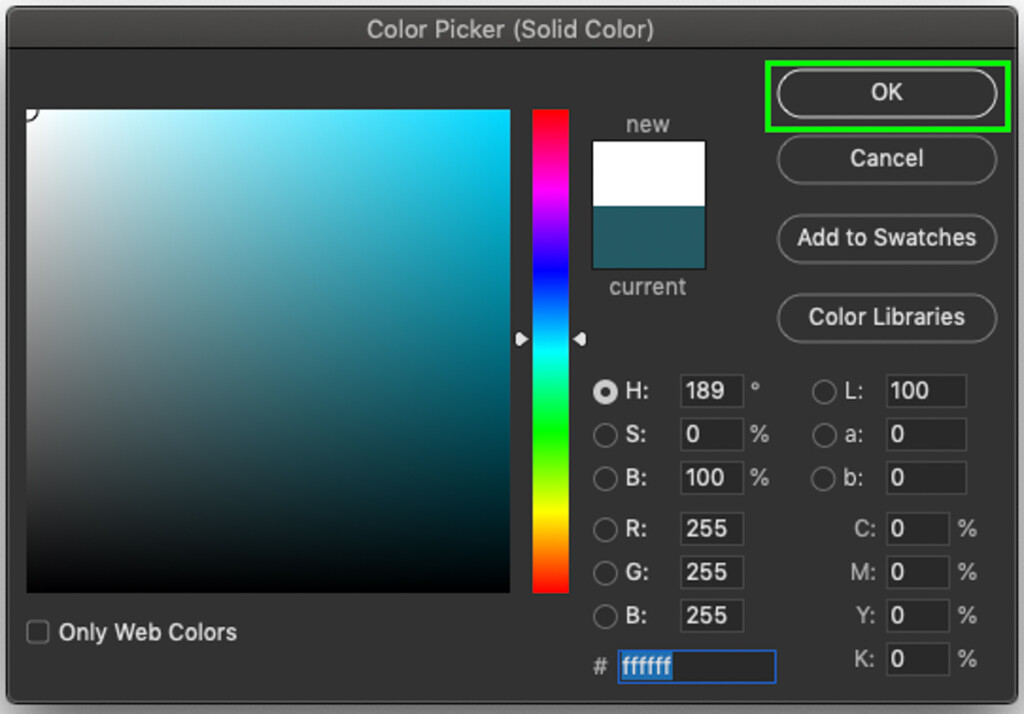
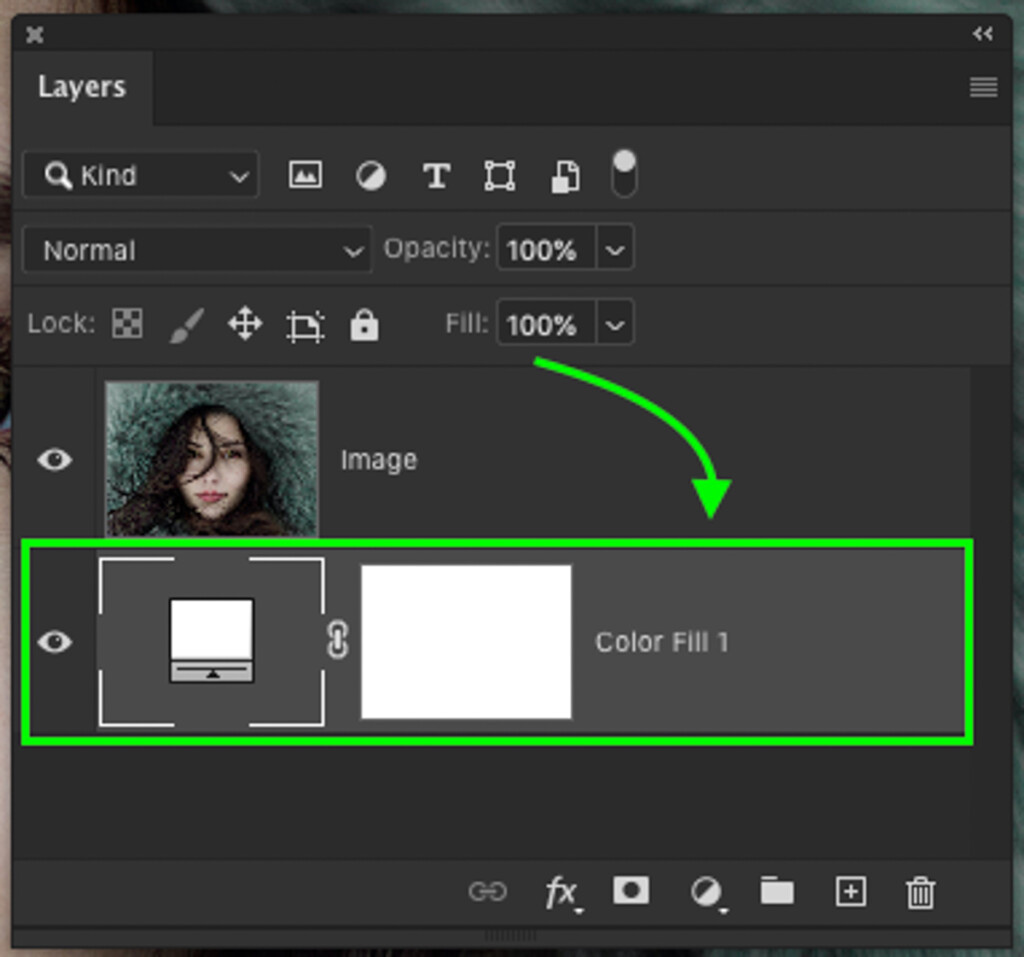
With a new color fill layer created, reposition it to sit underneath your image layer. This color fill layer will later be used as a background color behind the photo’s faded edges.
Next, click on your image layer and create a new layer mask.
Select your gradient tool and select a foreground to transparent gradient. Ensure that your foreground color is set to black.
With your layer mask selected, click and drag out around the edges of your image to fade out the edges. Since it will make these sections transparent, your underlying fill layer will start to show through. Continue this process of creating multiple gradients until you’re happy with the look of your image.

Now you’ve successfully faded the edges of an image using a transparent gradient on a layer mask. If you aren’t happy with the color in your image’s background, simply double click on your color fill layer to change the color.

Easy as pie!
What To Do If Your Transparent Gradient Isn’t Working
While you’re working with transparent gradients, you might run into a few problems where it stops working completely. Luckily the reason this tool stops working often comes down to one of these reasons below.
1. Check The Gradient Blending Mode
The gradient blending mode controls how a gradient blends into a layer as it’s created. In some cases, you might have accidentally changed this setting without realizing it. By selecting your gradient tool (G) and making sure the blending mode is set to normal, you’ll be back up and running.

2. Ensure Your Layer Or Layer Mask Is Selected
If you don’t have anything selected, Photoshop won’t know where you want to apply your gradient. Double-check to see that either your layer thumbnail or layer mask is selected depending on what you want to adjust.
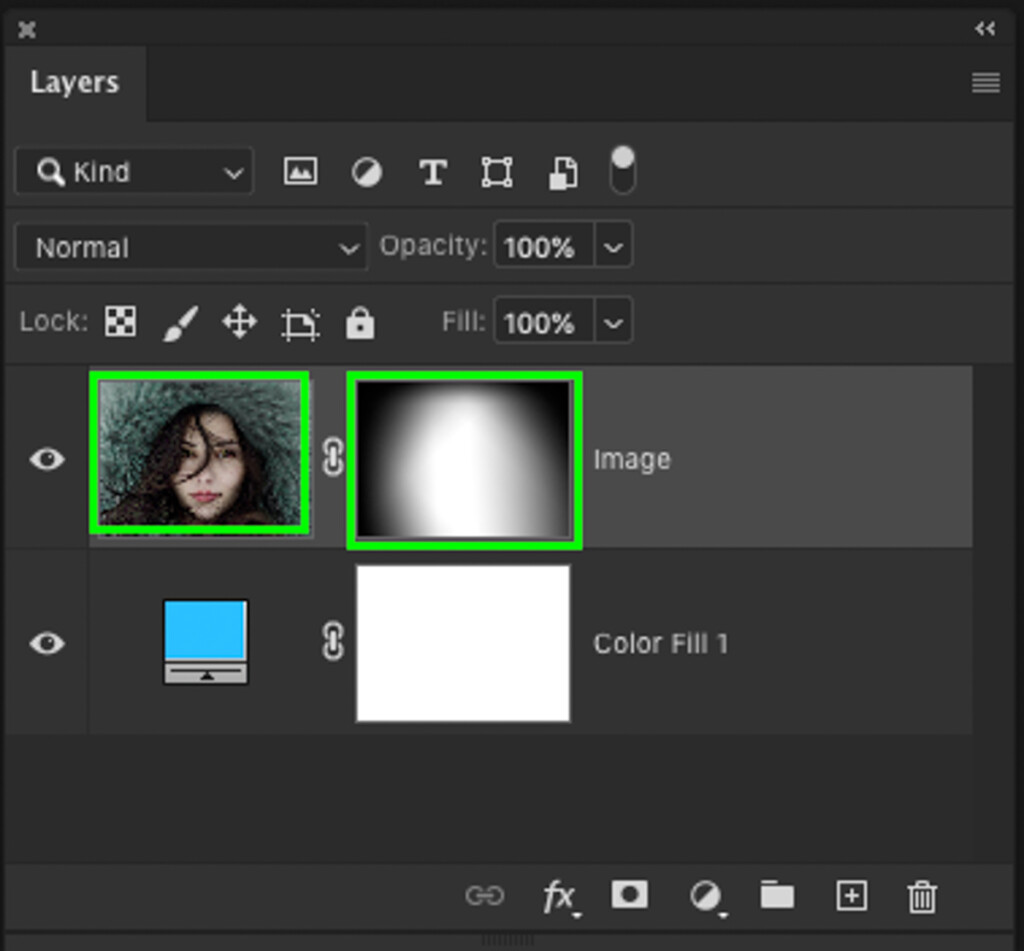
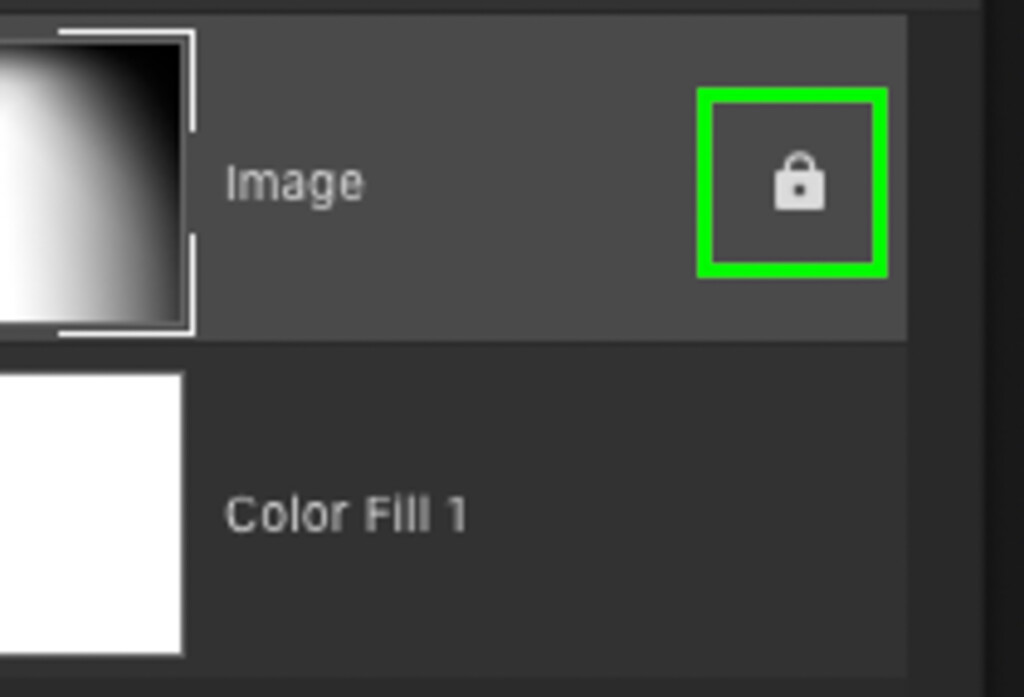
Likewise, make sure you aren’t trying to add a gradient to any locked layers, or you’ll also run into problems.
3. Check Your Foreground Color When Applying Gradient To Layer Masks
When you’re applying a transparent gradient to a layer mask, the color can make a big difference. In the world of layer masks, white is 100% visible, while black is 100% transparent. Meanwhile, all the shades of grey between white and black represent varying levels of transparency. Before you edit your layer mask, make sure you’re applying the right color to the mask. For example, if you apply a white gradient to a white layer mask, you won’t see any results. To better understand how layer masks work in Photoshop, check out this post.

4. Make Sure You Have The Correct Gradient Selected
In some instances, your gradient might look wildly different than what you expected. This often comes down to not having the proper gradient type selected. With the gradient tool active, you can find a series of gradient types besides the gradient editor. Check to see which gradient is selected here and whether or not that’s the one you’re trying to create.

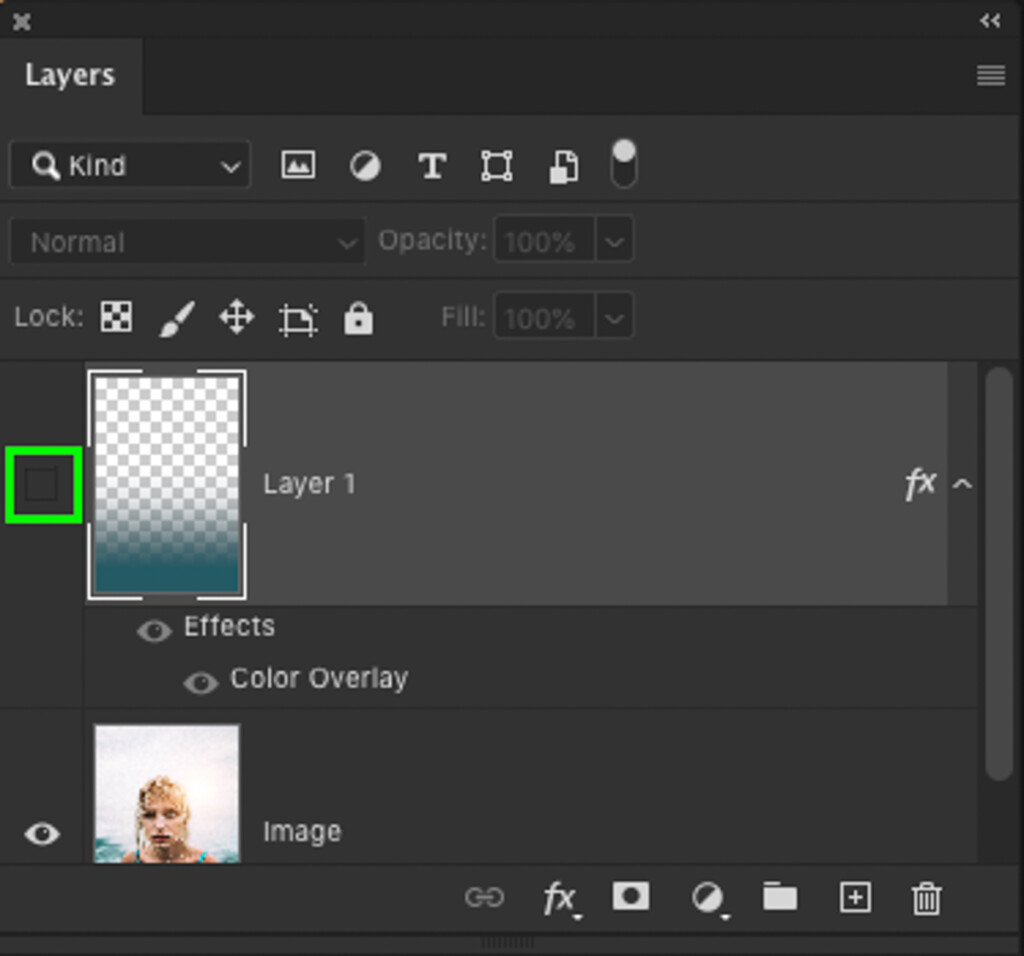
5. Check That Your Layer Is Visible
Now, this may go without saying, but it’s happened to the best of us. If your layer isn’t visible or the opacity is set to 0%, you won’t be able to see any of your gradient adjustments. Ensure that the eyeball icon is visible beside your selected layer and that your layer opacity is set to 100%. This is an easy fix that I’ve accidentally run into myself on numerous occasions.
Recommended Photoshop Tutorials For You:
After following the steps outlined in this post, you’re officially a transparent gradient master. Now you can gradient it up till your heart’s content.
Enjoy!
Brendan 🙂