How To Use Layer Masks In Photoshop
Layer masks are one of the most useful tools available in Photoshop. Without them, it’d be nearly impossible to edit non-destructively. Although relatively simple, they can feel pretty intimidating at first. Luckily, you can learn how to use layer masks in Photoshop, quickly, with a solid understanding of the basics.
In short, a layer mask is used to hide parts of a layer, without permanently erasing its information. The advantage of this is a reversible means to cut out images, alter layers, or blend images together. A layer mask gives you far more flexibility when adjusting a layer.
To highlight all the incredible uses of layer masks, let’s go over some examples and situations where layer masks are useful.
How Does A Layer Mask Work?
Before you can do anything with a layer mask, you need to understand the basic function of them. In the world of layer masks, everything is black and white. This is crucial to remember going forward.
On a layer mask, anything that is 100% white will be 100% visible.
Meanwhile, anything that’s 100% black will be 100% transparent or invisible.
If you paint any shade of grey between white and black on your layer mask, you’ll get varying levels of transparency. For example, 50% grey would be 50% transparent on your mask.
By default, a new layer mask will be completely white. You can think of this like a blank canvas that’s ready to be edited. When you want to hide a certain part of your layer, you can paint black over your layer mask to make parts transparent. This is perfect for when you need to blend something into your photo.

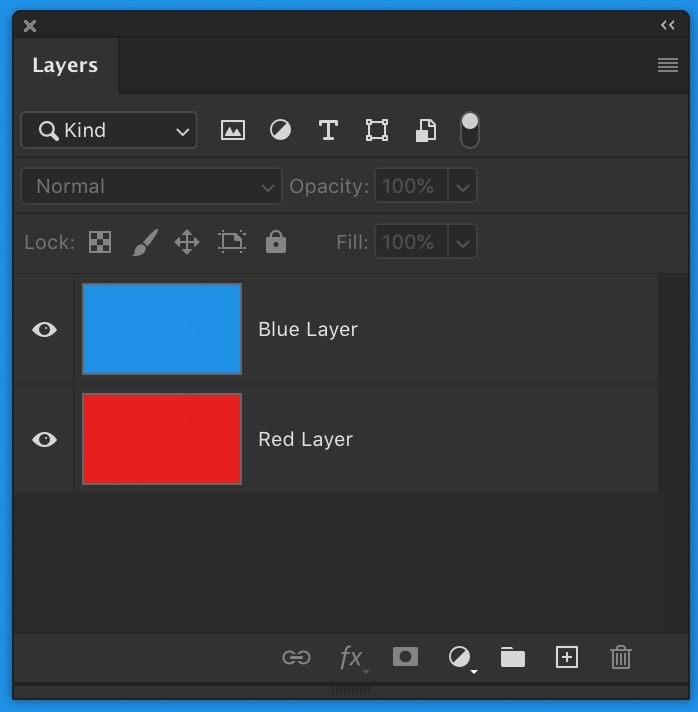
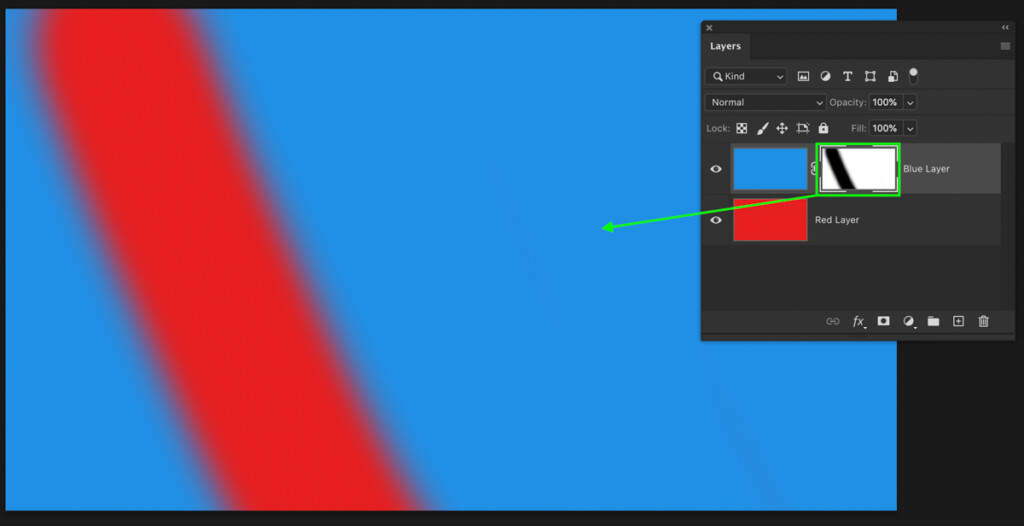
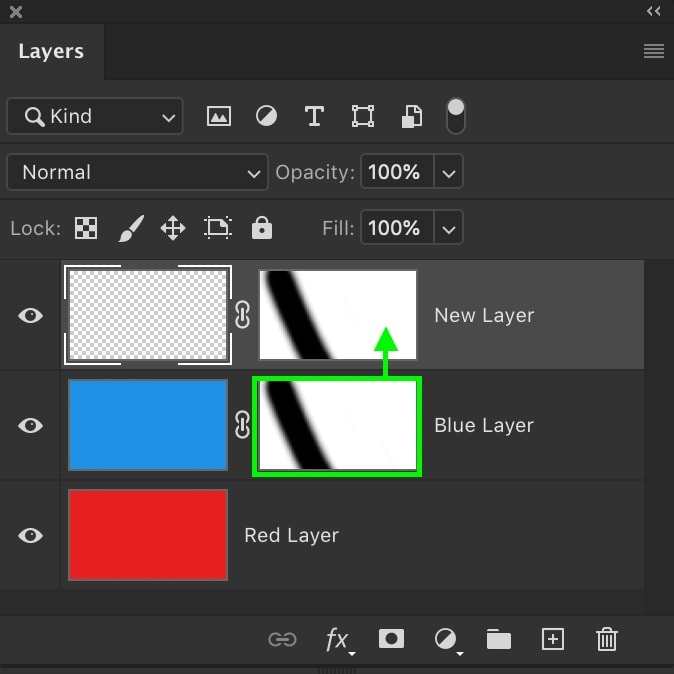
To give you a clear example, of a layer mask in action, I’ve created two solid colored layers. The blue layer is on top and the red layer is below. Let’s say I want to get rid of part of the blue layer, to reveal the red layer below.
Your first reaction might be to use the eraser tool to get this done, however, this is a permanent change. By erasing part of the blue layer, that information is gone for good. There’s no way to get it back. If you wanted to adjust this deleted area, you wouldn’t be able to.

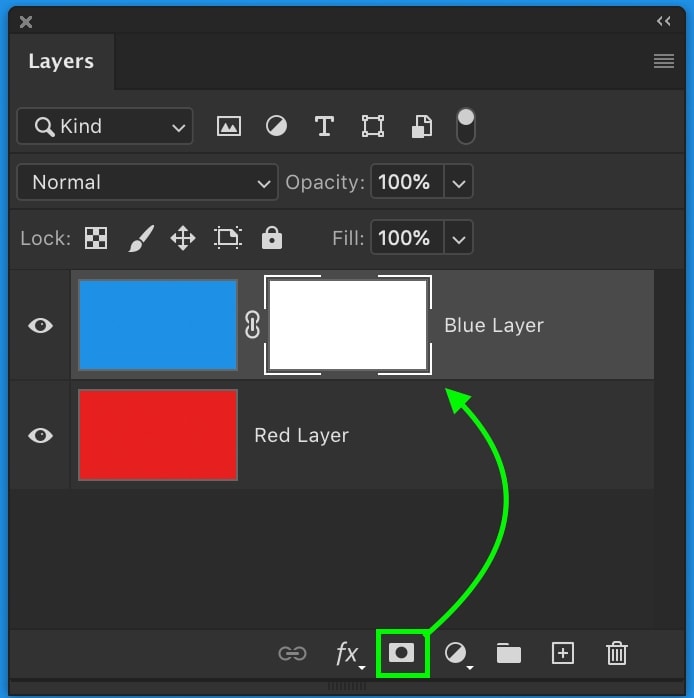
Instead, a layer mask becomes the better choice so you can edit non-destructively. By starting over and adding a layer mask to the blue layer, I’ll paint black onto the layer mask to mask out (aka hide) part of that layer.
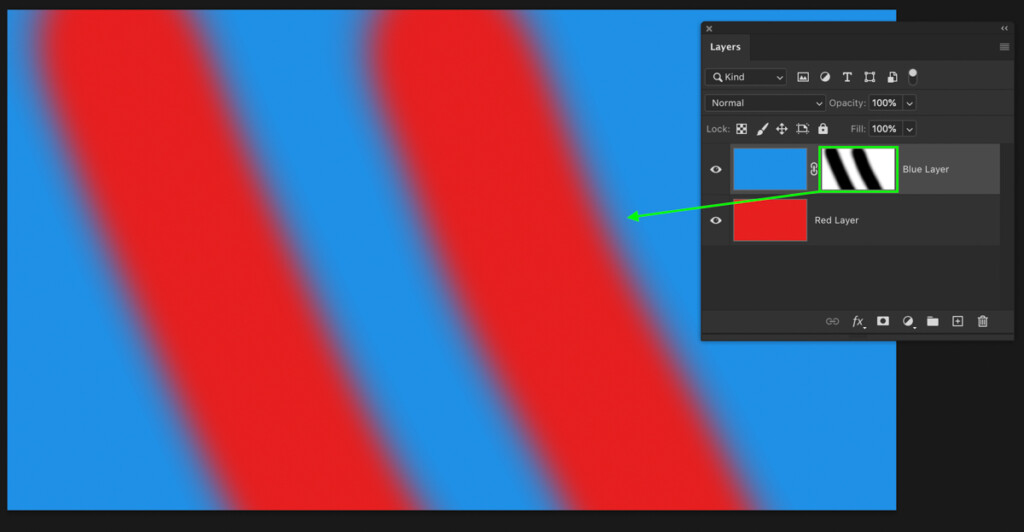
Now the final result looks the same, but the information from the blue layer isn’t deleted, it’s only hidden.
By painting white back onto the layer mask, I can easily add back any of the hidden areas of the layer.
This is the most basic example of how a layer mask works in Photoshop. They’re an amazing tool that offers a reversible way to “delete” part of your layer.
How To Use Layer Masks – Step By Step
Now that you have a general understanding of how a layer mask functions, here is the step by step process to use a layer mask.
Step 1: Create Your Layer Mask
Before you do anything, make sure that the layer you want to apply your mask to is selected. You can do this by clicking on the layer and making sure it’s highlighted.
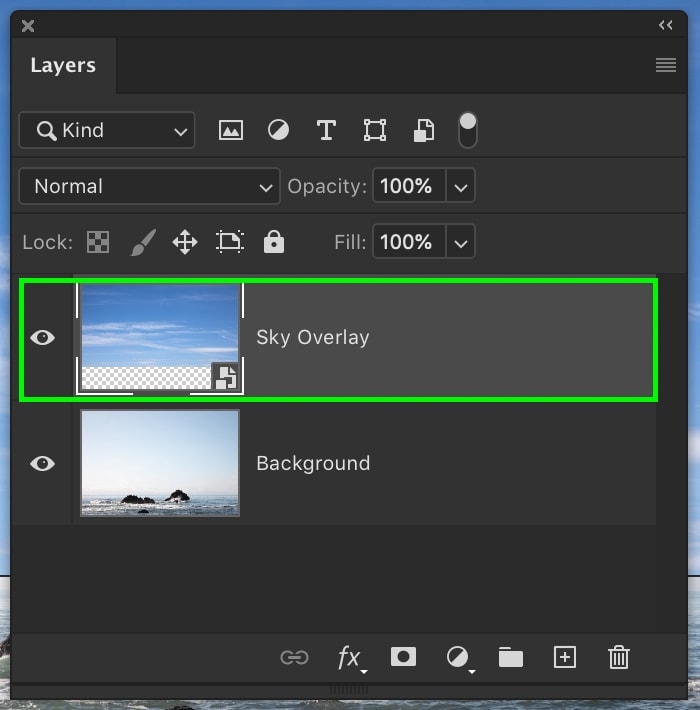
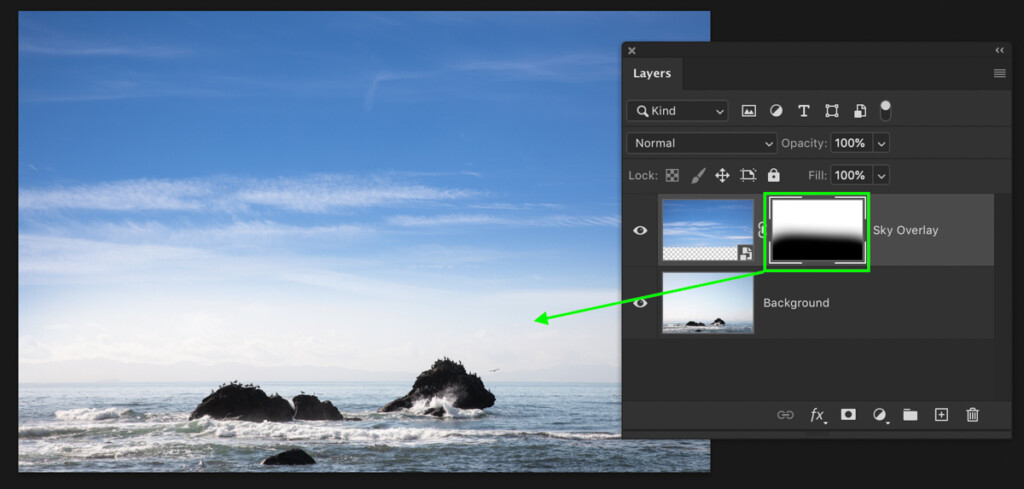
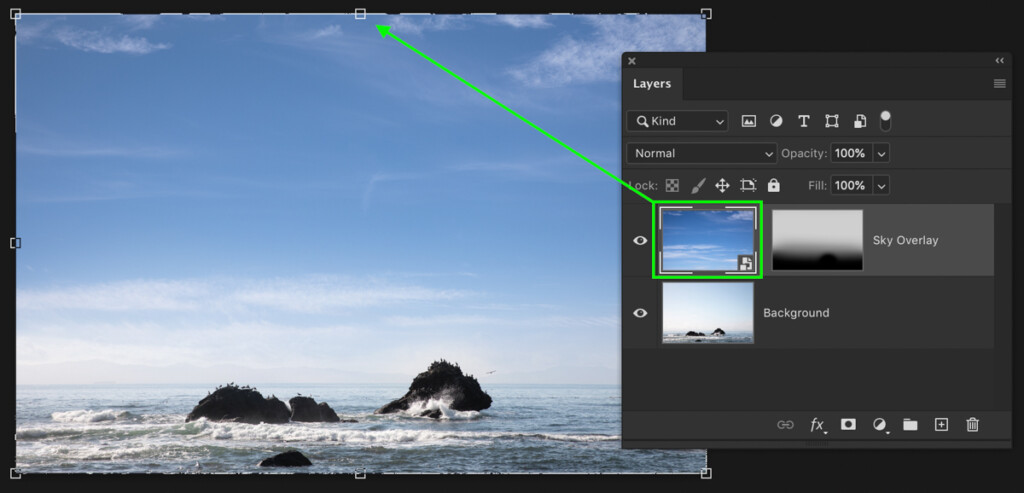
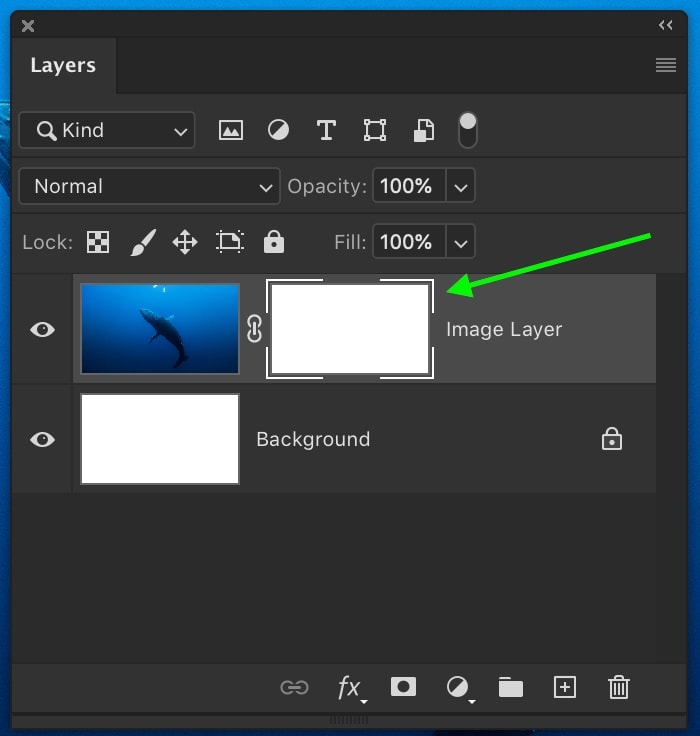
With your layer selected, click on the layer mask icon at the bottom of your layers panel to create a new mask. In this case, I’ll be applying a layer mask to my sky layer so I can add it to my landscape image.
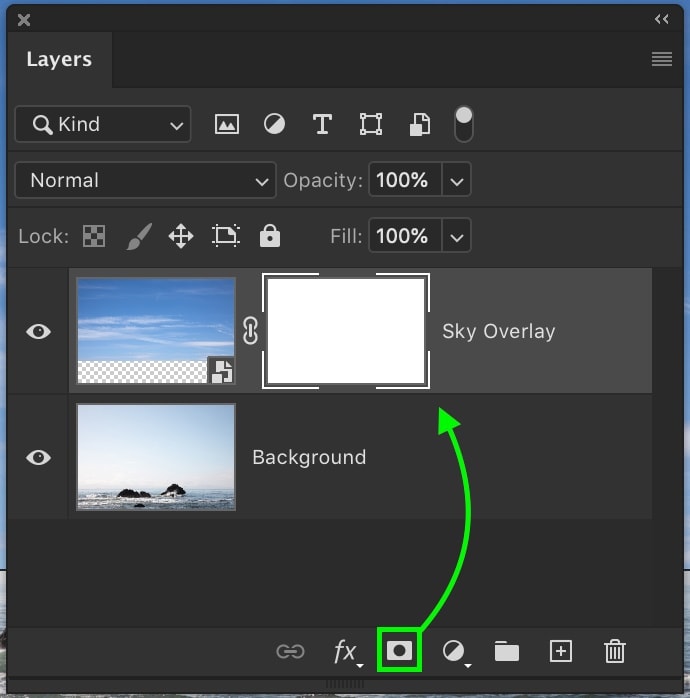
A white box will appear beside your layer thumbnail. This is your layer mask.
Step 2: Select The Mask And Grab Your Brush Tool
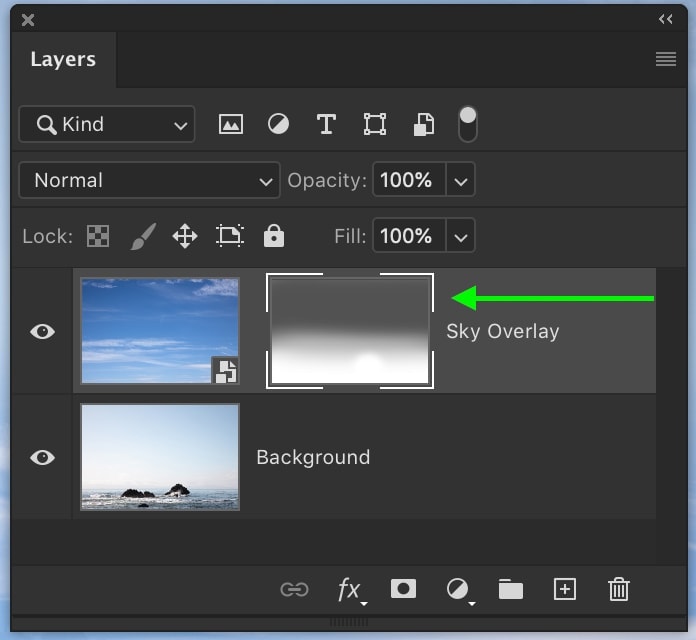
Make sure your layer mask is selected by taking note of the white box surrounding it. If you don’t see this box, click on your layer mask to select it. This way you can tell Photoshop what you want to paint on.
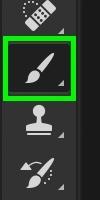
Next, grab your Brush Tool by pressing B or clicking on it in your toolbar.

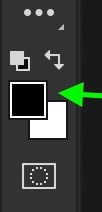
Since I want to hide parts of the sky layer, I’ll set my foreground color to black. This way black (100% transparency) will be applied to the layer mask.

Step 3: Paint On Your Layer Mask To Hide Parts Of Your Layer
With the Brush Tool active and black as my foreground color, I’ll begin painting on my image to hide parts of my selected layer.
Since the layer mask is selected, these black brush strokes are applied to the layer mask and not the layer. That’s why none of the black brush strokes appear in the photo.
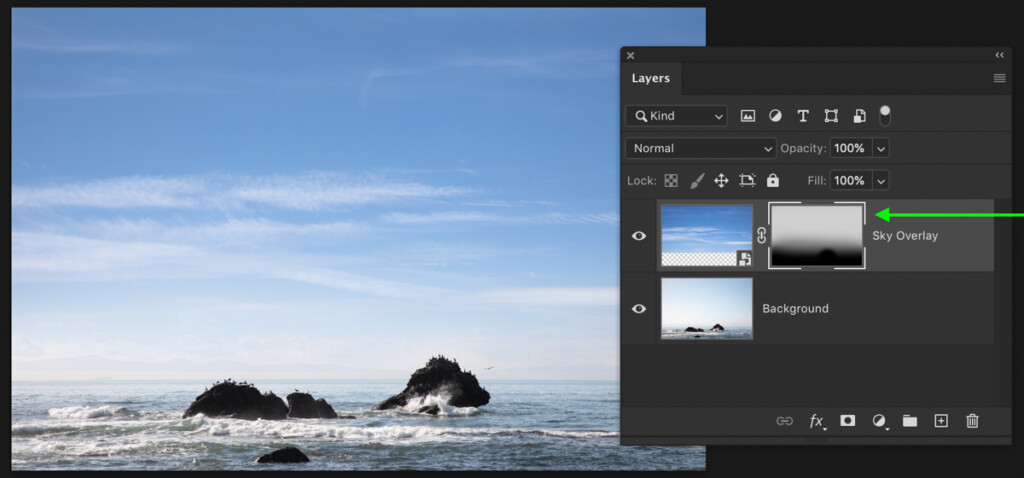
I’ll continue to mask out parts of the sky layer until I’m happy with the result.
Step 4: Refine Your Mask As Needed
In many cases, you’ll need to apply further adjustments to your mask. Take a moment to go through and touch up the mask until it perfectly suits your needs.
If you accidentally masked out too much of your layer, switch your foreground color to white by pressing X. Now you will reveal sections of the layer as you paint on the mask.
Step 5: Adjust The Positioning (Optional)
You might realize that the positioning of your layer or layer mask isn’t what you wanted. Rather than starting all over, you can move your layer and layer mask wherever you need.
To move your layer and layer mask together, simply select the Move Tool by pressing V and select the layer. Click and drag the layer across your canvas to reposition them both at the same time.
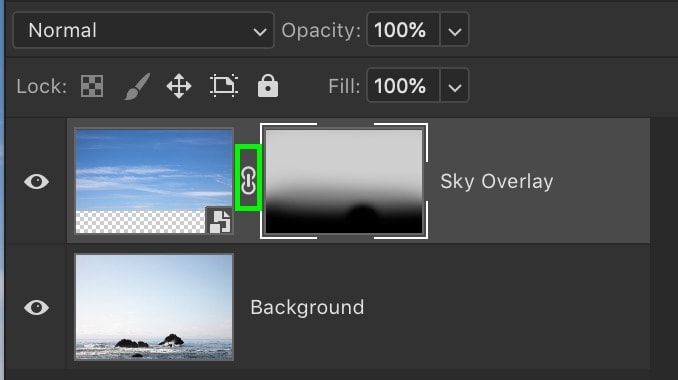
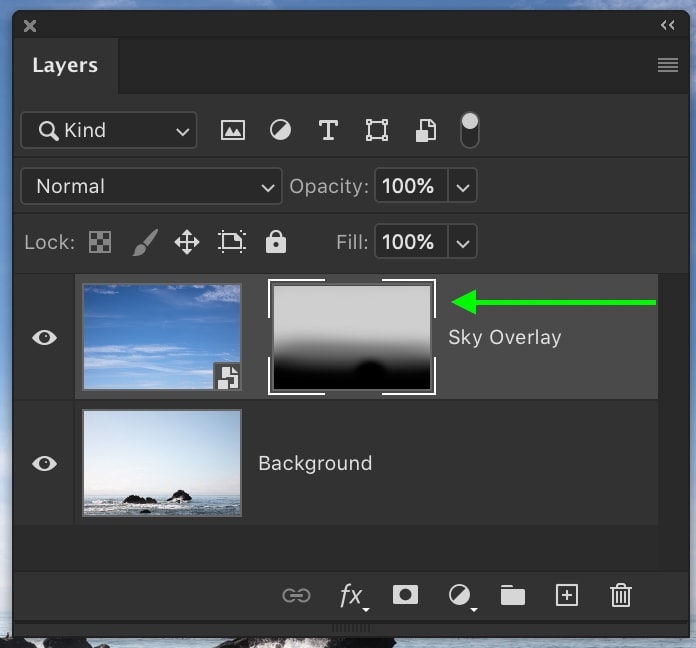
If you only want to adjust the positioning of your image, without moving your layer mask, click the chainlink icon. This will unlink the layer from the mask allowing them to move independently.
Click on your layer thumbnail and ensure it’s selected by noting the white boxes around it. Grab your Move Tool by pressing V and drag to reposition your layer. This time, only the image will move while the mask stays put.
Knowing both of these options will save you a lot of time when refining a layer mask. Sometimes all you need to do is reposition your image, rather than altering the layer mask completely!
Why Is Your Layer Mask White?
Any time you create a new layer mask, it will be completely white (100% visible) by default. This makes it far more convenient to immediately begin painting black to mask out parts of your layer.
You could consider these new white layer masks, like a blank canvas. Since Photoshop doesn’t know what you’ll want to adjust, it sets you up with a clean slate to work from. That way, all you need to do is start painting.
What Can You Use Layer Masks With?
Layer masks can be used with any type of layer in Photoshop. No matter which layer type they’re paired up with, they still function exactly the same. However, certain layer types might have different reasons behind why a layer mask is useful.
– Adjustment Layers
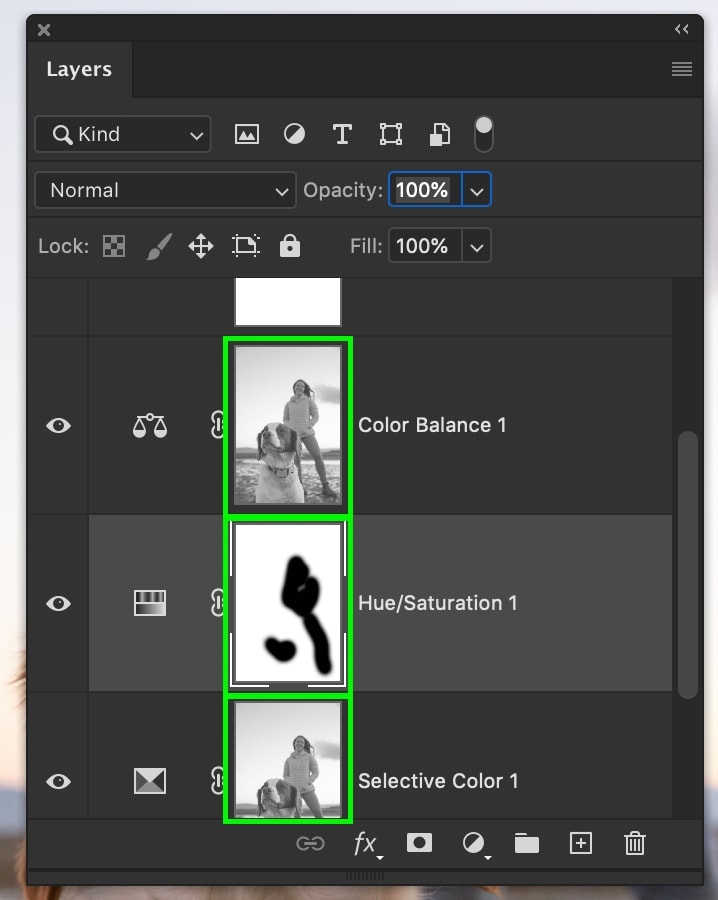
The first type of layer that uses layer masks is adjustment layers. When you create a new adjustment layer, you’ll notice that a new layer mask is created alongside it. This makes it easy to start fine-tuning where your adjustments take place.
Unlike other photo editing programs, Photoshop doesn’t really have a “spot adjustment brush” like in Lightroom or Luminar. Instead, layer masks can be used to get specific with where you target an adjustment.
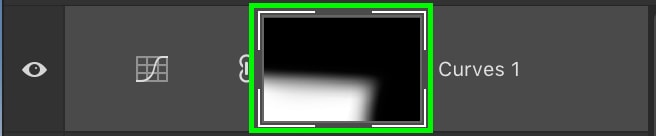
For example, let’s say you want to create a Curves adjustment to brighten the exposure, but only want it to affect the subject of your photo. By painting black on your layer mask, you can hide this curve adjustment in every part of your photo except around the subject.
This can be used with any type of adjustment layer making it simple to target sections of your picture.
– Regular Layers
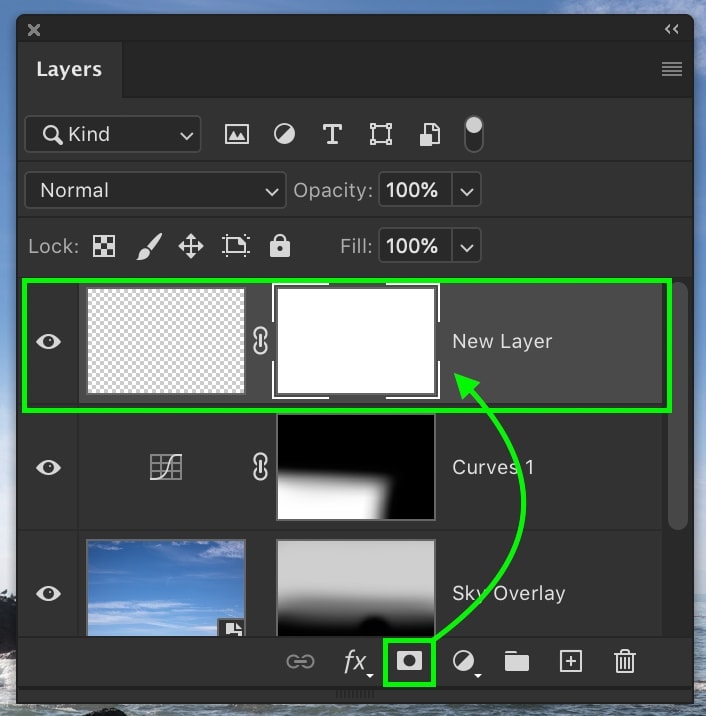
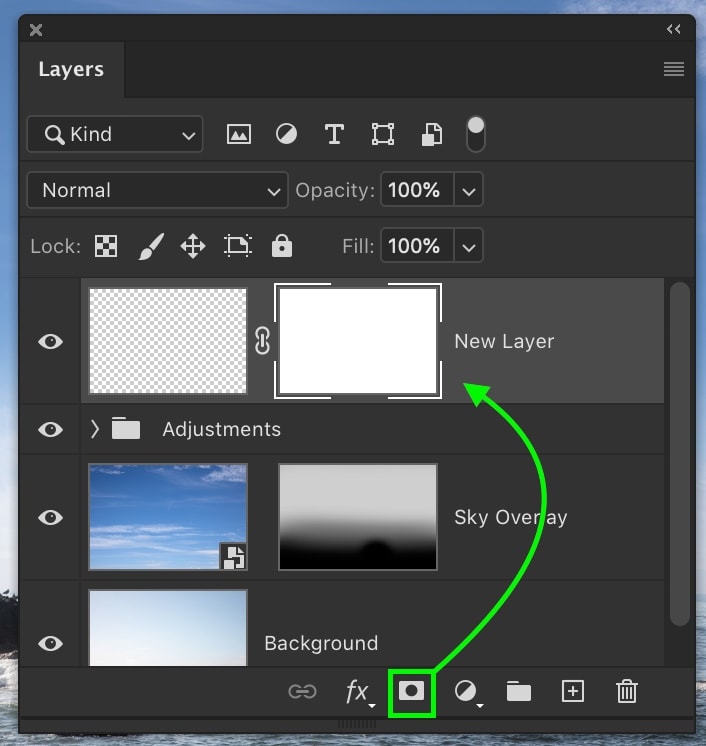
Any type of regular layer you create can use a layer mask. Whether you fill this layer with color, text, or an image, it’s all fair game. By default, new layers do not come with a layer mask. Luckily all you need to do is select the layer and hit the new layer mask icon to create one.
In most cases, layer masks are used with regular layers to hide sections you don’t want to see. They could be used to blend two images together or only make a section of your layer visible.
– Text Layers
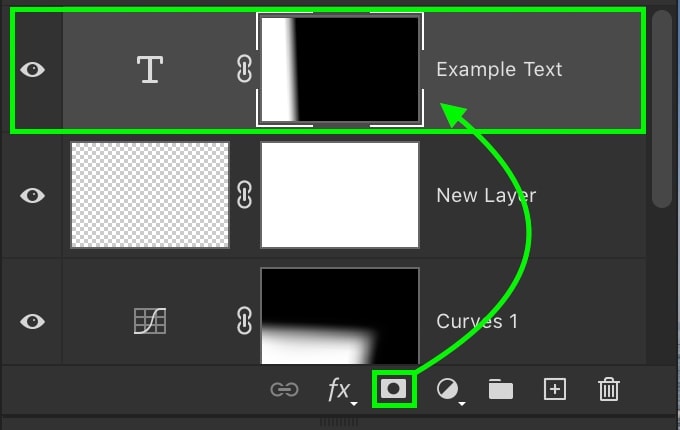
Layer masks can be used with text layers as well to refine what sections of the text are visible. If you want to fade parts of your text, for example, this can be easily done with a layer mask and a gradient adjustment. More on this later.
– Groups
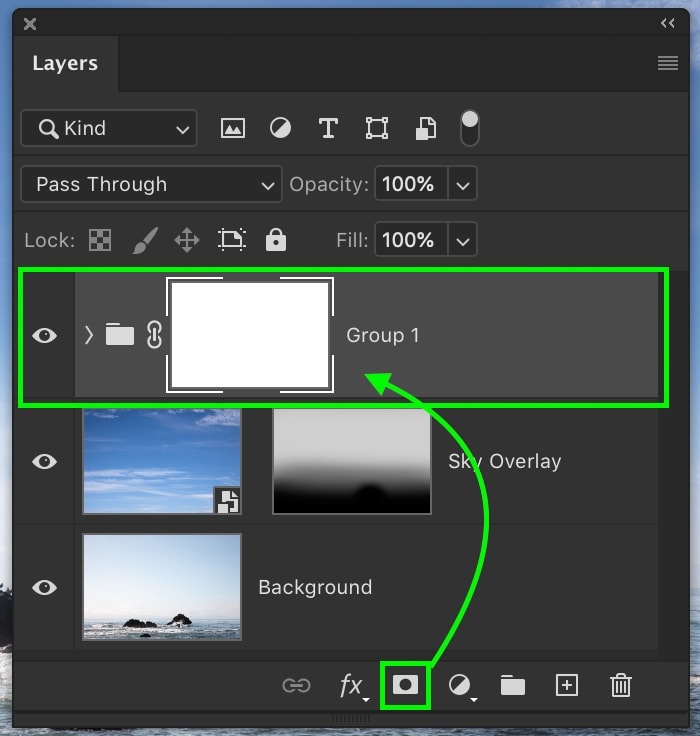
Rather than applying the same layer mask to a handful of layers, you can apply a single layer mask to an entire group.
With your group created, simply highlight the group and click the layer mask icon to create a new mask.
Any of your mask adjustments made here will affect all of the layers within your group at the same time. This is super efficient when you need to mask out the same areas of multiple layers.
How To Create A Layer Mask
To create a white layer mask, just press the layer mask icon and a new mask will be created on your selected layer. This is the method we’ve covered so far in this tutorial but is also the most common way you’ll create a mask.
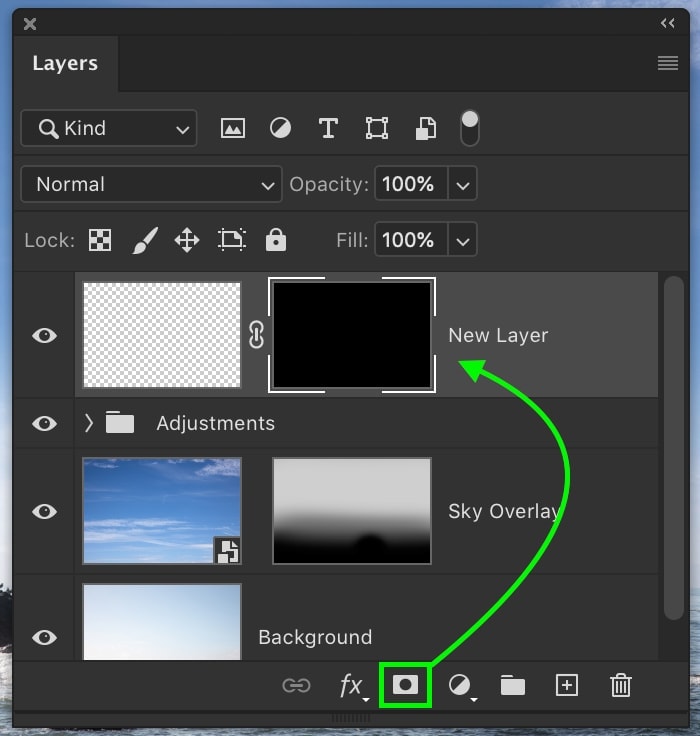
With that said, there may be occasions when the more efficient way to do things is with a black (100% invisible) layer mask. If you know that you only want a very small portion of your layer to be visible, this is ideal.
To create a new black (invisible) layer mask, hold the Alt (PC) or Option (Mac) key while clicking the layer mask icon. This will create a new fully transparent mask that renders your entire layer invisible. From here you can paint white onto this mask to reveal the sections of your layer you want to keep.
You’ll find yourself using both of these methods all the time as you practice with layer masks. At first, it can be easier just to create a regular white layer mask and mask out the sections you don’t want. It’s more straightforward and there’s slightly less to remember. However, once you get more comfortable with layer masks in Photoshop, you’ll get a lot of use out of these inverted layer masks.
How To Paint On A Layer Mask
To paint on a layer mask, all you need to do is select the layer masks and grab your Brush Tool This is the most basic way to adjust a layer mask and all that we’ve covered so far. It’s worth noting that there are a few other ways you can paint on and adjust a layer mask as well.
Before experimenting with the tools below, always make sure that your layer mask is selected. Otherwise, none of this will work.
– Brush Tool
The Brush Tool is one of the easiest and more versatile ways to adjust a layer mask. By adjusting your brush settings, you can create a variety of unique layer mask adjustments.
To edit your Brush Tool, click on the brush settings panel in your settings bar while the Brush Tool is active. Alternatively, when the Brush Tool is selected you can right-click on your canvas to bring up your brush settings.
![]()
By changing the size and hardness of your brush, you can get a variety of different effects on your layer masks. From a hard edge, soft edge, to varied transparency, the sky’s the limit with this tool.
You can even alter the brush tip to get more unique results on your layer mask.
For general use, there is no better layer mask adjuster than the Brush Tool.
– Gradient Tool
If you don’t need to be super specific, the Gradient Tool is a fast way to apply a soft transition to your layer mask. These work exceptionally well when working with adjustment layers. For example, you could brighten a part of your sky with a gradient on a layer mask to add a soft and realistic effect.
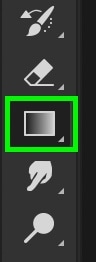
To apply a gradient to a layer mask, first select your Gradient Tool by pressing G or selecting it in your toolbar.
Next, make sure your gradient is set as “foreground to transparent” for the best results.
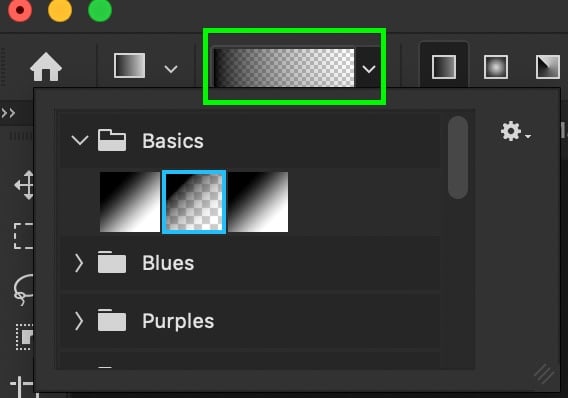
Choose whichever gradient type best suits your needs. For now, I’ll leave my gradient set to linear.

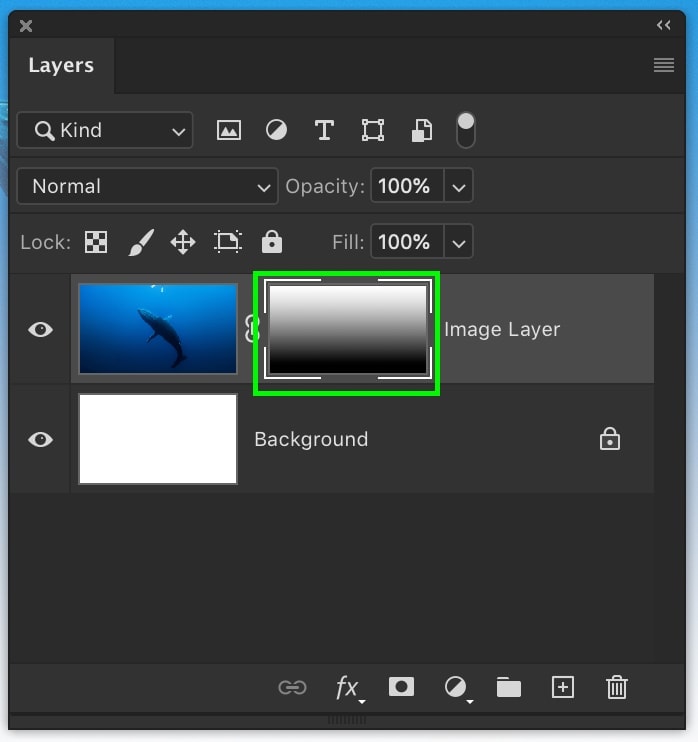
The gradient color will always be based on your active foreground color. Remembering that layer masks work in black and white, so pick one of these colors to adjust your layer mask with. In this example, I’ll select white to apply to my inverted layer mask.
With the layer mask selected, click and drag out on your canvas to create your gradient. The gradient will be applied to your layer mask and add a soft transition to your adjustment.
Gradients aren’t useful if you need to be specific about where your layer mask is visible. However, they’re perfect for hiding harsh edges or blending adjustment layers into an image.
– Applying Selections
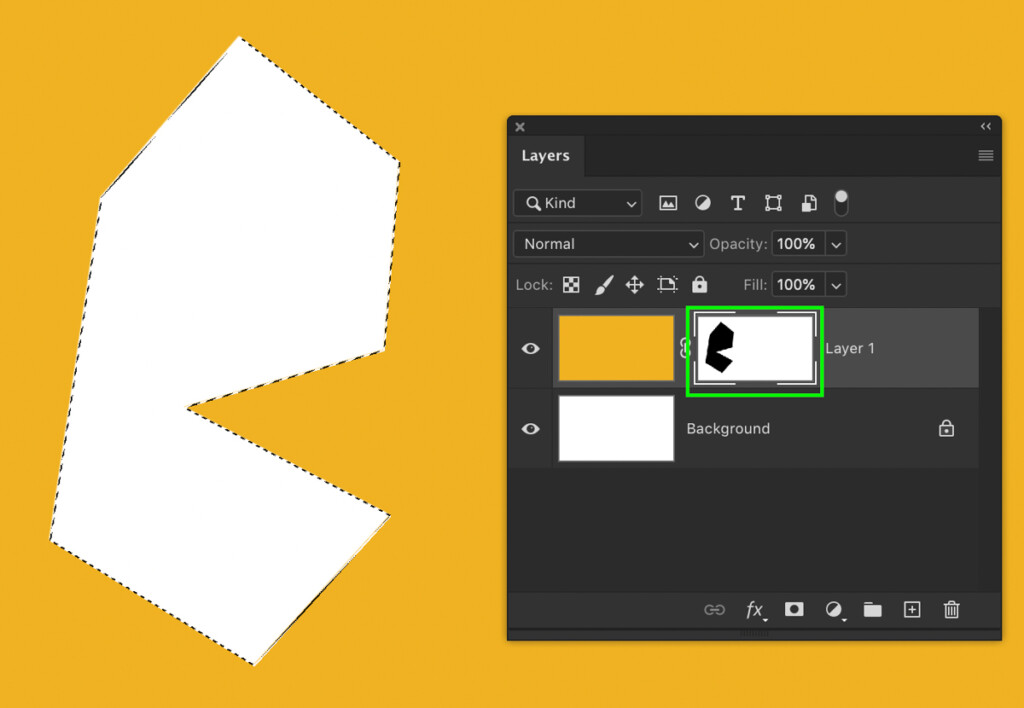
The third way you can paint onto a layer mask is by filling your active selections with color. Although this technique doesn’t require you to “paint” anything at all, it still works as an effective way to edit layer masks.
After using any method to create a selection, all that’s left is to fill your active selection.
First, click on your layer mask to ensure it’s selected. You can make sure of this by noting the white boxes around the mask thumbnail.
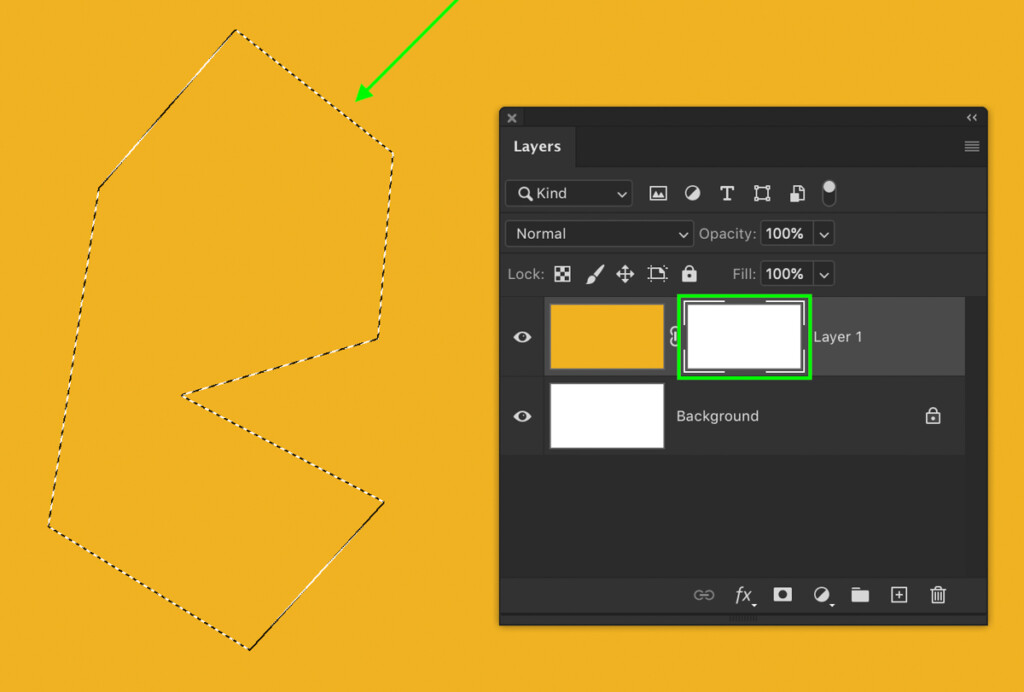
To then hide or reveal the contents of your selection, you need to fill it with white or black. Luckily, when you click on your layer mask your foreground and background colors will automatically switch to black and white. All that’s left is to fill the selection!
To fill your active selection with the foreground color, press Option + Delete (Mac) or Alt + Delete (PC).
To fill the selection with your background color, press Command + Delete (Mac) or Control + Delete (PC).
With this method, you can quickly adjust parts of your layer mask by using a selection. If you need to remove backgrounds or cut out an image, this is incredibly useful to remember!
If you’re new to cutting out images in Photoshop, don’t miss these 5 best tools for the job.
Using A Layer Mask To Remove Backgrounds In Photoshop
At this point, you know how layer masks work, their basic purpose in Photoshop, and why they’re useful. Now let’s walk through a scenario that you’ll find yourself in constantly. Let’s use a layer mask to help remove the background from a photo.
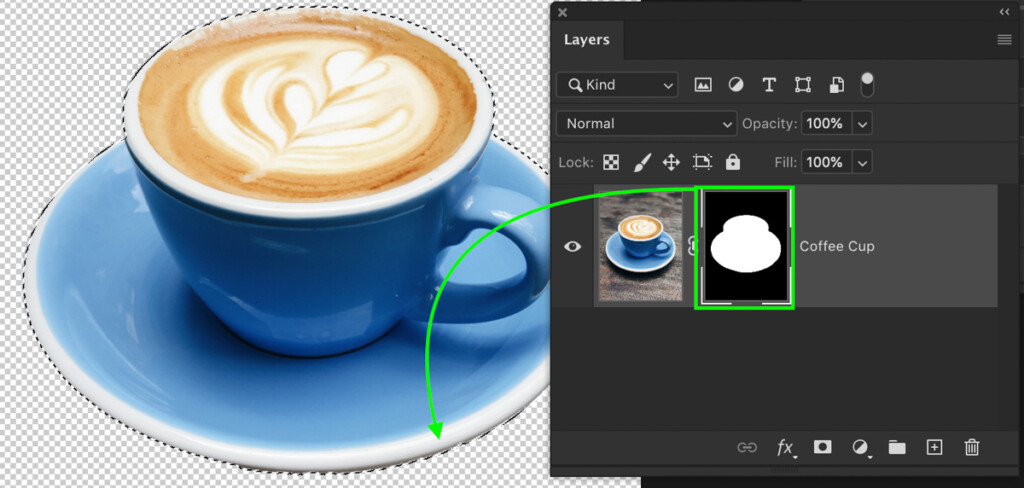
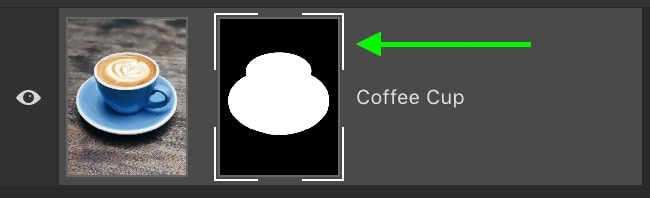
For this example, I want to remove the background behind this coffee cup. After making my initial selection with the Pen Tool (click to learn how), I now am ready to remove the background.
With the selection active, all I need to do is select my coffee cup layer and add a layer mask.
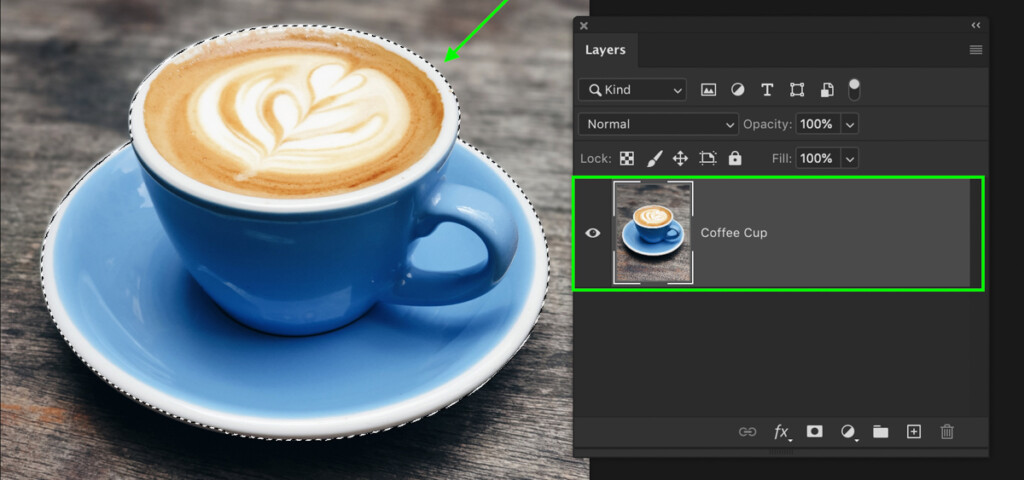
Since there is an active selection, Photoshop will apply this directly onto the new layer mask. Rather than having to manually paint on the mask or fill the selection, this significantly streamlines the process.

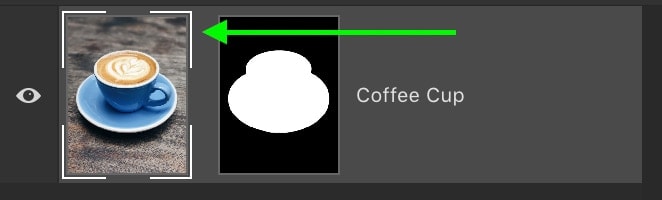
Now the selection is applied, you can adjust or add to the layer mask as needed with the Brush or Gradient Tools. Using a mask to remove backgrounds is the best way to do things non-destructively. Even if you don’t think you’ll need to make adjustments, it’s great to have the option later on. That’s what’s so great about using layer masks with selections!
10 Layer Mask Shortcuts And Additional Tips
To make layer masks even easier, try some of these handy keyboard shortcuts to streamline the process!
1. Create New Layer Mask Shortcut
There isn’t any built-in shortcut to create a new layer mask in Photoshop. However, you can create your own!
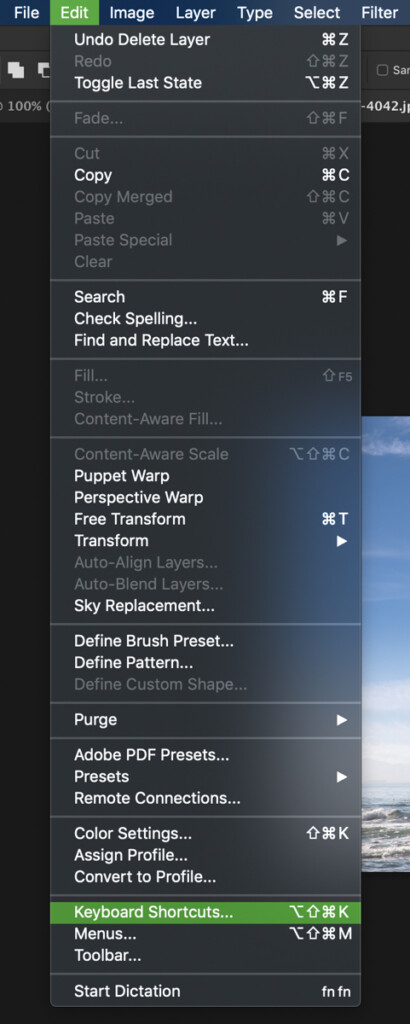
To do this, first, go up to Edit > Keyboard Shortcuts.
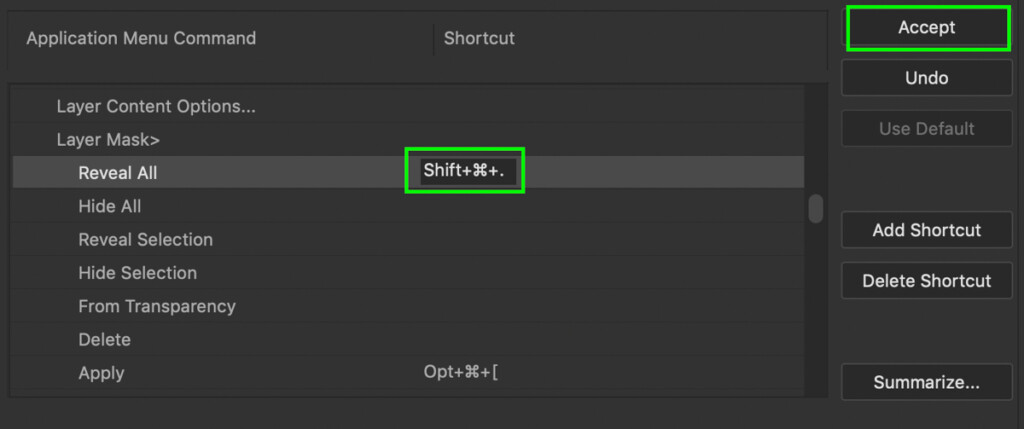
Scroll through the options and click the tabs Layer > Layer Mask > Reveal All.

Since “reveal all” is the action you want to make a shortcut for, make sure it’s selected and type in your desired keyboard shortcut. If the shortcut you use is already taken, an error will appear. I don’t recommend overriding preset shortcuts unless you’re absolutely certain.
If you’re not sure which shortcut to use, you can copy my keyboard shortcut of Command + Shift + . (Mac) or Control + Shift + . (PC).
Now you can create a new layer mask with this keyboard shortcut instead of clicking the mask icon!
2. Invert Layer Mask
When you already have an idea of what you want to mask out, sometimes the most effective way to start is with a black (transparent) layer mask.
To create invert a new layer mask, hold Alt or Option (PC/Mac) and click on your layer mask icon. This will create a new black layer mask.
Alternatively, you can invert a layer mask you’re already using by clicking on the layer mask and pressing Command + I (Mac) or Control + I (PC).
Be sure to check out this post about inverting layer masks to learn more about why and when this is useful.
3. Disable/Enable Layer Masks
Especially when you’re cutting out an image, you might want to see what the layer looked like before the mask. You can easily disable or enable a layer mask by holding Shift and clicking on your layer mask.
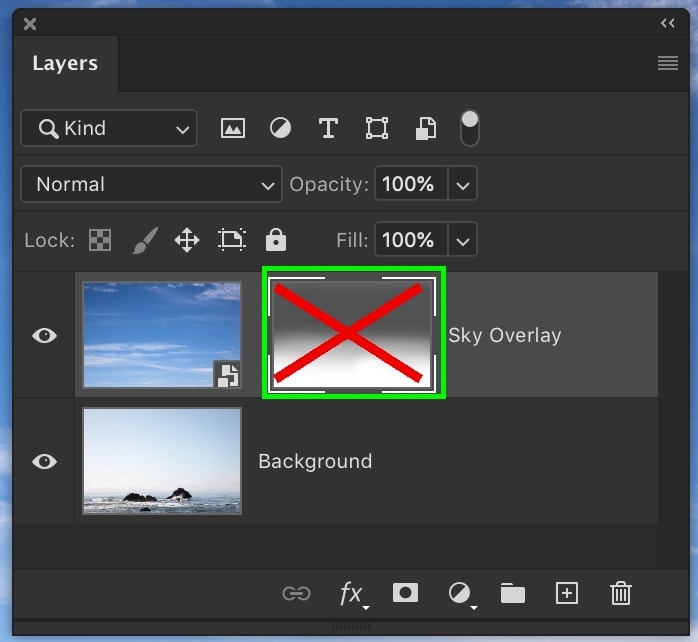
When your layer mask is disabled, a large red X will appear over the mask. This means it’s not active. To reactivate the mask, hold Shift, and click on your mask once again.
4. View Layer Mask
By holding Alt or Option (PC/Mac) and clicking on your layer mask, you’ll see your layer mask displayed on your canvas. This way you can more easily adjust your layer mask and see what areas are being affected.

In scenarios that you’re using a very specific layer mask, being able to see what your layer mask is affecting can be useful. Especially when using a selection method such as channels, you may need to manually adjust your layer mask to suit the selection. By viewing your layer mask directly this is much easier.
5. Deleting Layer Mask
To delete a layer mask, all you need to do is right-click on the mask and choose “Delete Layer Mask.” This will get rid of your layer mask completely while leaving your layer unaffected.

Alternatively, you can delete your mask from the properties panel. With your layer mask selected, open the properties panel, click the layer mask icon, then the trash can at the bottom of the panel.
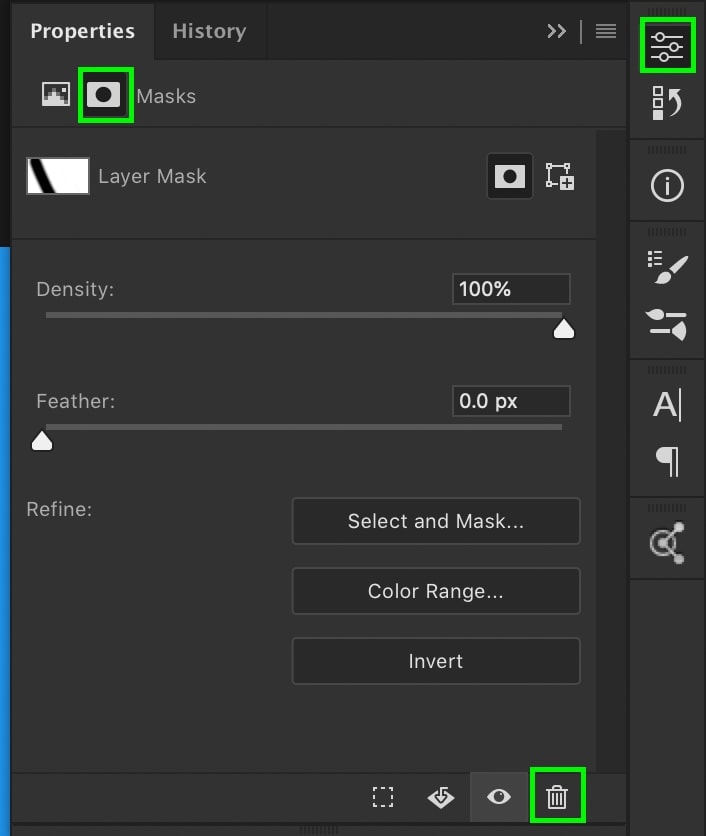
If you’re already working in the properties panel this might serve as a more efficient option.
6. Duplicate Layer Masks
Rather than trying to make the same mask for multiple layers, you can duplicate any mask with one simple click. Just hold Alt or Option (PC/Mac) and click and drag your layer mask from one layer to another.
Now you’ll have an exact copy of your initial layer mask on the new layer!
You can learn more about the different ways to move and copy layer masks in this post.
7. Turn Layer Masks Into Selections
When you use a mask to cut out an image, you might need to reactivate your initial selection. By holding Command (Mac) or Control (PC) and clicking on your layer mask, Photoshop will turn the white areas of the layer mask into a selection.
For things like removing objects or getting more specific with an adjustment layer, this will come in handy!
8. Unlink Layer Masks
To move your layer and layer mask independently you’ll need to unlink them. By clicking the chain icon between your layer and layer mask thumbnails, you disconnect the two.
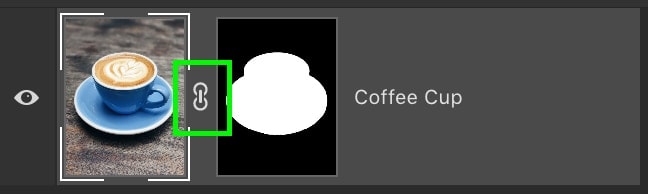
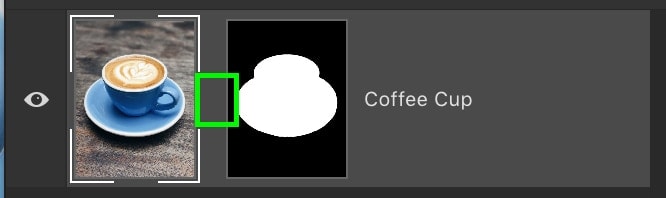
To move either your layer or layer mask, you’ll need to use your Move Tool (V). After clicking on one of them, you can then move one or the other and reposition accordingly.
9. Target Layer Mask
While working with layer masks you’ll have to deal with a lot of clicking back and forth between your layer and the mask. To streamline the process, you can use the keyboard shortcut Command + \ (Mac) or Control + \ (PC) to toggle from your regular layer to the layer mask.
To toggle back from your mask to the regular layer, press Command + 2 (Mac) or Control + 2 (PC).
10. Quick Mask
If you’re ever unsure about where your layer mask is affecting, you can bring up a quick mask to preview the affected area. With your desired layer selected, press \ to toggle the quick mask.

The quick mask will turn the area around your selection into a slightly transparent red to help see where your mask is visible.
Learning how to use layer masks in Photoshop are a crucial part of learning how to edit photos non-destructively. With masks, any change you make is easily reversible. Since you’re only hiding sections of a layer, all the information is still there to work with.
At the most basic level, layer masks just consist of white (100% visible) and black (100% transparent). By remembering this, all you need is to practice using layer masks for yourself to fully understand their values. Now it’s time to hop into Photoshop and get working!
Happy Editing,
Brendan 🙂