Tóm Tắt
Delete database Laravel (Xóa dữ liệu trên database)
Trình duyệt của bạn không tương hỗ nghe audio .
Bài học này sẽ giúp các bạn tạo view để tiến hành xóa một dữ liệu không mong muốn. Nói chung là xóa dữ liệu một cách trực quan luôn. Bài này có sử dụng các file và kết quả từ bài trước, nếu chưa có các bạn vui lòng quay lại bài Tạo view Insert database Laravel. Bài này có sử dụng các view, controller từ bài trước nên nếu chưa tạo các bạn back lại tạo theo hướng dẫn nha.
Xác định mục đích
Trong bài trước khi truy cập vào http://localhost:8000/admin/news chúng ta view được bảng dữ liệu như sau
Bạn đang đọc: Delete database Laravel (Xóa dữ liệu trên database)

Mục tiêu của tất cả chúng ta giờ đây là nhấn vào nút Delete của ID nào thì sẽ xóa dữ liệu của ID đó đi
Công tác chuẩn bị
Việc tất cả chúng ta cần làm là nhận diện tài liệu cần xóa trải qua id, sau đó thực thi giải quyết và xử lý xóa dữ liệu, muốn vậy tất cả chúng ta cần
- Thêm liên kết sao cho click vào sẽ gửi id tới trang xử lý xóa dữ liệu.
- Viết Controller điều khiển việc xóa dữ liệu.
- Cuối cùng là tạo một Route điều hướng dữ liệu từ Controller sang view.
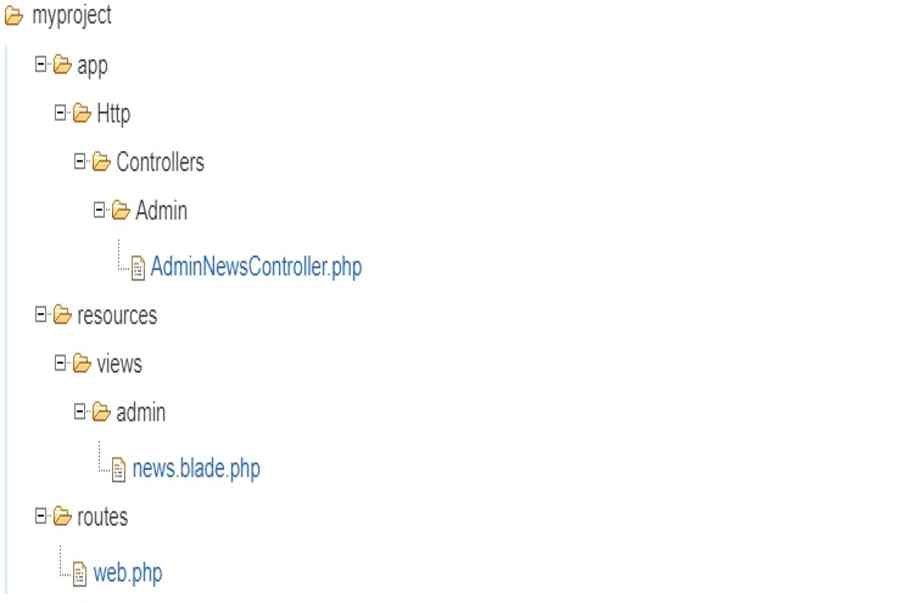
Các file giải quyết và xử lý sẽ thuộc cấu trúc sau :
Thêm liên kết xóa dữ liệu cho /resources/views/admin/news.blade.php
Trong bài trước tất cả chúng ta đã tạo sẵn được trang xem tài liệu giờ đây tất cả chúng ta chỉ cần thêm link để xóa dữ liệu vào trang là đã có trang xóa dữ liệu trực quan .Chúng ta cần truyền ID vào link để nhận dạng tài liệu cần xóa, link này ta viết dạng form submit tài liệu, action điều hướng tới Controller giải quyết và xử lý tài liệu, phương pháp được sử dụng là DELETE, ta viết như sau :
{{ $pageName }}
| ID | Title | Tools | |
|---|---|---|---|
| {{$row->id}} | { |
{$row->id}}”>{{$row->title}}
{$row->id}}”>Edit
{$row->id}}” onsubmit=”return ConfirmDelete( this )”>
@method(‘DELETE’)
@csrf
@endforeach
Trong đó :
- /admin/news/delete/{{$row->id}}: khi nhấn submit, dữ liệu sẽ được gửi tới /admin/news/delete với id tương ứng.
- onsubmit=”return ConfirmDelete( this )”: khai báo javascript trả về hàm ConfirmDelete để xuất thông báo thành công hoặc lỗi.
- @method(‘DELETE’): gọi form với phương thức delete.
- @csrf: tạo một chuỗi CSRF ngẫu nhiên, thuộc tính cần được sử dụng thường cho form.
Chạy lại đường dẫn http://localhost:8000/admin/news trên trình duyệt, ta sẽ nhận được hiệu quả sau :
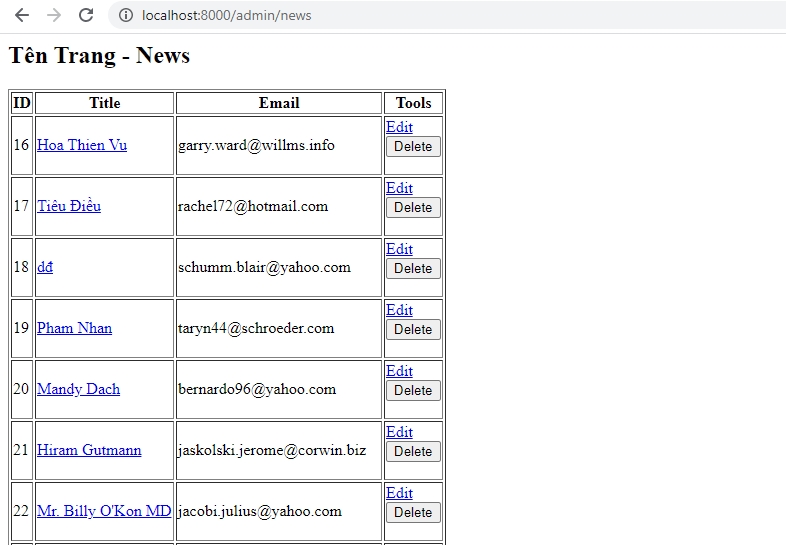
Thiết lập để xóa dữ liệu trong database Laravel
Thêm nội dung Controller
Bây giờ tất cả chúng ta cần thêm nội dung cho function destroy ( USD id ) của Controller AdminNewsController để xóa dữ liệu theo IDLúc này AdminNewsController có dạng
{
/**
* Display a listing of the resource.
*
* @return \Illuminate\Http\Response
*/
public function index()
{
$news = DB::table(‘news’)->select(‘*’);
$news = $news->get();
$pageName = ‘Tên Trang – News’;
return view(‘/admin/news’, compact(‘news’, ‘pageName’));
}
/**
* Show the form for creating a new resource.
*
* @return \Illuminate\Http\Response
*/
public function create()
{
return view(‘/admin/news_create’);
}
/**
* Store a newly created resource in storage.
*
* @param \Illuminate\Http\Request $request
* @return \Illuminate\Http\Response
*/
public function store(Request $request)
{
$news = new News;
$news->title = $request->title;
$news->email = $request->email;
$news->description = $request->description;
$news->save();
action([AdminNewsController::class, ‘create’]);
return Redirect::action([AdminNewsController::class, ‘create’]);
}
/**
* Display the specified resource.
*
* @param int $id
* @return \Illuminate\Http\Response
*/
public function show($id)
{
$news = News::where(‘id’, ‘=’, $id)->select(‘*’)->first();
$des = html_entity_decode($news->description);
return view(‘/admin/news_detail’, compact(‘news’, ‘des’));
}
/**
* Show the form for editing the specified resource.
*
* @param int $id
* @return \Illuminate\Http\Response
*/
public function edit($id)
{
$news = News::findOrFail($id);
$pageName = ‘News – Update’;
return view(‘/admin/news_update’, compact(‘news’, ‘pageName’));
}
/**
* Update the specified resource in storage.
*
* @param \Illuminate\Http\Request $request
* @param int $id
* @return \Illuminate\Http\Response
*/
public function update(Request $request, $id)
{
$news = News::find($id);
$news->title = $request->title;
$news->email = $request->email;
$news->description = $request->description;
$news->save();
action([AdminNewsController::class, ‘index’]);
return Redirect::action([AdminNewsController::class, ‘index’]);
}
/**
* Remove the specified resource from storage.
*
* @param int $id
* @return \Illuminate\Http\Response
*/
public function destroy($id)
{
USD news = News :: find ( $ id ) ; USD news -> delete ( ) ; action ( [ AdminNewsController :: class, ‘ index ‘ ] ) ; return Redirect :: action ( [ AdminNewsController :: class, ‘ index ‘ ] ) ;
}
}
Thêm nội dung Route
Ta thêm vào Route / routes / web.php nội dung sau :
Route::DELETE('/admin/news/delete/{id}', [AdminNewsController::class,'destroy']);
Thực hiện xóa dữ liệu
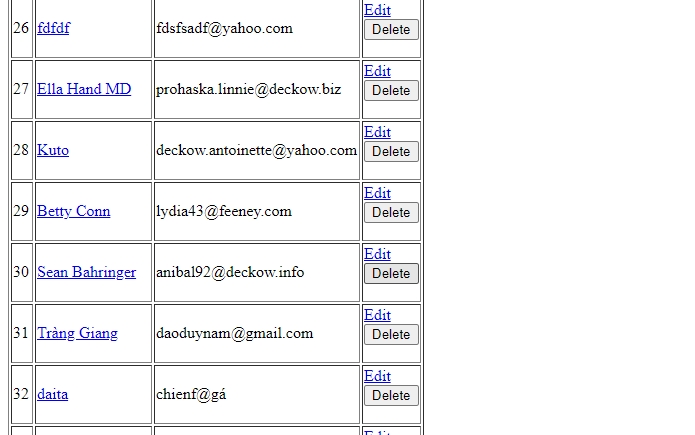
Chúng ta truy vấn lại trang http://localhost:8000/admin/news sau đó nhấn thử Delete để xóa dữ liệu của ID bất kể. Ví dụ ở đây chúng tôi xóa ID 30
Xem thêm: Ép kiểu trong Java | How Kteam
Kết quả thành công xuất sắc ID 30 đã không còn

Lời kết:
Xóa dữ liệu trong database Laravel thực tế không khó như việc chèn hay update dữ liệu. Đơn giản chúng ta chỉ cần lấy được ID cần xóa sau đó sử dụng controller để xóa là được. Có đoạn nào chưa hiểu các bạn hãy comment bên dưới nhé. Chúc các bạn học tốt!
Source: https://final-blade.com
Category: Kiến thức Internet