Borders are an important element in web design. They can be used to separate or draw attention to content on a web page, making it easier for people to understand and take action on your site.


For example, the audiovisual content studio Ende uses a border and box-shadow effect to emphasize the CTA button encouraging visitors to check out their reel.

To ensure you can effectively use this element in your website design, we’re going to cover everything you need to know about the CSS border properties, including:
Tóm Tắt
CSS Border Style
The CSS border-style property specifies what type of border to display. There are ten possible values you can use to set the border-style property. Let’s take a quick look at them below.
- None
: specifies no border
- Solid: specifies a solid border
- Dashed: specifies a dashed border
- Dotted: specifies a dotted border
- Double: specifies a double border
- Groove: specifies a 3D grooved border
- Ridge: specifies a 3D ridged border
- Inset: specifies a 3D inset border, which makes the element appear embedded
- Outset : specifies a 3D outset border, which makes the element appear embossed
- Hidden: specifies a hidden border
The effect of the groove, ridge, inset, and outset values depends on the value set for the border-color property. If no border-color value is given, then black is the default.
The border-style property can have between one and four values. If only one value is defined, then it applies to all sides of the element. If two values are defined, then the first value represents the top and bottom borders and the second represents the right and left borders. If three values are defined, the first value represents the top border, the second represents the left and right, and the fourth represents the bottom border. If four values are defined, they represent the top, right, bottom, and left, respectively.
Let’s take a look at examples of all these values below.
See the Pen zYZyMmx by Christina Perricone (@hubspot) on CodePen.
CSS Border Width
The CSS border-width property specifies the width of the border. You can set this property using keyword values or length values. Let’s take a quick look at them below.
- Keyword values: thin, medium, thick
- Length values: px, pt, em, rem, vh, and more
Like the border-style property, the border-width property can have between one and four values. If only one value is defined, then it applies to all sides of the element. If two values are defined, then the first value represents the top and bottom border widths and the second represents the right and left border widths. If three values are defined, the first value represents the top border width, the second represents the left and right, and the fourth represents the bottom width. If four values are defined, they represent the top, right, bottom, and left, respectively.
Let’s take a look at examples defined by different border-width values below.
See the Pen CSS Border Width by Christina Perricone (@hubspot) on CodePen.
CSS Border Color
The CSS border-color property specifies the color of the border. You can set this property using color names, hex color codes, RGB or RGBA values, and HSL or HSLA values.
Like the border-style and border-width properties, the border-color property can have between one and four values. If only one value is defined, then it applies to all sides of the element. If two values are defined, then the first value represents the top and bottom border colors and the second represents the right and left border colors. If three values are defined, the first value represents the top border color, the second represents the left and right, and the fourth represents the bottom color. If four values are defined, they represent the top, right, bottom, and left, respectively.
Let’s take a look at examples defined by different border-color values below.
See the Pen CSS Border Color by Christina Perricone (@hubspot) on CodePen.
CSS Border Shorthand
CSS shorthand is a group of CSS properties that allow values of multiple properties to be set simultaneously. These values are separated by spaces.
The border property, for example, is shorthand for the individual border properties above: border-width, border-style, and border-color.
So I could write the following declarations in longhand:
border-width: 5px;
border-style: solid;
border-color: #00A4BD;
Or in one declaration using the shorthand border property:
border: 5px solid #00A4BD;
While this shorthand property can save you time and make your code look cleaner, it does introduce room for error. Let’s take a look at a common issue you may run into when using this shorthand property.
CSS Border Not Showing
If you’ve set the shorthand border property in CSS and the border is not showing, the most likely issue is that you did not define the border style. While the border-width and border-color property values can be omitted, the border-style property must be defined. Otherwise, it will not render.
If values for the border-width and border-color properties are omitted, the border line will be rendered as black and about 3px wide by default.
Here’s an example of a border that shows because it’s been coded correctly, and a border that doesn’t show because it’s been coded incorrectly.
See the Pen CSS Border Not Showing by Christina Perricone (@hubspot) on CodePen.
CSS Border Padding
The CSS padding property creates space between an element’s content and an element’s border. If the padding property is not defined, then there is no space between its content and its border.
To add space, you can set the padding property using length or percentage values. Values must be positive. Negative values will not render.
Like the properties above, the padding property can have between one and four values. If only one value is defined, then it applies to all sides of the element. If two values are defined, then the first value represents the top and bottom padding and the second represents the right and left padding. If three values are defined, the first value represents the top padding, the second represents the left and right, and the fourth represents the bottom padding. If four values are defined, they represent the top, right, bottom, and left, respectively.
Let’s take a look at examples defined by different padding values below.
See the Pen jOBXXRW by Christina Perricone (@hubspot) on CodePen.
CSS Border Shadow
The CSS box-shadow property can be used in combination with the border property to create a shadow effect. There are two required values to set the border-style property: the h-offset and the v-offset. Let’s define these below:
- h-offset: This value sets the horizontal offset of the shadow. A positive value sets the shadow on the right side of the box, a negative value sets the shadow on the left side.
- v-offset: This value sets the vertical offset of the shadow. A positive value sets the shadow below the box, a negative value sets the shadow above.
There are four optional values that you can add after the h- and v-offset values to affect the box-shadow. Let’s take a quick look at them below.
- Blur: Include a third value to add a blurred effect. The higher the number, the more blurred the shadow will be.
- Spread: Include a fourth value to define the spread of the shadow. A positive value increases the size of the shadow, a negative value decreases it.
- Color: Include a color name, hex code, or other color value to define the color of the shadow. If no color value is included, the shadow color is the text color.
- Inset: Include the inset keyword to set the shadow inside the box.
You can also define multiple shadows. Simply separate the set of required and optional values by commas. Make sure to increase the h- and v-offset values of the cascading shadows so you can actually see them.
Let’s take a look at examples defined by different border-shadow values below.
See the Pen CSS Border Shadow by Christina Perricone (@hubspot) on CodePen.
CSS Image Border
The CSS border-image property allows you to set an image as a border instead of a border line.
The property is shorthand for the border-image-source, border-image-slice, border-image-width, border-image-outset and border-image-repeat properties. Only three are required to be defined when using the shorthand property. These are:
- border-image-source: specifies the image URL or file path
- border-image-slice: specifies how to slice the image
- border-image-repeat: specifies whether the border image should be stretched, repeated, or rounded
For an image border to render, the border property must be defined as well.
Let’s take a look at examples defined by different border-image values below.
See the Pen CSS Image Border by Christina Perricone (@hubspot) on CodePen.
CSS Border Gradient
You can also use the CSS border-image property to set a CSS gradient as a border. To create the border gradient, set the border-image property to “linear-gradient” or “repeating-linear-gradient.” Then, in parentheses, add as many color stops as you want. You can use any combination of HTML color names, hex color codes, RGB color codes, and HSL color values. Then add a value to define the border-image-slice property.
For the gradient border to render, the border property must be defined as well.
Let’s take a look at some examples:
See the Pen CSS Border Gradient by Christina Perricone (@hubspot) on CodePen.
You can learn more about creating CSS color gradients in How to Add & Change Background Color in HTML.
Rounded Border in CSS
The CSS border-radius property can be used to round the edges of a border. You can set this property using length values. The higher the value, the rounder the edges.
Like the border-style, border-width, border-color, and padding properties, the border-radius property can have between one and four values. If only one value is defined, then it applies to all sides of the element. If two values are defined, then the first value represents the top and bottom border edges and the second represents the right and left border edges. If three values are defined, the first value represents the top border edge, the second represents the left and right, and the fourth represents the bottom edge. If four values are defined, they represent the top, right, bottom, and left, respectively.
Let’s take a look at examples defined by different border-radius values below.
See the Pen Rounded Border in CSS by Christina Perricone (@hubspot) on CodePen.
To learn how else you can use this property in your website designs, check out How to Draw a Circle Using the CSS Border Radius Property.
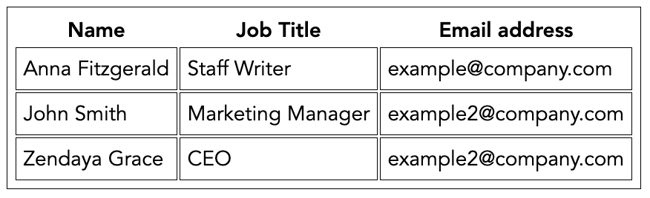
CSS Border Collapse
If you are creating a table in HTML and the table element as well as the table row and cell elements have a defined border, then you can keep the borders separate. Or, you can collapse them using the CSS border-collapse property.
Here’s how a simple table element would look like with the border-collapse property set to “separate.” Please note that since the default value of this property is separate, you can leave it out of your CSS.
Here’s how that example would look if the border-collapse property were set to “collapse” instead.
See the Pen CSS Border Collapse by Christina Perricone (@hubspot) on CodePen.
It’s important to note that if the border-collapse property is set to “collapse,” then the border-radius property won’t render. You’ll need the border-collapse property to be set to “separate” to use the border-radius property.
Adding Borders Around Elements in Your Website Design
Borders can help make content easier to understand and more eye-catching on your website. The best part is how easy it is to create and style borders thanks to the CSS border properties. With a basic understanding of HTML and CSS, you can add this design element to your web pages quickly and easily.