‘Preparing Automatic Repair’ loop, preceded by a blue or black error screen, is a common startup error in Windows. This error happens when your PC cannot boot properly due to missing boot files or a corrupt registry.
The usual solution for booting errors is to use the Startup Repair tool. But what if the Repair tool itself is the problem? The fastest way to fix this endless repair loop is to troubleshoot for errors in safe mode or use a System Restore Point.
You can find detailed instructions to use System Restore, Safe Mode, and more solutions in our guide below.
What Causes Windows 10 to Be Stuck on Preparing Automatic Repair Loop?
The main reason why most people get stuck in the automatic repair loop is because of corrupt system files. Booting errors like this are mostly caused by missing or faulty files in the boot sector or registry. Some other common causes include:
- Corrupt Boot Configuration Data (BCD)
- Wrong values in the Windows Registry
- Antivirus software or Early Launch Anti-Malware (ELAM) malfunction
- Unstable system update
- Malware
- Hardware failure (mostly driver-related but can be caused by physical components in rare cases)
How to Fix if Windows 10 Is Stuck on Preparing Automatic Repair Loop?
The best-case scenario is if you have a System Image Recovery file or Windows Restore point. You can easily fix the Automatic Repair Loop by restoring your system to an earlier point with either of these.
If you don’t have a system backup, you can boot in UEFI with CSM (Compatibility Support Module) mode. You’ll typically use the Del/F10/F11/F12 keys depending on your chipset manufacturer.
You’ll need to access the Windows Recovery Environment (winRE) to try System Restore and the other solutions. If your PC loads to it by default, that’s great. If not, you’ll need to manually boot by power cycling 3 times.
- Turn your PC/Laptop on by pressing the power button.
- Turn off your device as soon as you notice the monitor or CPU power up. Press the power button for roughly 10 seconds to do this properly.
- Repeat this two more times for a total of three power cycles.
- Turn your device on and it will bypass the automatic repair loop and load to winRE directly.

You can also troubleshoot using Safe Mode, System Repair, and other methods from winRE. Please read the step-by-step instructions for these methods below.
Use System Image Recovery or Windows Restore
A system restore point saves OS files, Windows registry, settings, drivers, and similar important information as a backup. This doesn’t affect personal files.
If you’ve created a System Restore point before, you can easily break the endless repair loop by reverting your system configuration to a point before the error started. To use system restore,
- Boot into Windows Recovery Environment (winRE). If your computer doesn’t automatically do this, follow the instructions from the section above this to power cycle.
- From the Choose an option page, open Troubleshoot.

- Next, open the Advanced Options section.

- Click on System Restore from the top left and follow the instructions on-screen.
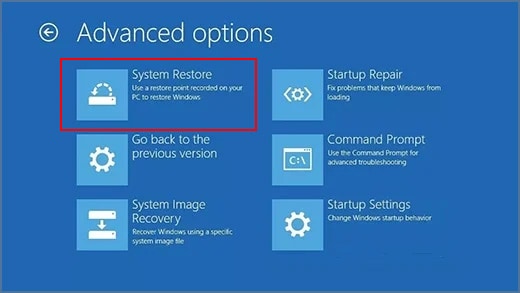
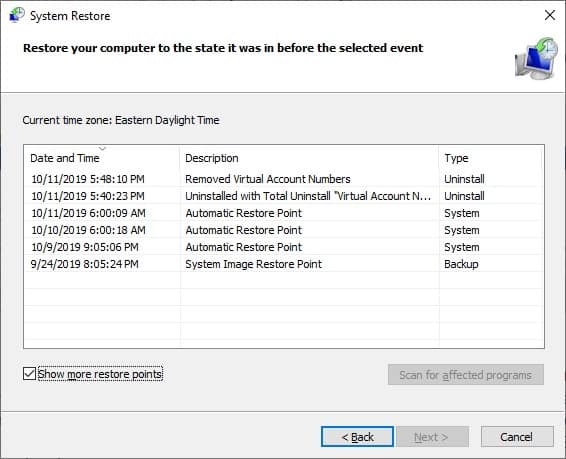
- Pick the latest system restore point or whichever one you prefer. Press Next and follow the instructions on-screen to complete the process.
A system recovery image file is an extensive backup of your hard drive. It’s important to understand that restoring Windows using a system image will change everything on your hard drive to the way they were when the image was created.
It means both system and personal files (apps, photos, documents, games, anything!) will revert to the backup state. To recover using a system image, here are some steps you can follow.
- Open winRE using the same steps as above.
- Navigate to Troubleshoot > Advanced Options > System Image Recovery.
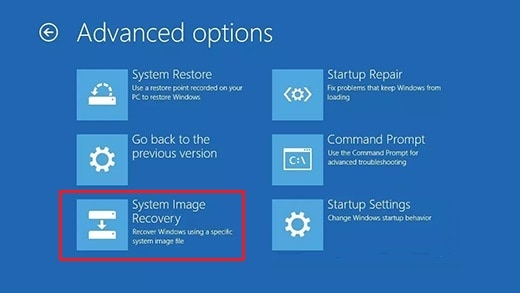
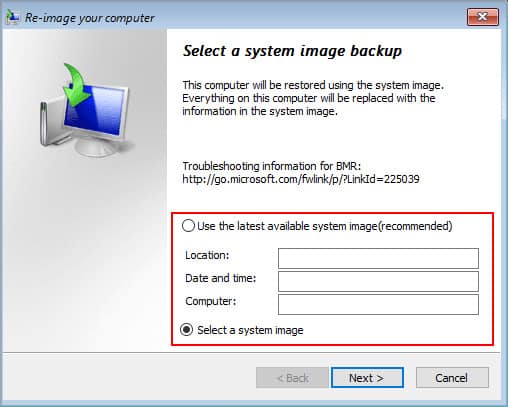
- Pick the preferred system recovery image and follow the on-screen instructions to complete the process.
Boot Into Safe Mode
Safe Mode is an alternate boot mode used to diagnose and fix problems in Windows OS by loading only the core essentials. When your PC powers up, press F8 to access Advanced Boot Options. You can press F4 to boot into Safe Mode, F5 for Safe Mode with Networking, and F6 for Safe Mode with Command Prompt.
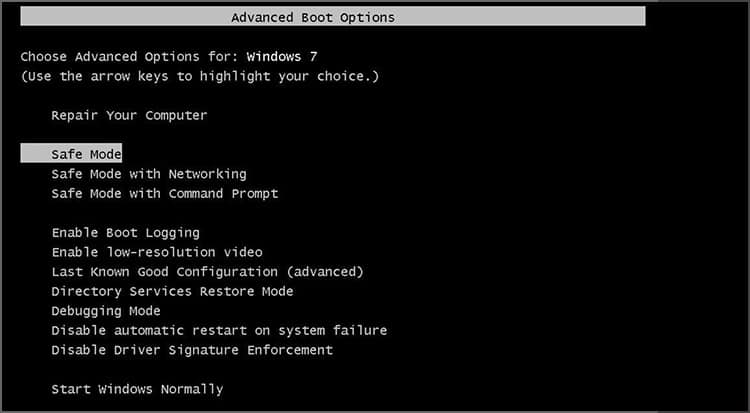
The second way to boot into safe mode is through winRE.
- Navigate to Troubleshoot > Advanced Options > Startup Settings.
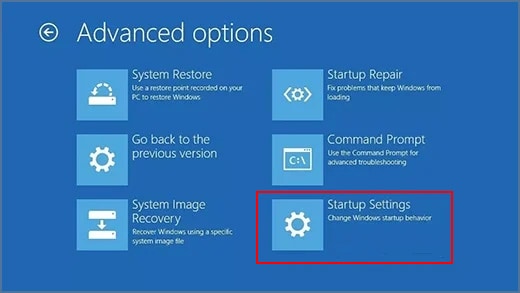
- Select Safe Mode by pressing 4 or F4.
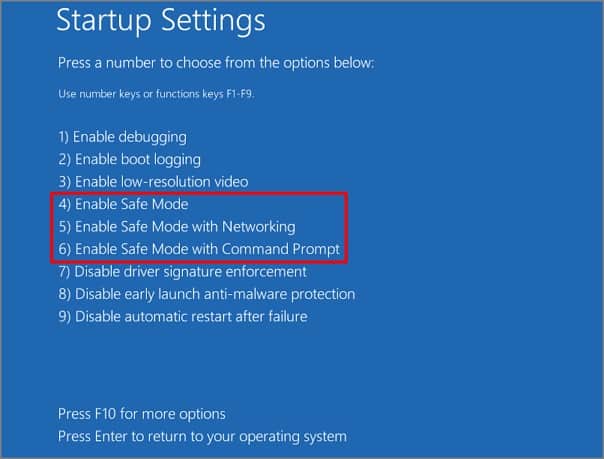
- Select Safe Mode with Networking with 5 or F5 instead if you need an internet connection.
- Press Restart to boot into safe mode.
- Check for error messages, viruses, and outdated drivers. Remove any recently installed applications that you think maybe the cause of the problem.
Disable Startup Repair using CMD
If you want to manually use Startup Repair, it’s best to use a different PC to create a bootable USB drive if possible. Plugin the device and navigate to Troubleshoot > Advanced Options > Startup Repair in winRE.
But since automatic repair isn’t working, doing it manually is unlikely to change much. So, we instead recommend you disable startup repair and try out the other solutions. To do so,
- Navigate to Troubleshoot > Advanced Options > Command Prompt.
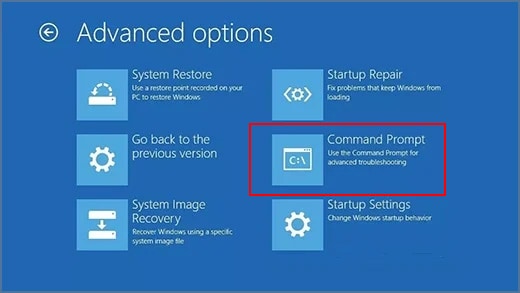
- Type ‘bcdedit’ and note the value for identifier. In the next step, you must replace {current} with the value shown if it is different.
- Type the shown text and press Enter:
bcdedit /set {current} recoveryenabled no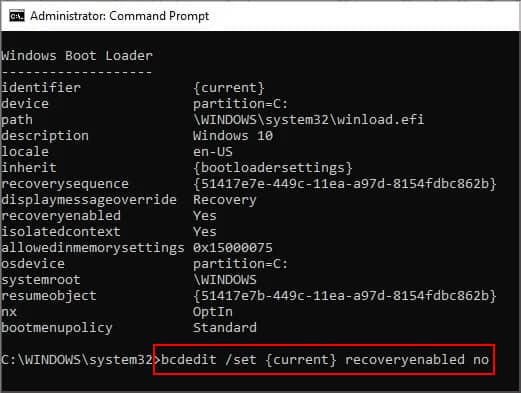
- Restart your PC. If you’re still stuck in the loop, move on to the other steps below.
Restore the Windows Registry
Windows Registry stores the system configuration, settings, and other information for the OS and certain applications. A corrupt registry is a common cause of many application and system errors. Fixing the registry is very straightforward. You essentially perform a factory reset on the database and revert everything to default.
Windows used to have an automatic registry backup feature. This meant you could pick a recent backup to revert to, a lot like system restore. But unfortunately, this service was discontinued starting with Windows 10 Version 1803. To perform a clean restore,
- Navigate to Troubleshoot > Advanced options > Command Prompt in winRE.

- Type the following command and press Enter. Remember to change ‘C’ to the drive your OS is installed on if different.
C:\>xcopy C:\Windows\System32\config\regbackC:\Windows\System32\config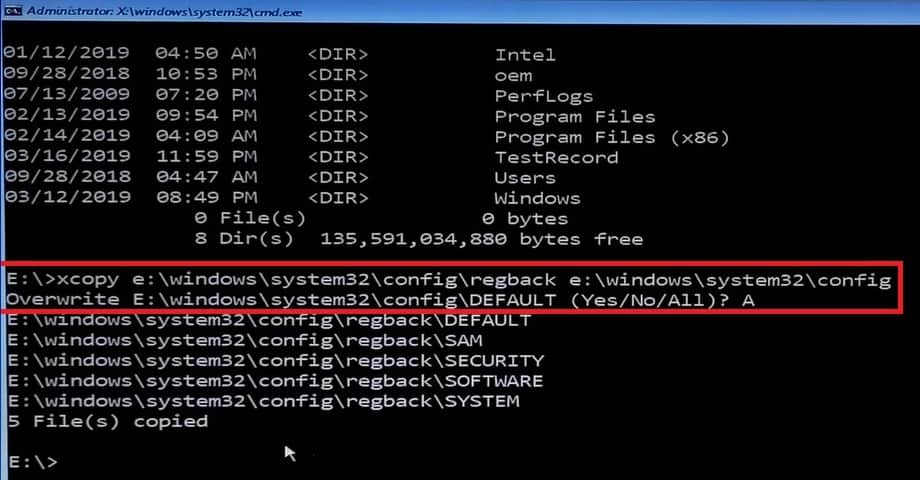
- Type A and press enter to reset all registries at once.
- Type exit and press enter.
- Restart your computer and check if the registry reset fixed the issue.
Run CHKDSK and Repair Corrupt System Files
Check Disk is a commonly used utility tool for diagnosing and fixing file system errors in Windows. The Sfc /scannow command is also used to scan and repair corrupt system files. To use them,
- Navigate to Troubleshoot > Advanced options > Command Prompt in winRE.
- Type the following command and press Enter:
chkdsk C: /f /r /x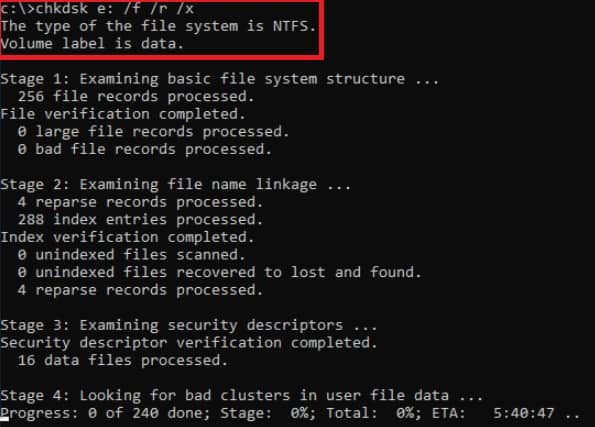
- Type the following command and press Enter:
sfc /scannow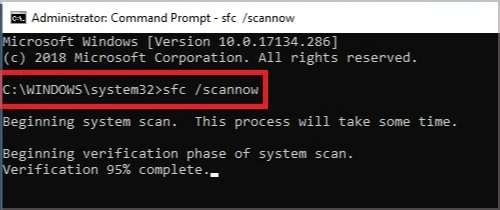
- Type exit and press enter.
- Restart the PC and see if you’re still stuck in the automatic loop.
Rebuild Boot Configuration Data (BCD)
Boot Configuration Data (BCD) manages boot priority and stores important configuration data for the Windows Boot Loader. Corrupt boot sector or missing boot files often causes startup and OS-related errors. The process to repair the BCD is very simple.
- Navigate to Troubleshoot > Advanced options > Command Prompt in winRE.
- Type the following commands and press Enter after each one.
bootrec /fixbootbootrec /scanosbootrec /rebuildbcd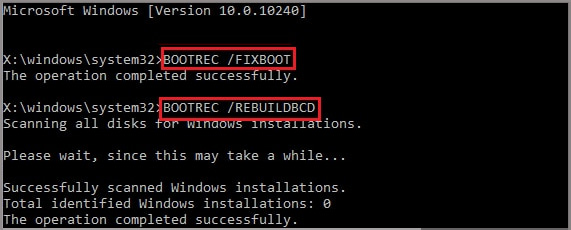
- Type exit and press Enter.
- Restart your PC.
Disable Early Launch Anti-Malware (ELAM) Protection
The Early Launch Anti-Malware feature starts up Anti-Malware drivers before any other drivers at boot. As the name suggests, ELAM scans other drivers for malicious programs such as Rootkit.
ELAM can sometimes malfunction and identify a properly working/critical driver as malicious or unessential. In such cases, you can disable ELAM via startup settings or Command Prompt.
To disable it via Startup Settings,
- Navigate to Troubleshoot > Advanced options > Startup Settings in winRE.

- Press 8 or F8 to disable ELAM.

- Press restart and check if the issue is fixed.
To disable it via Command Prompt,
- Navigate to Troubleshoot > Advanced options > Command Prompt in winRE.
- Type the following command and press Enter:
bcdedit /set {current} disableelamdrivers yes
- Type ‘exit and press Enter.
- Restart your PC and see if it boots properly now.
Fix Faulty System Drive
Windows is installed on C: Drive by default. ‘C’ is the drive or device letter here. Windows Boot Loader uses this value to boot your PC. But in rare cases, it can try to load some other drive due to the wrong value. To check and correct this,
- Navigate to Troubleshoot > Advanced options > Command Prompt in winRE.

- Type bcdedit and press Enter to check the drive letter.
- To correct it, type the following command and press Enter:
bcdedit /set {current} device partition=c:bcdedit /set {current} osdevice partition=c:
Reset Your PC
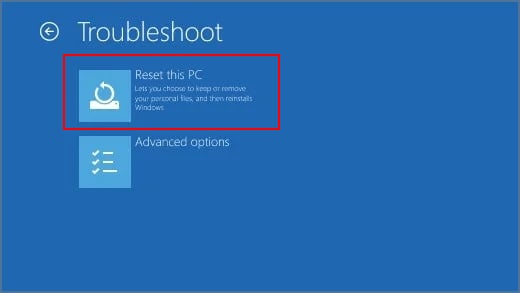
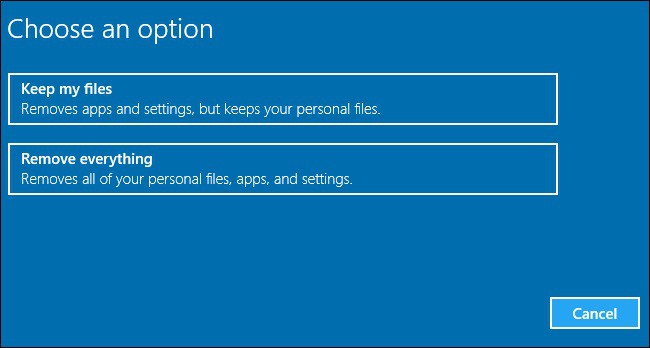
The ‘Reset Your PC’ option in winRE is basically the factory reset button. It’s used as a last resort to fix OS-related issues as it re-installs Windows and resets everything back to default. In Windows 10, you can also opt to keep your personal files instead of a clean wipe.
- Navigate to Troubleshoot > Reset your PC in winRE.
- Choose whether you want to keep your personal files or not.
- Follow the instructions on-screen to complete the reset.
Related Questions
How Do I Fix the Automatic Repair Loop Without Safe Mode in Windows 10?
The “Preparing Automatic Repair” boot loop can prevent you from using BIOS keys to access safe mode and other repair tools. In such cases, you should hard-reboot your system three times to bypass the loop error and directly boot to the Windows Repair Environment (winRE). Check our guide above for step-by-step instructions for this process.
How Long Do I Need to Wait for the Automatic Repair Tool to Work?
If the Automatic Repair is working as intended, the repair process can take anywhere from 5 minutes to over an hour, depending on your hard drive specs. If it’s stuck in an endless loop, you can just hard-reboot following the steps in our guide and try out some of the fixes.