We use the internet for so many different things that it has become a part of our day-to-day lives. Having issues with your internet connection can be one of the most frustrating things to deal with.
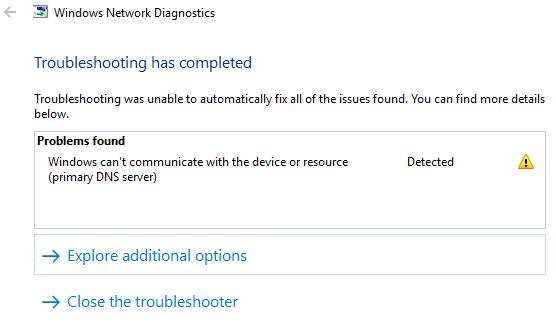
You can diagnose the error by using the Windows Network Diagnostics tool. Once the tool finishes scanning for issues, it will return the “Windows can’t communicate with the device or resource primary DNS server)” error.
Are you not sure what the next step should be to fix this issue in Windows 10? Don’t worry, we compiled multiple useful methods for you. Even if you’ve never performed any troubleshooting in the past, you can easily follow along and get back online from your computer.
What Causes Windows can’t communicate with the device or resource error
There are three common causes for this error to happen. You either have outdated network drivers, badly configured settings, or connection issues to the DNS server you’re using. Something many users report is proxy servers causing trouble that can lead to this error message appearing as well. Before you attempt any of our methods, try simply disabling your proxy server to see if you can gain your internet back.
If you have a restricted internet connection (college, work, public wifi, etc.) it’s best not to mess with the settings, as it can cause the error as well. These connections use different settings and guidelines than home connections. This can cause conflict in settings, making you unable to go online.
Fix: Windows can’t communicate with the device or resource (Primarily DNS Server)
There are several quick and easy ways of fixing this Windows 10 issue. Although these methods are all safe, we recommend setting up a System Restore point, just in case something goes wrong.
Note: If you’re unsure of how to set up and use System Restore points, you can watch this video by MDTechVideos. They offer an in-depth tutorial on the entire process, allowing you to follow along and keep your computer safe.
Method 1. Update your drivers
Keeping your drivers up-to-date is extremely important. An outdated driver can cause more issues than you’d imagine. There are multiple ways in which you can update your drivers. Follow one of the guides which suit your approach.
Update your driver from Windows itself
In this method, we will be using the Device Manager to find a new, updated driver.
-
Press and hold the
Windows
key, then press
R
. This will launch the
Run
application.
-
Type in
devmgmt.msc
and hit
OK
to bring up the Device Manager.

-
Expand the
Network adapters
section by clicking on the arrow icon
.
-
Right-click on your audio driver and select
Update Driver
.
-
Click on
Search automatically for updated driver software
.

-
If Windows can find an updated driver, it will automatically download and install the update to your computer.
-
Restart your PC and test if you can connect to the internet.
Update your drivers with a third-party app
You can also find and download third-party updater tools such as Driver Booster, DriverHub or DriverPack Solution. These three tools are all free and easy to use, but you can always look around the web for more advanced apps.
Note: Always make sure that the app you’re using is trustworthy. Many applications that promise to fix or update your drivers contain malware, adware or spyware. We recommend searching the name of the product and reading reviews made by real people.
Method 2. Clear the DNS Cache
Caching data is often useful and can speed up the performance of many applications and services. However, it can also backstab you by storing outdated information, for example.
We recommend trying to clear the DNS cache before any other methods, as it’s a simple and easy task to perform. If it works, you’re saving a lot of precious time. For this method, you will be required to have a local user with administrator permissions.
-
Type in
Command Prompt
to the search bar within your taskbar. Right-click on it from the results, then select
Run as administrator
.

-
Type in the ipconfig /flushdns command then hit the
enter key
on your keyboard.

-
When you see the “
Successfully flushed the DNS Resolver Cache.
” message, you can close the Command Prompt. Try and see if you can connect to the internet now.
Method 3. Reset Connection Settings
There is a second method that allows you to flush the IP and DNS settings on your computer. This is a little bit more advanced, which means it might work even if the previous solution failed.
Once again, you will be required to have a local user with administrator permissions. Follow these steps to reset your connection settings:
-
Type in
Command Prompt
to the search bar within your taskbar. Right-click on it from the results, then select
Run as administrator
.
-
Input the following four commands. After each one, press the
enter key
to execute the command:
-
ipconfig /flushdns
-
ipconfig /registerdns
-
ipconfig /release
-
ipconfig /renew

-
Close the Command Prompt and
restart your computer
. When you’re done, try to connect to the internet to test your connection.
Method 4. Change your IPV4 and IPV6 Settings
Messing around with the settings of your wifi can often lead to unpredictable issues with your connection. For example, you might have a static IPv4 or IPv6 address that’s preventing you from establishing a connection.
Note: A static IP address means that the address your computer is using was entered and configured manually. This can cause a number of issues on your network.
We will attempt to have an IP address automatically assigned to your device by your router. To do this, you need to change both your IPv4 and IPv6 settings, as they are separate protocols.
-
Press and hold the
Windows
key on your keyboard, then press
R
. This will bring up the
Run
utility.
-
Type in
ncpa.cpl
and click on the
OK
button. Doing this will open up the Network Connections window.
-
Right-click on the network you’re using, then select the
Properties
option.
-
Double click on
Internet Protocol Version 4 (TCP/IPv4)
.
-
From the General tab, select both
Obtain an IP address automatically
and
Obtain DNS server address automatically
. Click the
OK
button when you’re done.
-
Double click on
Internet Protocol Version 6 (TCP/IPv6)
.
-
From the General tab, select both
Obtain an IP address automatically
and
Obtain DNS server address automatically
. Click the
OK
button when you’re done.
-
Click the
OK
button on both windows and restart your computer. Once your computer is booted up again, try and connect to the internet.
Method 5. Reset TCP/IP with the NetShell Utility
Corrupted TCP/IP files can also be the culprit behind the “Windows can’t communicate with the device or resource” error. Luckily, Microsoft has addressed this issue and provided an accessible fix for anyone to download.
Note: If you can’t access the internet from your own device at all, download the tool on a PC or laptop with a working internet connection. After you’re done, simply transfer the file to your device.
Follow our steps to download and run the NetShell utility distributed by Microsoft. This tool is completely free and safe of any malware, as it comes from the official website of Microsoft.
-
Click here
to open the official Microsoft download page of the utility.
-
Click on the
Download
button. Even though it doesn’t list Windows 10 as a compatible operating system, you can still run the tool.
-
Double click on the
.diagcab
file you just downloaded to launch the
NetShell utility
. Simply click the
Next
button and follow the instructions on the screen to have your TCP/IP reset.
Final Words
We hope that our article was able to provide you with a way of fixing the “Windows can’t communicate with the device or resource” error. Enjoy your connection to the internet!
If you’re looking for a software company you can trust for its integrity and honest business practices, look no further than SoftwareKeep. We are a Microsoft Certified Partner and a BBB Accredited Business that cares about bringing our customers a reliable, satisfying experience on the software products they need. We will be with you before, during, and after all the sales.