Run your php artisan make:auth and php artisan migrate in a new Laravel application. Later you have to navigate to your browser to http://your-app.test/register or any other URL that’s alloted to your application. These two commands will lookout of platform your whole verification framework!
Laravel incorporates built-in authentication and session administrations which are regularly accessed by means of the Auth and Session facades. These features give cookie-based authentication for demands that are initiated from web browsers. They give strategies that permit you to confirm a user’s accreditations and verify the client.
In this tutorial, I will discuss how to implement Laravel login authentication. An important feature of this Laravel 5.5 authentication example implementation is that it filters out and generates an error whenever the authentication credentials (for example, email and/or password) are incorrectly entered by the user(s).
Tóm Tắt
Prerequisites for Laravel 5.5 custom authentication
- Cloudways Server. Get your server on Cloudways if you do not have one.
- Launch a Laravel 5.5 app.
Step 1: Setup the Database
- Go to your Laravel application on the Cloudways server.
- Click on Launch Database.
- Click on Create Table. Name the new table users and select innoDB and ascii_general
- Add the following columns in the table:
- id (int) (Check AutoIncrement A.I.)
- name (text)
- username (text)
- email (text)
- password (text)
- remember_token (text)
- timestamp (time)
- Click Save
- Now Click New Item and then add the following user:
- Name: Harry Potter
- Username: BoyWhoLived
- Email: [email protected]
- Password: caputdraconis
- Click Save
Tailor Made Cloud Hosting For Different PHP Frameworks
From Laravel to CodeIgniter, We Have Got You Covered On All PHP Frameworks!
Deploy Now
Step 2: Setup the Routes
$ vim app/Http/routes.php
Here lies all the endpoints.
Let’s make three endpoints:
- Post Call to submit the form
- Get Call to show the login form
- To LogOut.
<?php
/*

|--------------------------------------------------------------------------

| Application Routes

|--------------------------------------------------------------------------

*/

// route to show the login form

Route::get('login', array(
	'uses' => '[email protected]'
));

// route to process the form

Route::post('login', array(
	'uses' => '[email protected]'
));
Route::get('logout', array(
	'uses' => '[email protected]'
));
Route::get('/',
function ()
	{
	return view('welcome');
	});
Step 3: Make the Controllers
$ vim app/Http/Controllers/MainController.php
I will extend MainController from the Base Controller and make three functions to show login, check the login and for logging out.
Following is the code for MainController:
<?php
namespaceAppHttpControllers;
useRedirect;
useAuth;
useInput;
useIlluminateSupportFacadesValidator;
useIlluminateFoundationBusDispatchesJobs;
useIlluminateRoutingController as BaseController;
useIlluminateFoundationValidationValidatesRequests;
useIlluminateFoundationAuthAccessAuthorizesRequests;
useIlluminateFoundationAuthAccessAuthorizesResources;
useIlluminateHtmlHtmlServiceProvider;
class MainController extends BaseController

	{
	public

	function showLogin()
		{

		// Form View

		return view('login');
		}

	public

	function doLogout()
		{
		Auth::logout(); // logging out user
		return Redirect::to('login'); // redirection to login screen
		}

	public

	function doLogin()
		{

		// Creating Rules for Email and Password

		$rules = array(
			'email' => 'required|email', // make sure the email is an actual email
			'password' => 'required|alphaNum|min:8'

			// password has to be greater than 3 characters and can only be alphanumeric and);
			// checking all field

			$validator = Validator::make(Input::all() , $rules);

			// if the validator fails, redirect back to the form

			if ($validator->fails())
				{
				return Redirect::to('login')->withErrors($validator) // send back all errors to the login form
				->withInput(Input::except('password')); // send back the input (not the password) so that we can repopulate the form
				}
			  else
				{

				// create our user data for the authentication

				$userdata = array(
					'email' => Input::get('email') ,
					'password' => Input::get('password')
				);

				// attempt to do the login

				if (Auth::attempt($userdata))
					{

					// validation successful
					// do whatever you want on success

					}
				  else
					{

					// validation not successful, send back to form

					return Redirect::to('checklogin');
					}
				}
			}
		}
Step 4: Setup the View
Now let’s make the view, which will contain the HTML code of the app.
$ vim resources/views/checklogin.blade.php
The .blade.php extension lets Laravel know that I am using its Blade Templating system.
Here is the HTML code for this file.
<!doctype html>
<html>
   <head>
      <title>My Login Page</title>
   </head>
   <body>
      <
      {{ Form::open(array('url' => 'login')) }}
      <h1>Login</h1>
      <!-- if there are login errors, show them here -->
      <p>
         {{ $errors->first('email') }}
         {{ $errors->first('password') }}
      </p>
      <p>
         {{ Form::label('email', 'Email Address') }}
         {{ Form::text('email', Input::old('email'), array('placeholder' => '[email protected]')) }}
      </p>
      <p>
         {{ Form::label('password', 'Password') }}
         {{ Form::password('password') }}
      </p>
      <p>{{ Form::submit('Submit!') }}</p>
      {{ Form::close() }}
Now let’s check how the app looks!


This is a simple example of how you could implement login authentication in a Laravel app.
Another Laravel login and registration Setup
Here is a GIF that explains the entire process:
Database Migration
In a Laravel powered app, database configuration is handled by two files: env and config/database.php. In my case, I created a database with the name loginuser. The Cloudways Database Manager makes the entire process very easy.
Next, run the following command in the terminal to create tables in the database:
Login to SSH terminal by using Master Credentials and go to the application folder by using the command
$ ls
applications
$ cd applications
applications$ ls
pjbeasusxr trxbnbphae
applications$ cd trxbnbphae/
trxbnbphae$ cd public_html/
php artisan migrate
Now, when you check the database, you will see that the tables have been created successfully.
Laravel 5.5 authentication
php artisan make:auth
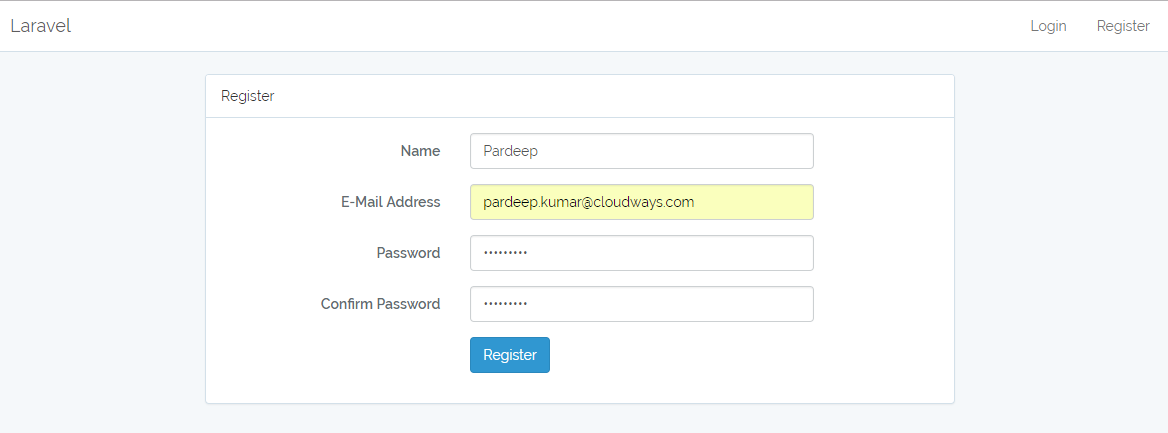
This command should be used in fresh applications and will install a layout view, registration and login views, as well as routes for all authentication endpoints.
Register
Login

Use Username for Authentication
Laravel uses the provided email address as the default authentication field. However, users prefer to use their username instead of emails. To change the default behavior, here is how to define a username in the
Login Controller
public function username()
{ return 'username';}
If you have a question about this Laravel 5.5 authorization example or wish to add to the conversation about Laravel 5.5 login example, please leave a comment below.
What is authentication in Laravel?
Authentication is the process of identifying the client credentials. In web applications, authentication is overseen by sessions that take the input parameters such as mail or username and password, for client recognizable proof.
How do I enable authentication in Laravel?
You need to Install the laravel/ui Composer bundle and run php artisan ui vue –auth in a new Laravel application. After migrating your database, open http://your-app.test/register or any other URL that’s assigned to your application on your browser.
Share your opinion in the comment section.
COMMENT NOW
Share This Article
Customer Review at ![]()
“Cloudways hosting has one of the best customer service and hosting speed”
Sanjit C [Website Developer]
Explore Cloudways
Noor Ali
Noor Ali is an Associate Software Engineer at Cloudways. He loves to solve technical problems through programming and mathematics.
Get Connected on:
Community Forum