Photoshop Brushes are perhaps one of the most popular and useful tools we have available to us in Photoshop. Beginning with Photoshop 2018 we now have the ability to sort and save our brushes into folders, which is a huge step in keeping them organized.
The tried and true default brushes known as ‘Legacy Brushes’ are in their own folder, so you never have to worry wether or not your favorite ‘classic’ PS brushes are still around.
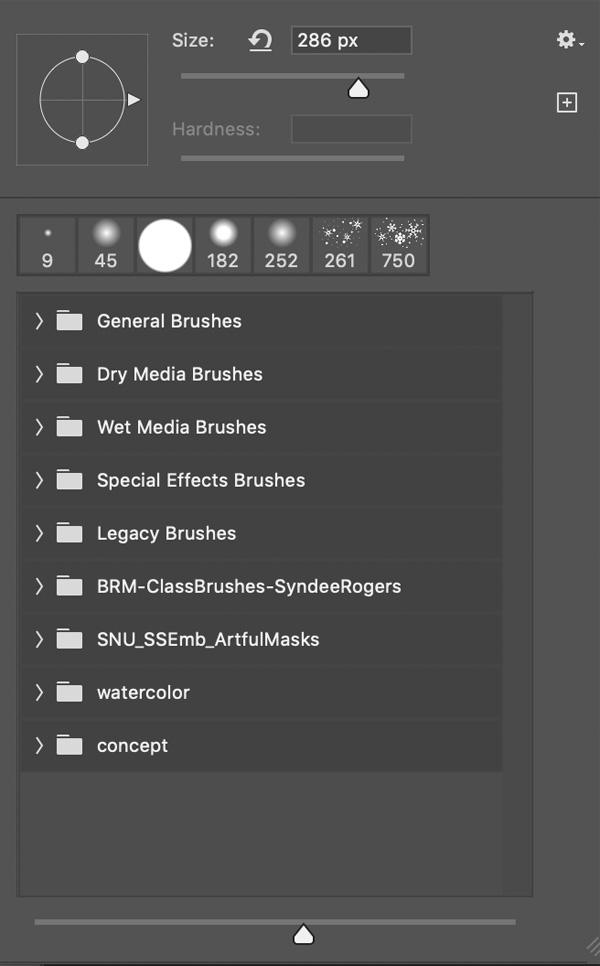
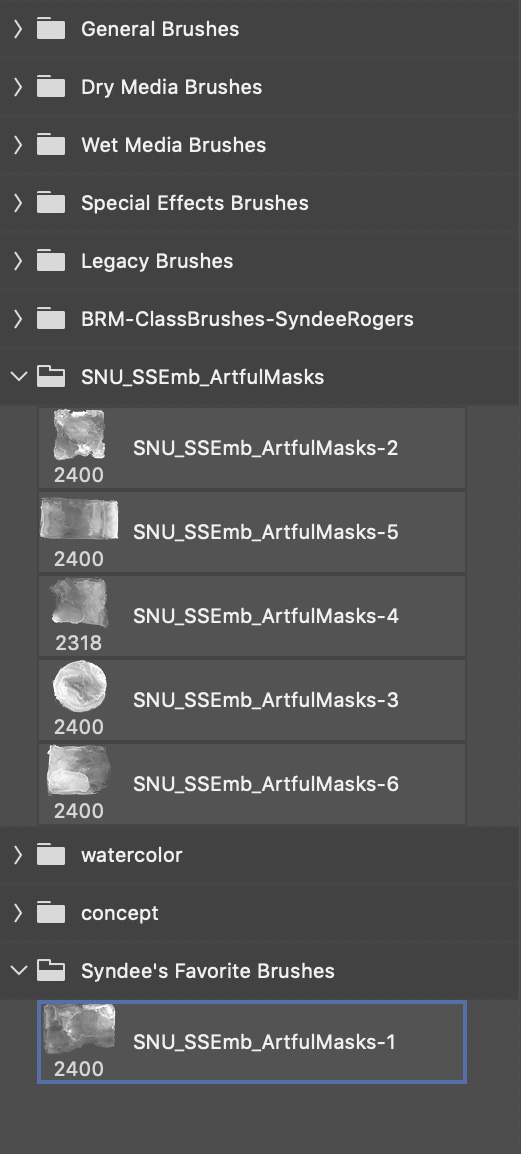
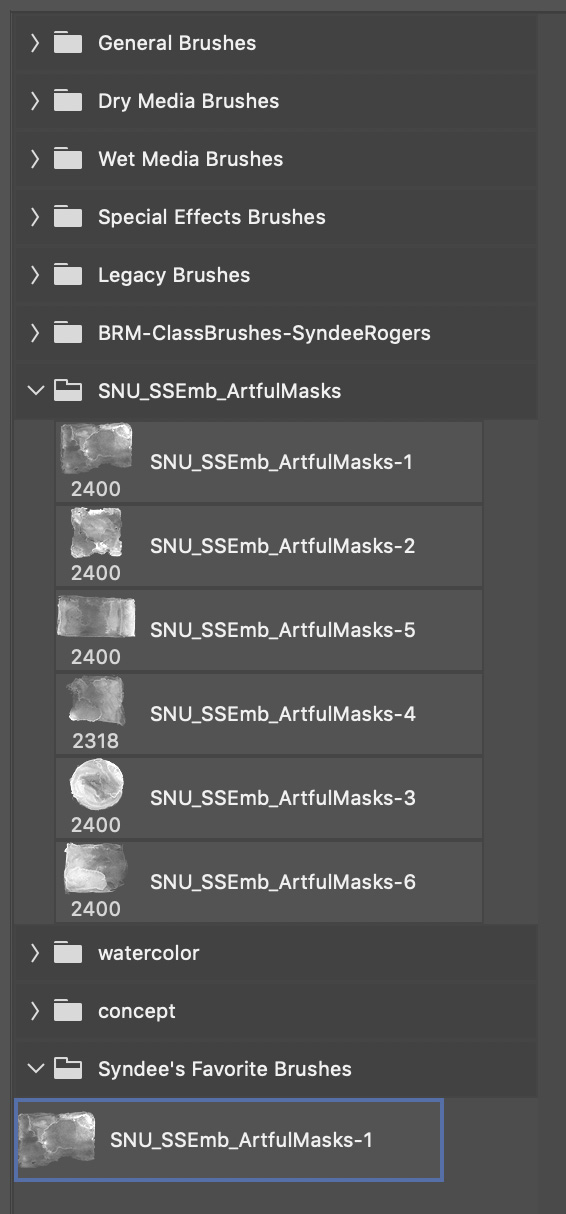
Once you open up the Brush Picker in the Options Bar in Photoshop, the Brush Picker panel will pop open. As you can see below there are several folders. Click on the arrows to the left of each folder to twirl them open and reveal the contents within each one. The first five folders are default folders and below that are my own personal brush sets as well as a couple I’ve downloaded from Adobe.com.
I like to create a folder of my favorite brushes, ones that I find myself using on a consistent basis. You can also create groups by theme, style, and more!
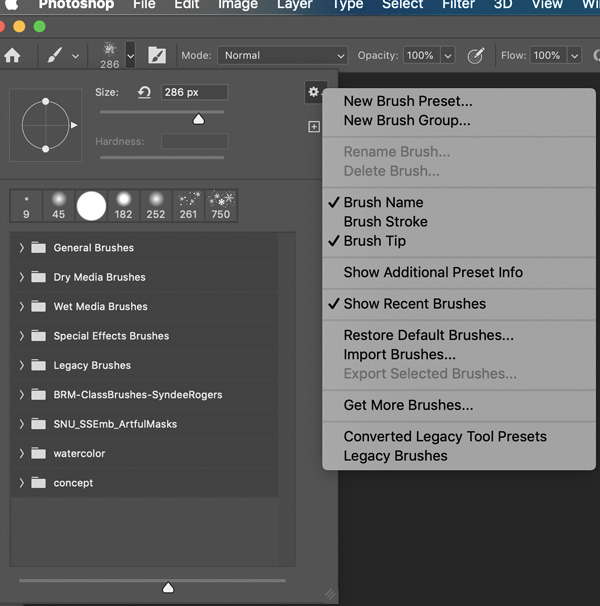
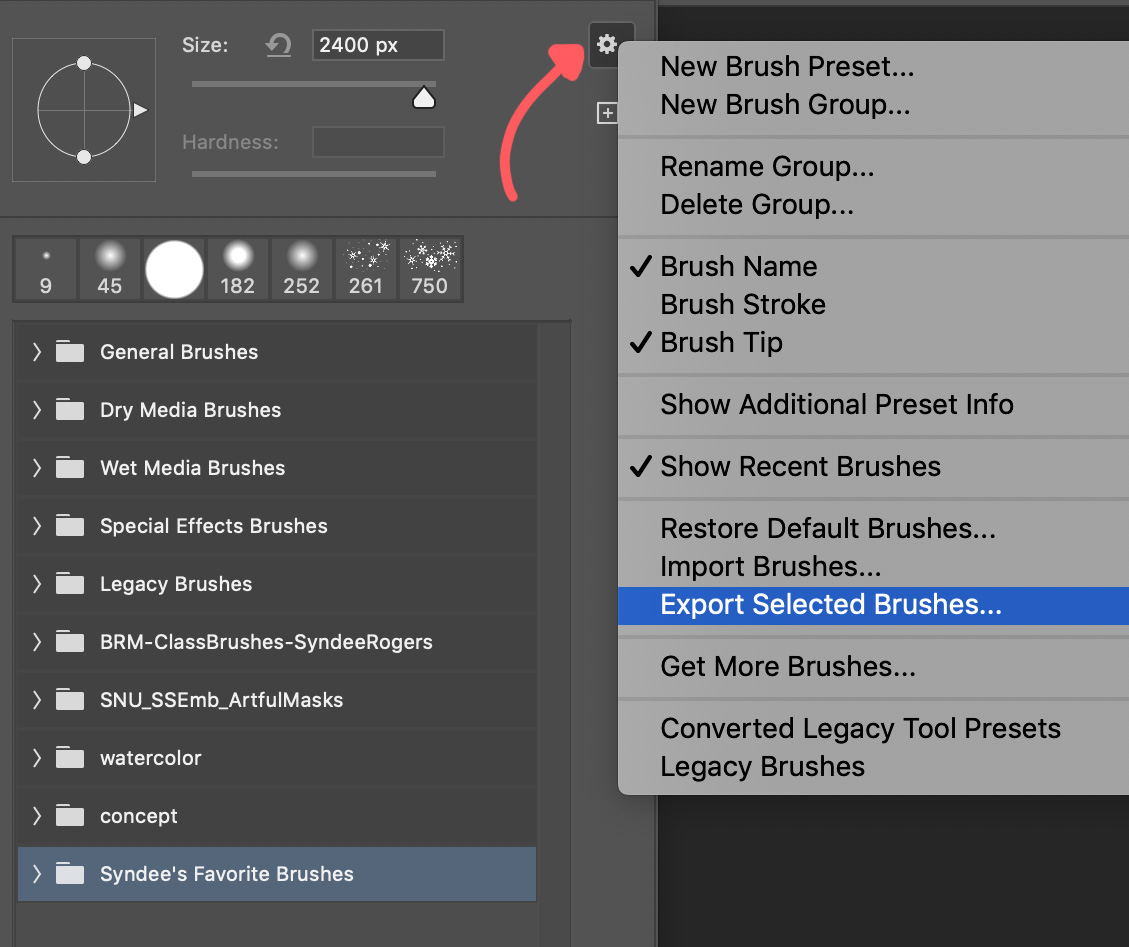
To create a new group, click on the Gear icon at the top right of your Brush Picker to open the menu and choose New Brush Group.
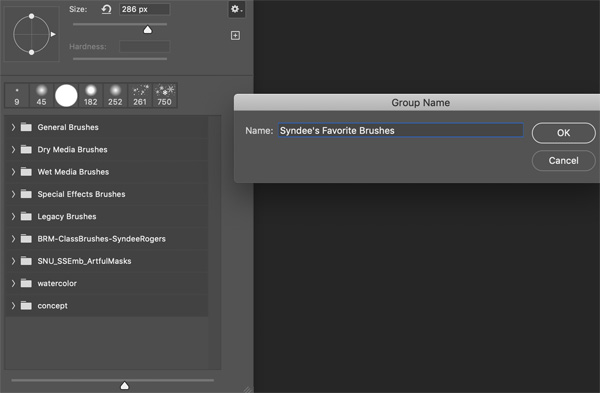
Then give your new Group a name and click OK.
Your new Group folder should appear at the bottom of your Brush Picker.

Next you’ll want to add the desired brushes to your new folder. They will need to already be installed in your Brush Picker. In this example I’ve opened my Artful Masks brush set folder. You can just click on the brush you want and drag it into your new Brush Folder. It does remove the brush from the original folder in the Brush Picker but not from the actual .abr file you have saved on your computer.
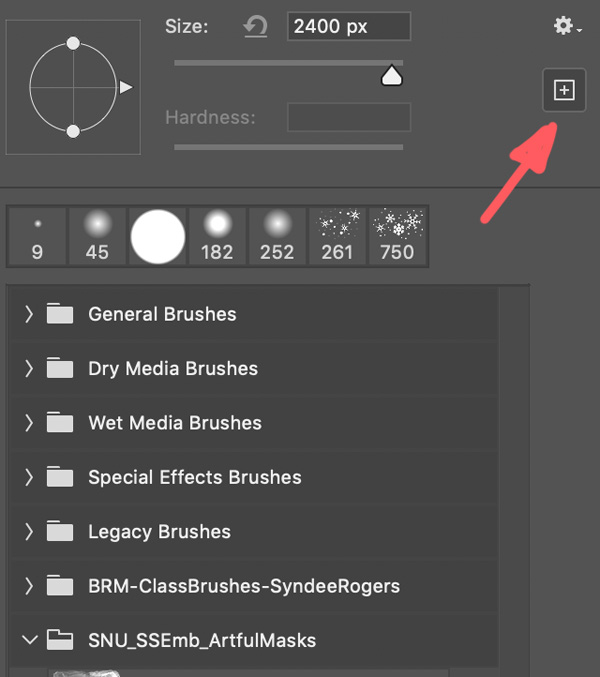
Alternatively, if you want to make a copy of a brush and drag that into your new folder instead, click on the little Plus icon at the top right of the Brush Picker below the Gear icon.
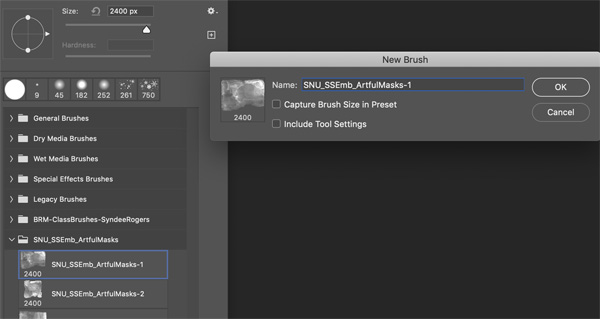
You can then rename the duplicate brush if you would like (I wouldn’t recommend it, so that you will always know the name of the original brush) and click OK.
And now as you can see below there are two identical brushes in the original brush set.
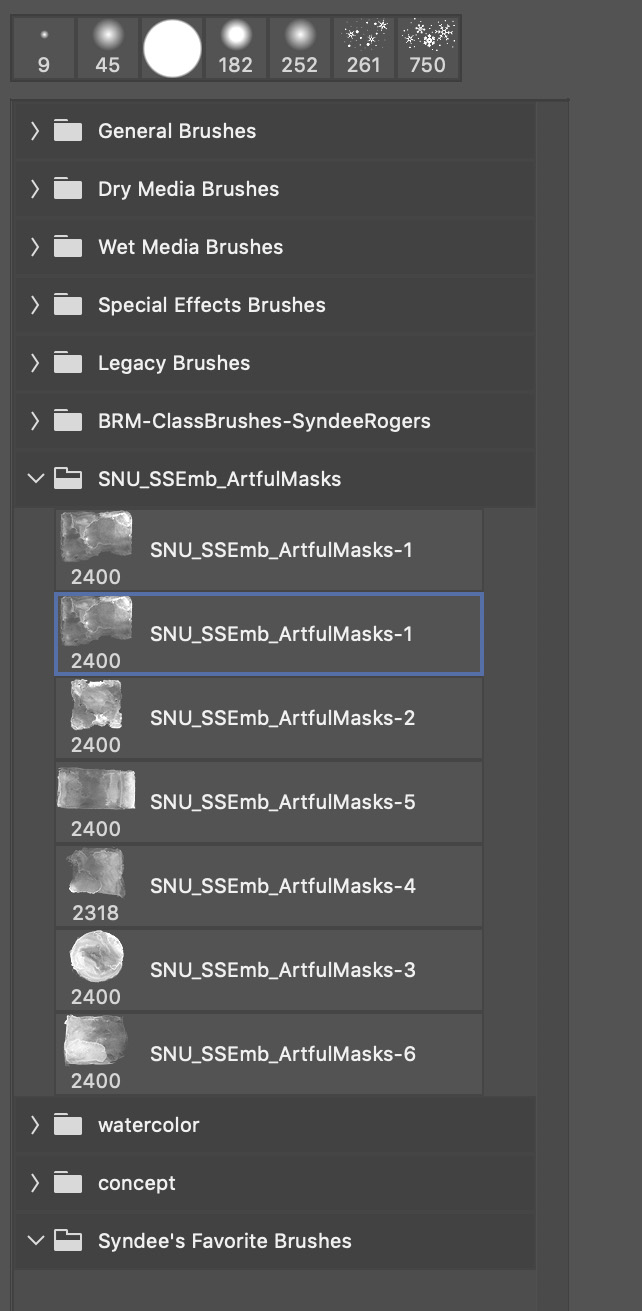
Click on it and drag it down to your new Brush folder.
Once you are done creating a new group (folder) of brushes it’s a good idea to save it somewhere on your computer incase the set disappears from your Brush Picker at some point.
I hope you find this a helpful way of organizing your brushes, I know I did!
Stay tuned for some helpful tips on saving brushes in Photoshop Elements as well as delving deeper into organizing your brush in PS coming soon.