Tóm Tắt
Overview of Startup Repair not working in Windows 10/11
Windows 10/11 has its own repair tools, and Startup Repair is a frequently used one among them. You can use it to scan and repair some PC issues like corrupted system files or invalid boot files. That is, if your Windows 10/11 won’t boot, you can use installation disc or system repair disc to boot into Advanced options, and then perform a Startup Repair.
However, some users find Windows 10/11 Startup Repair not working sometimes. Here are 2 most common cases:
Case 1: Windows 10/11 Startup Repair loop
Windows 10/11 Startup Repair loop is also known as Windows 10/11 Startup Repair stuck. When you encounter this error, Windows 10/11 will boot again and again into Startup Repair and present an endless loop, so that you cannot access anything else on the computer.
Case 2: Windows 10/11 Automatic Repair failed
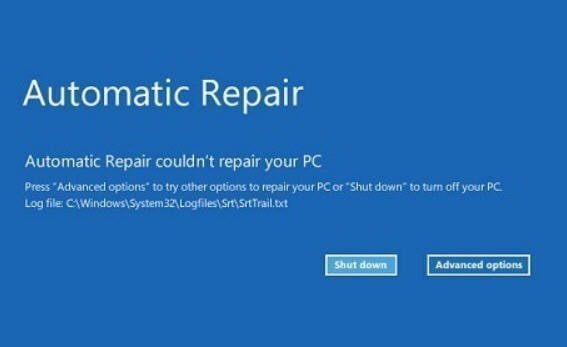
Startup Repair is supposed to help you to fix some issues, but it will not always work. Sometimes, you may receive a message on the screen that says Windows 10/11 Automatic Repair couldn’t repair your PC.

How to fix Windows 10/11 Startup Repair not working efficiently
Learn how to resolve Startup Repair not working in Windows 10/11 under the two cases separately:
● Case 1: Windows 10/11 Startup Repair loop
● Case 2: Windows 10/11 Automatic Repair failed
Case 1: Windows 10/11 Startup Repair loop
If you cannot use Startup Repair, then your option is to disable automatic restart, run chkdsk and rebuild bcd settings.
● Solution 1: Disable automatic restart
● Solution 2: Run chkdsk
● Solution 3: Rebuild bcd settings
☛ Solution 1: Disable automatic restart
To disable automatic restart, please follow the steps below:
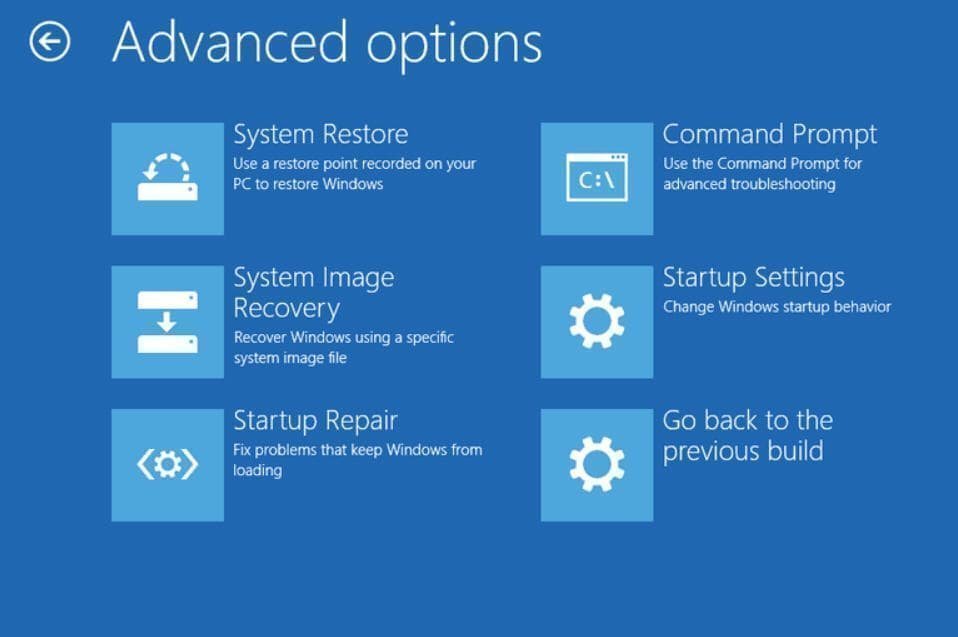
1. Restart your computer and then on the screen titled “Choose an option”, click Troubleshoot > Advanced options > Startup Settings > Restart subsequently.
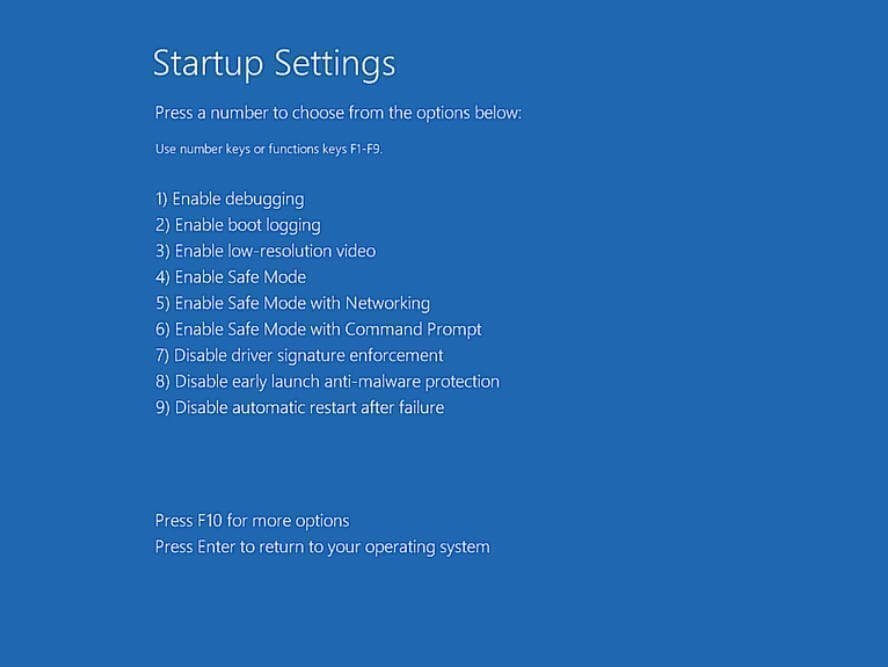
2. On the Startup Settings screen, press 9 or F9 to choose Disable automatic restart after failure. After that, just wait for your PC to boot and see if Windows 10/11 Startup Repair loop is solved.

☛ Solution 2: Run chkdsk
Corrupted boot partition may cause Windows 10/11 Startup Repair loop issue. You can try to check the boot volume using chkdsk:
1. Restart your computer and then on the screen titled “Choose an option”, click Troubleshoot > Advanced options > Command Prompt.

2. In the Command Prompt window, type chkdsk C: / f /r and press Enter to check your system partition for corrupted, invalid or deleted system files.
☛ Solution 3: Rebuild bcd settings
To rebuild bcd settings, you may follow the instructions below:
1. Open Command Prompt as mentioned in Solution 2.
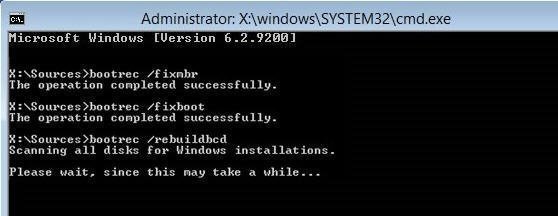
2. Type following command lines and press Enter after each to fix Startup Repair stuck issue:
-
bootrec /fixmbr
-
bootrec /fixboot
-
bootrec /rebuildbcd

Case 2: Windows 10/11 Automatic Repair failed
If you are told Windows 10/11 Automatic Repair couldn’t repair your PC, then try the following solutions:
☛ Solution 1. Run sfc /scannow command
You can run the sfc /scannow command (System File Checker) to repair system files.
1. Restart your computer. Open Command Prompt in Advanced option as mentioned above.
2. When Command Prompt appears, type sfc /scannow /offbootdir=d:\ /offwindir=d:\windows and press Enter.
3. Restart your computer after the process is done.
☛ Solution 2. Disable early launch anti-malware protection
If you have been facing the problem after installing an anti-malware program, you can disable anti-malware protection to fix Windows 10/11 Automatic Repair failed.
1. Restart your computer. On the screen titled “Choose an option”, click Troubleshoot > Advanced options > Startup Settings.
2. Press 8 or F8 to select Disable early launch anti-malware protection at list and then press Enter.
Extra tip for fixing Windows 10/11 startup repair issue
As you see, the Windows 10/11 Startup Repair not working problem can be caused by corrupted, invalid or deleted system files. Therefore, it’s important for you to create a system image backup so that you can restore system to a normal state when problems occur.
Here I’d like to recommend the best free backup and restore software – AOMEI Backupper Standard. It can be used in Windows Visa/XP/7/8/8.1/10/11. It allows you to create not only system backup but also disk backup, partition backup and file backup. Click the button below to download this freeware:
Download Freeware
Win 11/10/8.1/8/7/XP
Secure Download
With the intuitive interface, you can create a system image backup via AOMEI Backupper in only three steps: click Backup and System Backup > select a destination path to save the backup image > click Start Backup.

Notes:
-
If you want to continuously protect your computer, you can create a scheduled backup at daily, weekly, monthly, etc.
-
Incremental or differential backup is recommended, because it only backs up the changed data, thus saving much time and disk space.
-
To restore your computer when it fails to boot, you can create a bootable disk beforehand.
Summary
There are five solutions offered in this article to help you solve the Windows 10/11 Startup Repair not working problem. You can pick one solution according to your situation. To restore from possible system errors, you may backup your computer with AOMEI Backupper.
If you want to protect unlimited computers within your company, you can pick AOMEI Backupper Technician or Technician Plus. It allows you to create a portable version of this software and directly run off a USB flash drive without installing on a different computer.
Then, you can use this software to deploy/restore system image file to multiple client-side computers over network, migrate operating system to SSD, clone large SSD to smaller SSD etc.