Để bạn học ReactJS thuận tiện hơn thì mình sẽ làm những ví dụ nhỏ để bạn nắm rõ hơn về những kỹ thuật giải quyết và xử lý và tích hợp với 1 số ít library thường được sử dụng .
Tóm Tắt
Khởi tạo project và cài package
Đầu tiên là chúng ta tạo một project mới bằng lệnh
yarn create react-app redux-thunk-hooksSau khi đã tạo xong thì bạn truy cập vào project bằng lệnh
cd redux-thunk-hooksvà tiến hành cài 3 packageredux, react-redux, redux-thunkbằng lệnhyarn add redux react-redux redux-thunkSau đó thì cài thêm
redux-loggerbằng lệnhyarn add redux-logger --devđể chỉ cài cho môi trườngdevthôi.Sau khi add xong thì file
package.jsoncủa bạn sẽ trông thế này{ "name": "with-redux-thunk", "version": "0.1.0", "private": true, "dependencies": { "@testing-library/jest-dom": "^4.2.4", "@testing-library/react": "^9.3.2", "@testing-library/user-event": "^7.1.2", "react": "^16.13.1", "react-dom": "^16.13.1", "react-redux": "^7.2.1", "react-scripts": "3.4.3", "redux": "^4.0.5", "redux-thunk": "^2.3.0" }, "scripts": { "start": "react-scripts start", "build": "react-scripts build", "test": "react-scripts test", "eject": "react-scripts eject" }, "eslintConfig": { "extends": "react-app" }, "browserslist": { "production": [ ">0.2%", "not dead", "not op_mini all" ], "development": [ "last 1 chrome version", "last 1 firefox version", "last 1 safari version" ] }, "devDependencies": { "redux-logger": "^3.0.6" } }Các bạn chú ý quan tâm về phiên bản của Redux thì từ bản 7.1 trở lên thì mới tương hỗ Hooks nha .
Thêm Redux vào project
Tiếp theo các bạn tạo một thư mục
src/redux,src/redux/reducers,src/redux/actions,src/redux/constantsvà một filesrc/redux/store.jsTrong ví dụ lần này mình sẽ tạo một project để show một list posts get từ api về .
Sau đó tạo các file bên trong các thư mục lần lượt
actions/postAction.js,reducers/postReducer.js,constants/post.jsSau khi hoàn tất thì cấu trúc project sẽ như sau :
Folder Structure
Chúng ta sẽ tạo những action name ở trong file
constantnhư sau// post.js export const FETCH_POST_REQUEST = "FETCH_POST_REQUEST"; export const FETCH_POST_SUCCESS = "FETCH_POST_SUCCESS"; export const FETCH_POST_ERROR = "FETCH_POST_ERROR";Chúng ta mở file
postReducer.jsra// import constants import { FETCH_POST_REQUEST, FETCH_POST_SUCCESS, FETCH_POST_ERROR, } from '../constants/post'; // khởi tạo một init state const initialState = { requesting: false, success: false, message: null, data: null } // bắt từng action type function exampleReducers(state = initialState, payload) { switch (payload.type) { case FETCH_EXAMPLE_REQUEST: return { ...state, requesting: true }; case FETCH_EXAMPLE_SUCCESS: return { ...state, requesting: false, success: true, data: payload.data }; case FETCH_EXAMPLE_ERROR: return { ...state, requesting: false, message: payload.message }; default: return state; } } export default exampleReducers;Tiếp theo tất cả chúng ta viết action
Chúng ta
dispatchvới typeFETCH_POST_REQUESTsau đó call apiKhi api đã call xong thì lại
dispatchđếnFETCH_POST_SUCCESSvà kèm theo dataresponseBodyTrường hợp lỗi thì nó sẽ tự chạy vào
catchvà sẽ dispatch đếnFETCH_POST_ERROR// postAction.js import { FETCH_POST_REQUEST, FETCH_POST_SUCCESS, FETCH_POST_ERROR, } from '../constants/POST'; export const loadPosts = () => async dispatch => { try { dispatch({ type: FETCH_POST_REQUEST }); const url = "https://jsonplaceholder.typicode.com/posts"; const response = await fetch(url) const responseBody = await response.json(); dispatch({ type: FETCH_POST_SUCCESS, data: responseBody }); } catch (error) { console.error(error); dispatch({ type: FETCH_POST_ERROR, message: error }); } }Sau đó sẽ tạo một file
reducers/index.jsđể làm main reducers// reducers/index.jsjs import { combineReducers } from 'redux'; import postReducer from './postReducer'; const reducers = combineReducers({ posts: postReducer, }); export default (state, action) => reducers(state, action);Tiếp theo tất cả chúng ta cùng viết store, về triết lý của store mình sẽ không nói lại ở đây nữa nhé .
import { createStore, applyMiddleware } from 'redux'
import { createLogger } from 'redux-logger'
import thunk from 'redux-thunk'
import reducer from './reducers'

const middleware = [ thunk ];
// check nếu không phải production thì push logger vào để log ra những action
if (process.env.NODE_ENV !== 'production') {
  middleware.push(createLogger());
}

export const store = createStore(
  reducer,
  applyMiddleware(...middleware)
)
Kết nối redux vào app
Sau khi đã xong phần
reduxthì bạn hãy mở fileApp.jslên và import 2 thằngimport { useDispatch, useSelector } from 'react-redux'; import { loadPosts } from './redux/actions/postAction';Tiếp tục trong phần app function chúng ta viết một hàm
useEffectvà đồng thời khai báouseDispatchđể sử dụngChi tiết bạn hoàn toàn có thể xem về react redux hooks
const dispatch = useDispatch();
  useEffect(() => {
    dispatch(loadPosts());
  }, [dispatch]);
Bạn vẫn gọi dispatch như bình thường, nhưng với hooks thì bạn sẽ sử dụng
useDispatchđể kết nói với redux.Còn với
useEffectnó sẽ chạy mỗi khi update, nó sẽ tương ứng với các hàm cũcomponentDidMount,componentDidUpdate,componentWillUnmountTiếp theo chúng ta sẽ gọi hook
useSelectorra để lấy state tương tự việc bạnmapStateChi tiết về nó bạn hoàn toàn có thể xem tại đây
const data = useSelector((state) => state.posts.data);
  const requesting = useSelector((state) => state.posts.requesting);
Tất cả đã xong mình chuyển xuống dưới để show data ra như sau
return ();{ requesting ? : (data && data.length > 0) ?
:{data.map(item =>
- {item.title}
)}Data is empty}Toàn bộ file
App.jscủa mình sẽ như thế nàyimport React, { useEffect } from 'react'; import logo from './logo.svg'; import './App.css'; import { useDispatch, useSelector } from 'react-redux'; import { loadPosts } from './redux/actions/postAction'; function App() { const data = useSelector((state) => state.post.data); const requesting = useSelector((state) => state.post.requesting); const dispatch = useDispatch(); useEffect(() => { dispatch(loadPosts()); }, [dispatch]); return (); } export default App;{ requesting ? :{data.map(item =>
- {item.title}
)}Data is empty}Ok giờ chạy thử thôi
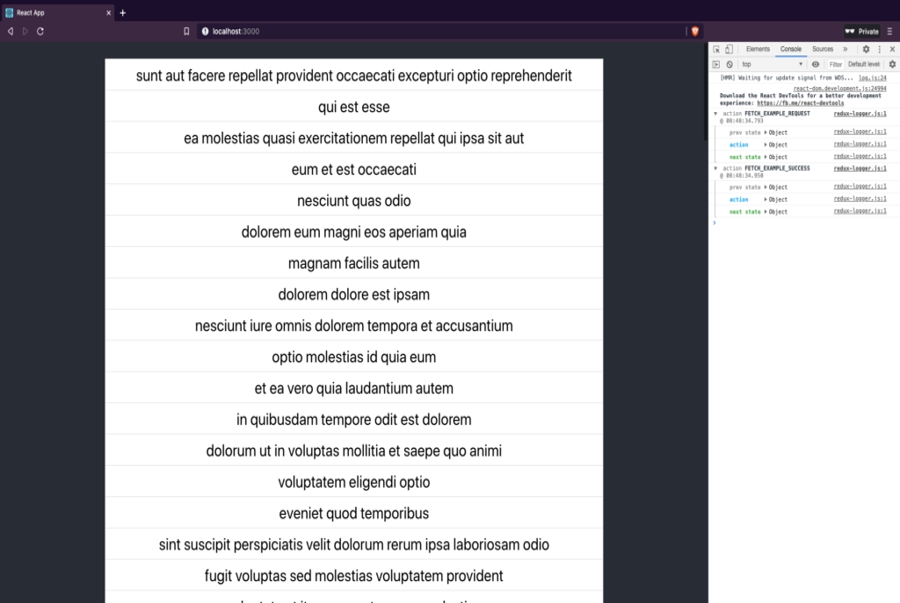
yarn startvà mở cổng 300 ra xem nó ra cái gì nào
Redux thunk hooks result
Vậy là ok không có lỗi lầm gì cả rồi nhé.
Kết luận
Như vậy qua bài này mình đã hướng dẫn bạn sử dụng Redux Thunk Hooks. Nó không có gì khác nhiều so với sử dụng thông thường, chỉ cần thay một số ít chỗ là ok
Nếu có bất kể vướng mắc nào bạn hoàn toàn có thể comment ở bên dưới, hoặc join group Facebook để cùng luận bàn nhé
Hẹn gặp bạn trong những bài tiếp theo .
Source: https://final-blade.com
Category : Kiến thức Internet